Bread Alone: Bold Fresh Loaves from Your Own Hands
by Daniel Leader and Judith Blahnik
Bread Alone provides a good, solid introduction to artisan bread baking. Daniel Leader begins with a thorough description of the equipment, ingredients, and care that go into making a good loaf of artisan bread, imbuing the reader with a real sense of the romance and long tradition of bread baking in European history. The detailed recipes are interspersed with stories of bakers and bakeries that Leader has encountered on his European travels. The recipes for classic country-style hearth loaf, sourdough starter, and pain au levain are perfect for introducing new bakers to the fundamentals of artisan bread baking, and in fact, these are recipes that I go back to again and again as springboards for experimentation.
At times, however, Leader’s reverent and weighty language can be intimidating for the novice baker and makes ‘the perfect artisan loaf’ appear attainable by only the few learned and experienced master bakers. The repetition of the even most basic instructions in every recipe and the reminders to ‘conserve your plastic wrap!’ and ‘use only the best organic ingredients!’ can feel off-putting and condescending. An added frustration is the durability of the physical book--or lack there of. After only a few uses, pages of my favorite recipes started falling out of the spine. Ultimately, I had the spine cut off (we have a nifty machine at the noodle factory that does this in about five seconds! Fancy!), punched holes in the pages, and put it in a three-ring binder. Still, practicing the basic recipes found in this book is an excellent way to begin exploring the diverse world of artisan bread baking.
Monday, October 2, 2006

Sunday, October 1, 2006
Books: The King Arthur Flour Baker's Companion
The King Arthur Flour Baker's Companion: The All-Purpose Baking Cookbook
This hefty cookbook is a veritable Mecca of recipes, baking advice, and resource information. Not only do the authors walk you through basics like white bread, chocolate chip cookies, and muffins, but they will then coach you onwards and upwards to such lofty aspirations as croissants, elephant ears, and sourdough artisan bread. If one of the ingredients is flour, I guarantee there’s a recipe for it in there. The tone throughout the book is friendly and familiar, never assuming prior baking knowledge but also including plenty for even the most experienced baker to get excited about. In addition to the recipes, boxes with helpful baking tips and background information on ingredients and recipes are scattered throughout the book. The appendix descriptions of the various equipment and ingredients one could possibly use for baking along with opinions on the merits of each item, how they can be used, and where to find them. This hard cover, 640-page book will withstand being propped up, pressed opened, dribbled upon by errant goos and powders, and still live to see another baking day. If you like to bake, this is one book that deserves a permanent place on the shelf.
This hefty cookbook is a veritable Mecca of recipes, baking advice, and resource information. Not only do the authors walk you through basics like white bread, chocolate chip cookies, and muffins, but they will then coach you onwards and upwards to such lofty aspirations as croissants, elephant ears, and sourdough artisan bread. If one of the ingredients is flour, I guarantee there’s a recipe for it in there. The tone throughout the book is friendly and familiar, never assuming prior baking knowledge but also including plenty for even the most experienced baker to get excited about. In addition to the recipes, boxes with helpful baking tips and background information on ingredients and recipes are scattered throughout the book. The appendix descriptions of the various equipment and ingredients one could possibly use for baking along with opinions on the merits of each item, how they can be used, and where to find them. This hard cover, 640-page book will withstand being propped up, pressed opened, dribbled upon by errant goos and powders, and still live to see another baking day. If you like to bake, this is one book that deserves a permanent place on the shelf.
Friday, September 22, 2006
Basic Pasta Sauce
Quickie post this lazy Sunday afternoon--just wanted to share my basic pasta sauce recipe with all y'all. For the longest time, I didn't question the fundamental American assumption that pasta sauce comes in jars. Period. No further thought required. Then one fateful shopping trip, while tenaciously deciphering which pasta sauce had the cheaper unit price and then asking myself if this was a sauce I actually desired to consume, it hit me. I could actually make my own pasta sauce. My own! Let me share a little secret with you: at its most basic, pasta sauce is really just...wait for it...tomatoes. Yes, tomatoes. Eureka!
Now there are about a hundred bajillion recipes for tomato sauce (basic pasta sauce) out there. By all means, go forth and sample. But if you're like me and the idea of making your own sauce is a novel shift of paradigm, here's a good place to start. The veggies I give below are my basic mix, but you can certainly add or subtract based on what you have in your fridge and your tastes.
A note on the tomatoes: If they're in season, sauce made from fresh beefsteak tomatoes is to die for. Plan extra time for it, though, as it takes a good hour or so for the tomatoes to simmer down into a sauce. However, if it's the middle of winter, if you're short on time, or if you just don't feel like it, a can of diced tomatoes is a perfectly reasonable substitute. There is no shame in home cooking. Get a 28 oz can of your grocery store fav--I use "Nature's Promise" brand from Stop&Shop, from their new line of organic products. You can usually find cans with Italian spices or without, salted or not. If you want quick and easy, go for the pre-spiced stuff. If you're feeling adventurous, go for no spices, no salt and add your own.
A note for folks on Weight Watchers: The only ingredient adding points to this sauce is olive oil. Since such a small amount is used, I usually average this out to about 1/2 of a point (just to keep me honest). If you add in the wine, kick the sauce up to a whole point. Serve 3/4 cup of sauce over a cup of pasta for a good meal for just around 5 points.
----------
Emma's Basic Pasta Sauce
makes 6-8 servings
28 oz can of diced tomatoes with the juices--with Italian spices or not
or 2 pounds or more of beefsteak tomatoes (about 4 large), cored, peeled, and cut into 3/4-inch chunks
1 whole sweet onion--diced
1/2 large (or 1 small) zucchini--diced and salted (salt draws out the liquid in the zucchini)
1 red pepper (or orange or yellow)--diced
1/2 package of mushrooms--sliced (about 1 cup sliced)
3 medium-sized cloves garlic
2 cubes of veggie, chicken, or beef bouillon (I like using bouillon instead of broth for the concentrated flavor and to keep the amount of liquid used in the sauce at a minimum)
1-2 tsp olive oil
1/4 cup fresh basil or 1 tablespoon dried basil
salt and pepper to taste
1/2 cup of red wine (optional)
Heat olive oil in a large sauce pan or wok. Add onions and zucchini, and saute until barely translucent. Add garlic and stir until fragrant (about 30 seconds). Add peppers and stir until onions are fully translucent and zucchini is almost cooked through. Add mushrooms and saute for a minute or so. (If making sauce from whole tomatoes, do not cook the veggies as fully before adding the tomatoes. They will cook more fully as the sauce simmers.)
Add canned tomatoes (or diced whole tomatoes) and allow to come to a boil. Once boiling, add bouillon cubes, basil, and other spices. Reduce to a simmer. If using canned tomatoes, start water boiling for pasta. If using whole tomatoes, allow to simmer until sauce reaches desired consistency--between 45 minutes to 1 1/2 hours. In either case, stir occasionally.
Just before serving, stir in 1/2 cup of red wine if desired--this will give your sauce a nice depth of taste. Also, make sure the bouillon cubes are completely dissolved. There's nothing like chomping down on a bouillon cube to put you off salt for life. Or at least the next several minutes. But at least the faces you make will provide endless entertainment for any nearby guests, children, or other various loved ones.
Now there are about a hundred bajillion recipes for tomato sauce (basic pasta sauce) out there. By all means, go forth and sample. But if you're like me and the idea of making your own sauce is a novel shift of paradigm, here's a good place to start. The veggies I give below are my basic mix, but you can certainly add or subtract based on what you have in your fridge and your tastes.
A note on the tomatoes: If they're in season, sauce made from fresh beefsteak tomatoes is to die for. Plan extra time for it, though, as it takes a good hour or so for the tomatoes to simmer down into a sauce. However, if it's the middle of winter, if you're short on time, or if you just don't feel like it, a can of diced tomatoes is a perfectly reasonable substitute. There is no shame in home cooking. Get a 28 oz can of your grocery store fav--I use "Nature's Promise" brand from Stop&Shop, from their new line of organic products. You can usually find cans with Italian spices or without, salted or not. If you want quick and easy, go for the pre-spiced stuff. If you're feeling adventurous, go for no spices, no salt and add your own.
A note for folks on Weight Watchers: The only ingredient adding points to this sauce is olive oil. Since such a small amount is used, I usually average this out to about 1/2 of a point (just to keep me honest). If you add in the wine, kick the sauce up to a whole point. Serve 3/4 cup of sauce over a cup of pasta for a good meal for just around 5 points.
----------
Emma's Basic Pasta Sauce
makes 6-8 servings
28 oz can of diced tomatoes with the juices--with Italian spices or not
or 2 pounds or more of beefsteak tomatoes (about 4 large), cored, peeled, and cut into 3/4-inch chunks
1 whole sweet onion--diced
1/2 large (or 1 small) zucchini--diced and salted (salt draws out the liquid in the zucchini)
1 red pepper (or orange or yellow)--diced
1/2 package of mushrooms--sliced (about 1 cup sliced)
3 medium-sized cloves garlic
2 cubes of veggie, chicken, or beef bouillon (I like using bouillon instead of broth for the concentrated flavor and to keep the amount of liquid used in the sauce at a minimum)
1-2 tsp olive oil
1/4 cup fresh basil or 1 tablespoon dried basil
salt and pepper to taste
1/2 cup of red wine (optional)
Heat olive oil in a large sauce pan or wok. Add onions and zucchini, and saute until barely translucent. Add garlic and stir until fragrant (about 30 seconds). Add peppers and stir until onions are fully translucent and zucchini is almost cooked through. Add mushrooms and saute for a minute or so. (If making sauce from whole tomatoes, do not cook the veggies as fully before adding the tomatoes. They will cook more fully as the sauce simmers.)
Add canned tomatoes (or diced whole tomatoes) and allow to come to a boil. Once boiling, add bouillon cubes, basil, and other spices. Reduce to a simmer. If using canned tomatoes, start water boiling for pasta. If using whole tomatoes, allow to simmer until sauce reaches desired consistency--between 45 minutes to 1 1/2 hours. In either case, stir occasionally.
Just before serving, stir in 1/2 cup of red wine if desired--this will give your sauce a nice depth of taste. Also, make sure the bouillon cubes are completely dissolved. There's nothing like chomping down on a bouillon cube to put you off salt for life. Or at least the next several minutes. But at least the faces you make will provide endless entertainment for any nearby guests, children, or other various loved ones.
Sunday, September 10, 2006
Fortune Cookies
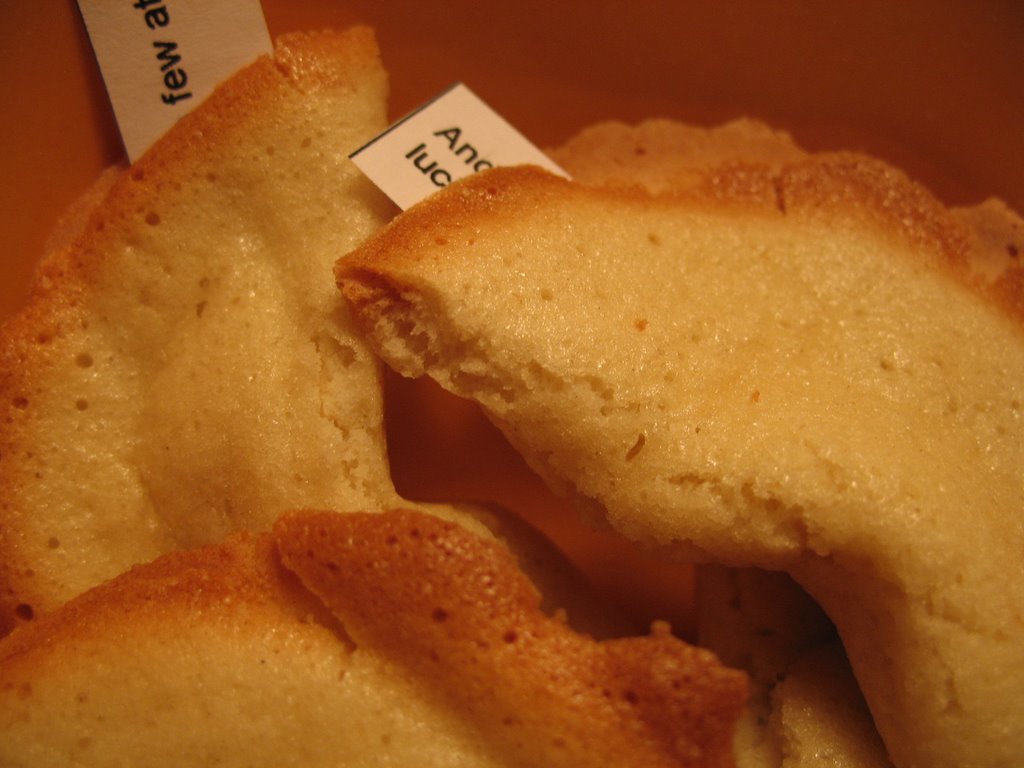 A few weeks ago, one of the departments in my company became inundated with projects that had moved down the conveyor belt to their desks and all the folks in that department were suddenly up to their ear lobes with paperwork and books and e-mails ever-so-politely requesting status updates on particularly gnarly projects (some of which MAY have come from yours truly). Part good wishing, part joke, part peace offering, I made the whole gang a batch of personalized fortune cookies.
Here's the recipe--por favor, give it a try and let me know your thoughts:
---------
Fortune Cookies
with grateful acknowledgement to Cooking Light magazine
Makes roughly 18 cookies
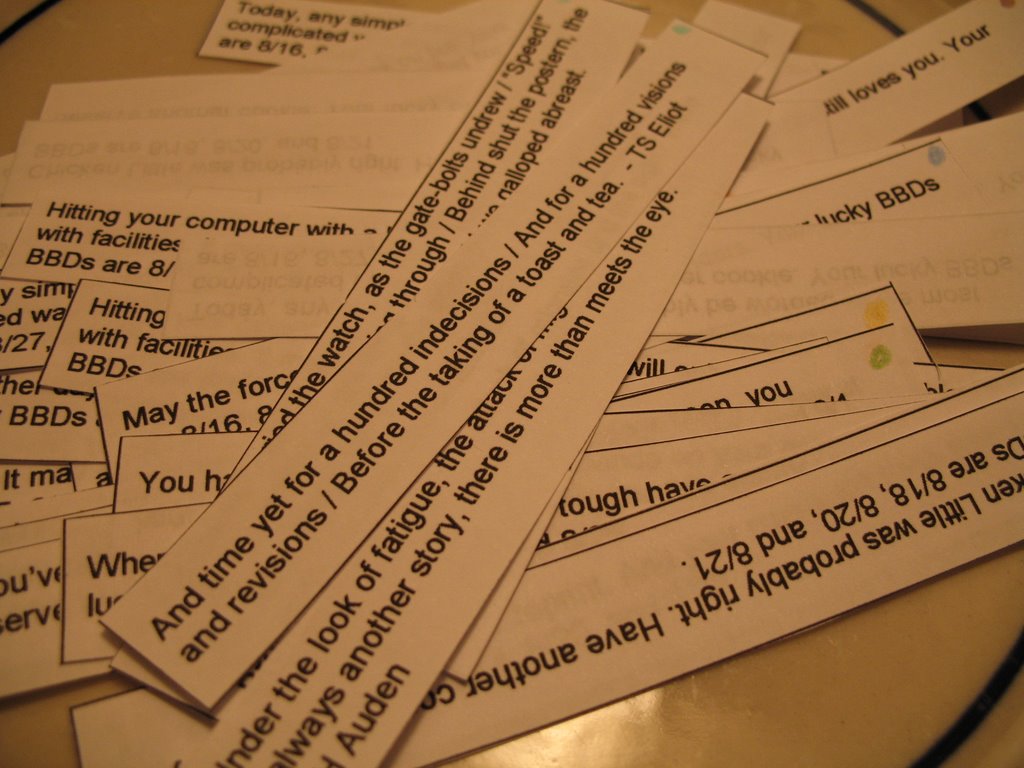 1/2 c. bread flour
1/2 c. sugar
1 tsp vanilla extract (almond or orange extract might be yummy too!)
2 large egg whites
20 fortunes (a few extra just in case) roughly 3 inches long by 1/2 high
Pre-heat oven to 400 degrees.
1. Combine all ingredients and mix until well blended. You should have a thin batter similar in consistency to icing or glaze (mine was just a bit thinner than pancake batter). Cover bowl with plastic wrap and chill 1 hour.
2. While batter is chilling, cover two large baking sheets with parchment paper. Using a biscuit cutter or drinking glass about 3 inches in diameter, trace three or four circles in a row along the middle of the paper. Turn paper over.
3. Spoon about 1 teaspoon of batter into the center of each circle and use the back of the teaspoon to spread the batter evenly over the entire circle.
4. Bake one sheet at a time for about 5 minutes or until the edges of the cooks are just started to get brown and crinkly. Remove from oven.
5. Use a spatula to release the cookies from the baking sheet. (Don't afraid to be tough.)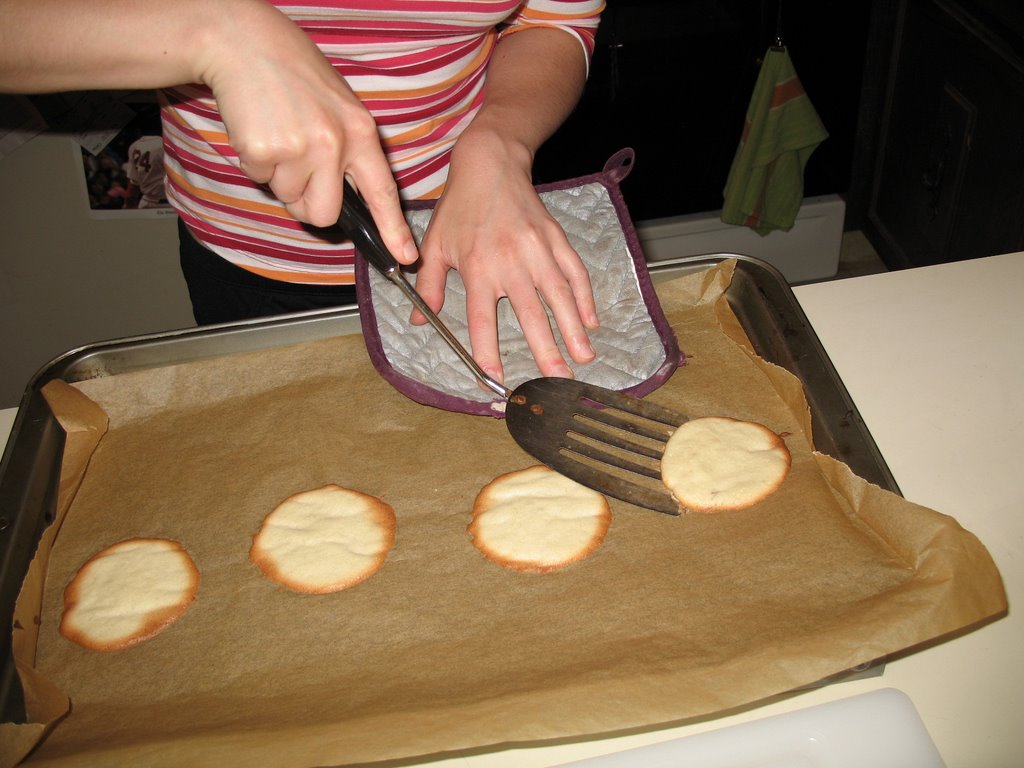
6. Working quickly and doing one cookie at a time, place the prepared fortune along the center of the cookie. Lay the handle of a wooden spoon or a chopstick along the fortune and fold the cookie over so the edges meet over the spoon handle. Press edges together. Remove spoon.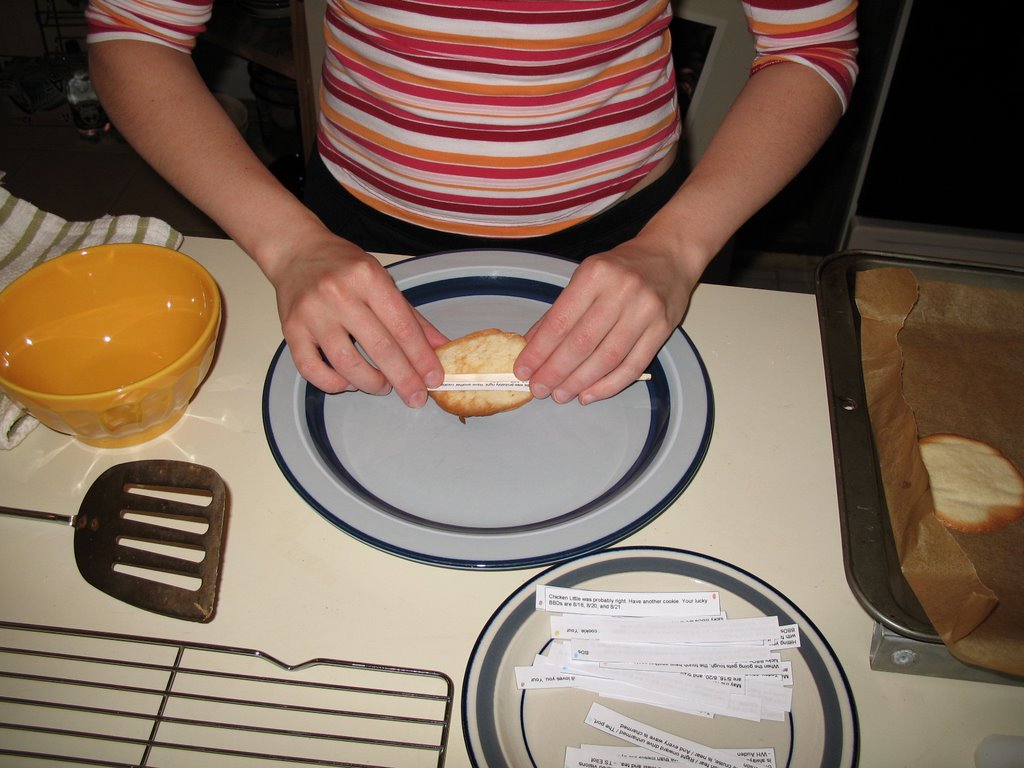
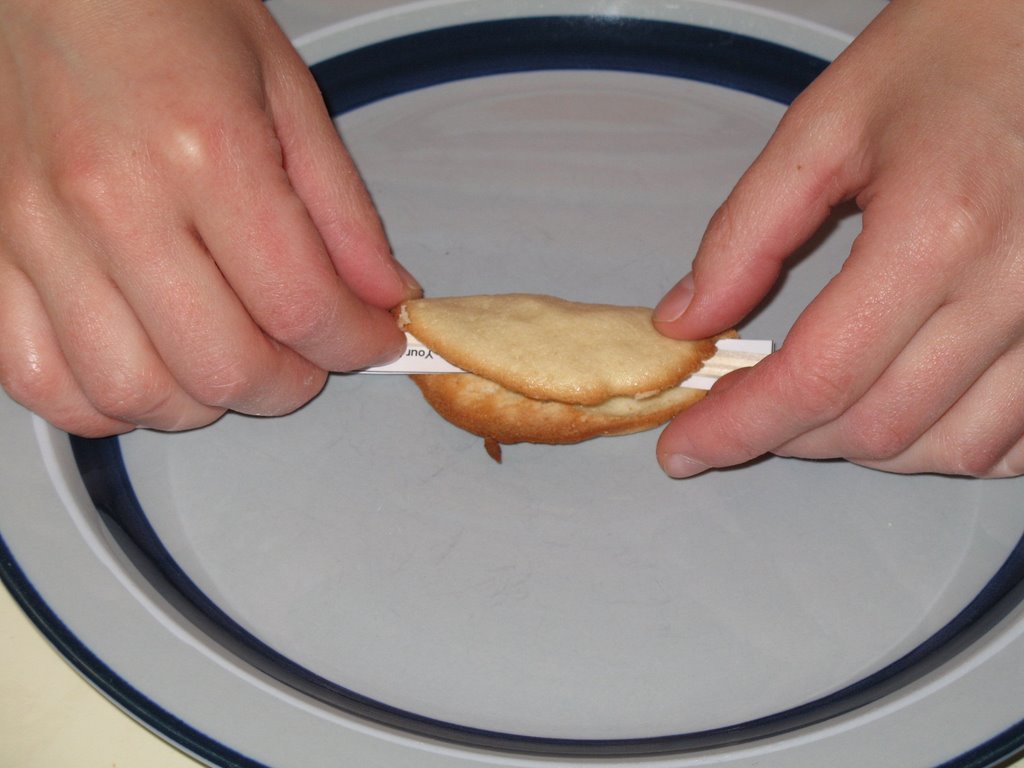
7. Pull the ends of the cookie down over the rim of a small bowl. Hold for a few seconds until set and then place cookie on a wire rack to cool completely. Repeat with remaining baked cookies.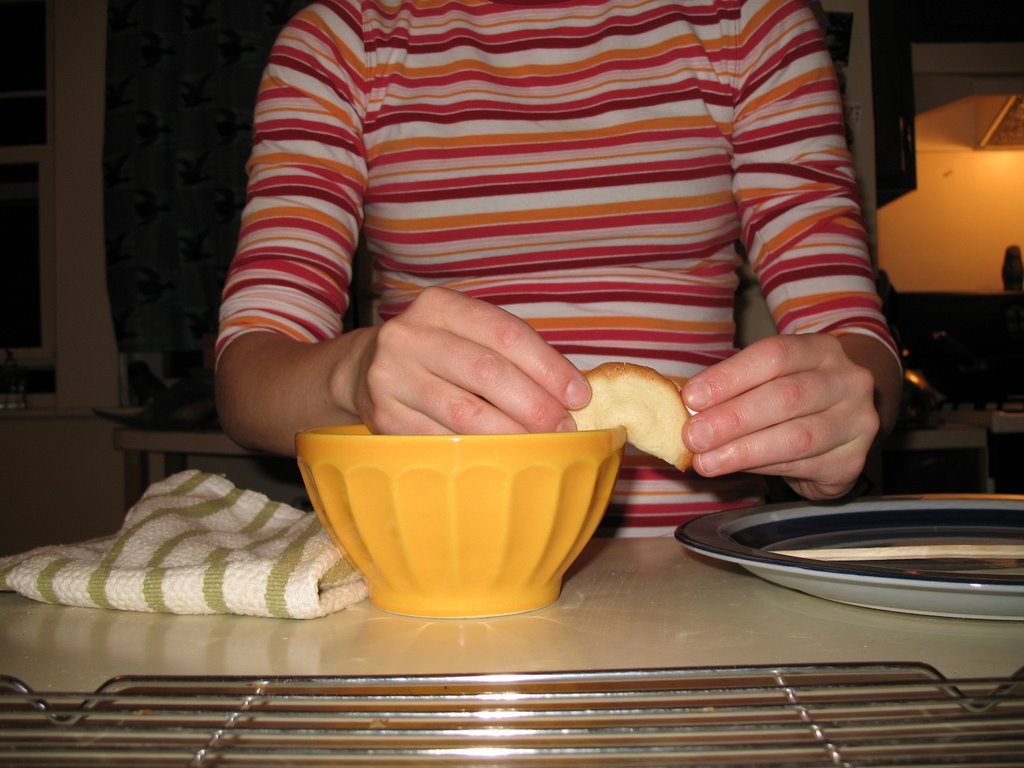
8. Repeat entire procedure until all the batter is used. Store in an air tight container.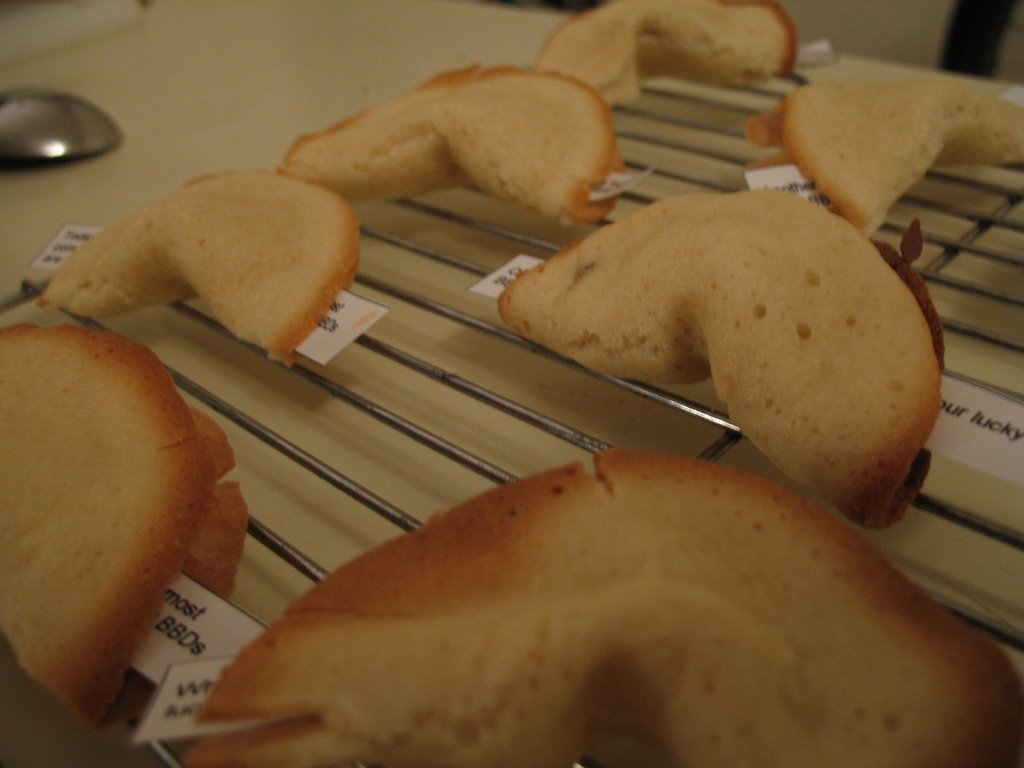
Calories: 37; Fat: 0.1 g; Protein: 0.9g; Fiber: 0.1g; Chol 0 mg; Iron 0.2 mg; Calcium 1 mg
Saturday, August 19, 2006
Our Sourdough, Ourselves--Part II
 This is my favorite, tried and true sourdough recipe. It consistently has a sourdough flavor that is not too sharp but has just the right amount of kick. The crumb is moist and chewy--and stays that way for several days. When made in loaf pans, the crumb tends to be a bit more 'fine' and spongy. When made in a brotform, bread basket, or baguette-shape, the crumb is more airy with larger holes (though not as airy as traditional baguette). By the by, sourdough will stay fresh significantly longer than regular bread because the 'sourdough' bacteria resists mold. Bonus for those of us who don't necessarily consume an entire loaf all that quickly (though I'm sure I could if I really put my mind to it...). This bread also rocks the house as toast with butter, French toast, bread crumbs, stuffing, and other yeasted favorites.
This is a traditional hearth bread recipe with a levain made the night before and allowed to ferment overnight. Levain is a term for one of several different varieties of 'pre-ferments.' Pre-ferments contribute to the leavening of the dough and enhance the flavor and texture of the bread. They are usually a combination of flour, water, and yeast, and the different kinds of pre-ferments vary in the proportion of flour to water. Some common pre-ferments are levain, chef, sponge, starter, and poolish.
Note: If I plan it right, I like to make the levain in the morning before I go to work and then prepare the final dough in the evening up to the step where you shape the loaves. At this point, I go ahead and shape the loaves, but instead of doing the final rise, I put them in the fridge overnight. In the morning, I let them come to room temperature and continue rising (the final rise)--about one hour or so--before baking them as the recipe directs. The idea for this was inspired by the delayed-fermentation method used for some slack-dough breads. I find the overnight rise in the fridge improves just about every aspect of the bread: the crust is more firm and chewy; the crumb has gorgeous, well-developed holes; and the taste is a bit sweeter and nuttier, though still distinctively sourdough.
Traditional Pain au Levain
This recipe is gratefully borrowed from Bread Alone by Daniel Leader.
 Levain
1 ¼ c. (6 oz) flour (either white or a blend of wheat and white)
1 ½ c. (12 oz) sourdough starter
Mix this the night before and let it sit out on the counter overnight in a container with a tight lid. The levain will double or more in size, so use a container with lots of extra space. Mix all ingredients together at once. This will form a very stiff dough. (
 Photos on left are from after it's fermented overnight: Photo # 1) Side view of the levain through the plastic tupperware--see all the bubbles? Photo #2) Top view of the levain--kinda gross-looking, huh? That's ok. It's how it's supposed to look.)
Final Dough
2 c. (18oz) levain (entire batch)
2 ¼ c. (18 oz) water
4 ½ - 5 ½ c. (24 -– 29 oz) flour (either all white or a blend of whole wheat and white)
1 tbsp ( ¾ oz) fine sea salt (if you use regular table salt, add about ¼ to ½ teaspoon extra)
Mix and knead the final dough (20-45 min): Combine the levain and the water in a 6-quart bowl. Break up the levain well with a wooden spoon or squeeze it through your fingers until broken up. Continue stirring until the levain is partly dissolved and the mixture is slightly frothy. Add 1 cup (5 oz) of the flour and stir until well combined. Add just enough of the remaining flour to make a thick mass that is difficult to stir. Turn out onto a lightly floured surface and knead:
 This is what the dough looks like before you knead it.
Kneading Alternative 1: (This is the traditional kneading technique you'll find in most standard cookbooks) Add salt just before you begin kneading. Begin kneading, adding remaining flour when needed, until dough is firm and smooth--—about 15 -– 17 minutes total. The dough is ready when a little dough pulled from the mass springs back quickly, or if you poke it, the impression of your finger springs back.
Kneading Alternative 2: (This is my perferred kneading techique. I find I get less tired, the dough is less sticky and uncooperative, and the final dough has better developed gluton) Knead for about five minutes. Dump some of the extra flour on the board and roll the dough in it so its nice and floury. Let it rest for 10 minutes while you gaze at it lovingly. Before the second round of kneading add the salt (I always forget this--usually I put the salt shaker in front of the dough before I let it rest so I don't forget). Fold in the salt and knead for 10 minutes. Dump a little of the extra flour on the board and roll the dough in it so its nice and floury. Let it rest for 10 minutes while you make a cuppa tea. The dough should be a little tacky during this final round, but if it starts sticking to your kneading surface or seriously gumming up your hands, add about a tablespoon of flour. The dough shouldn't require any more kneading after this, but you can tell it's ready when a little dough pulled from the mass springs back quickly, or if you poke it, the impression of your finger springs back.
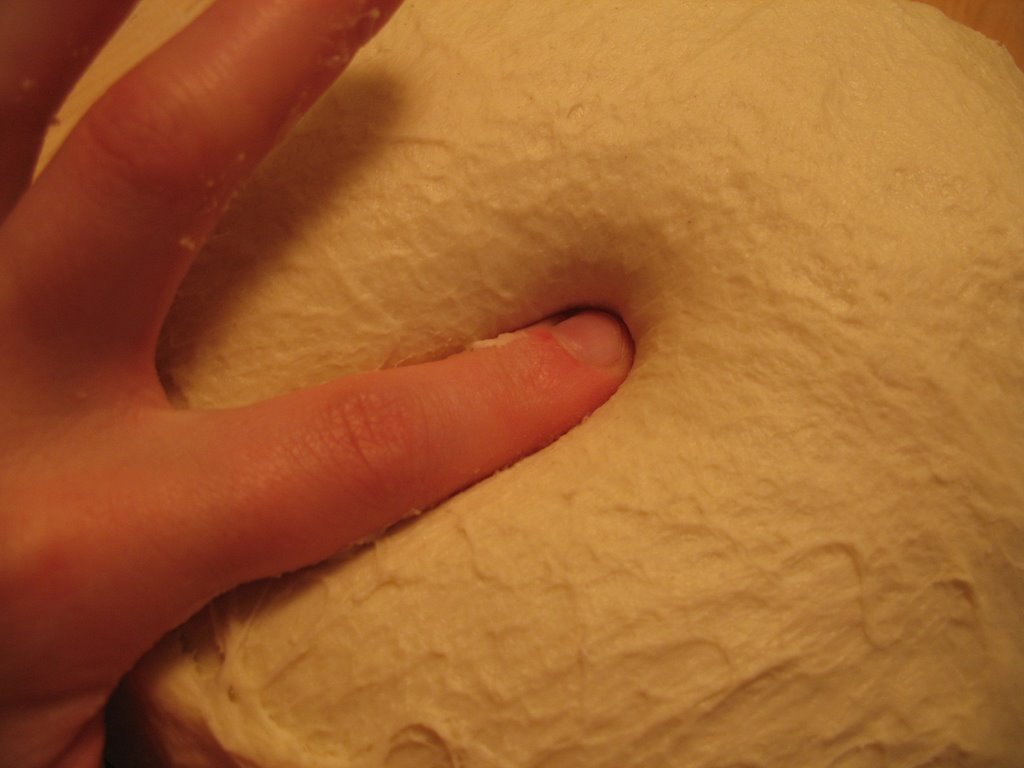 After you're done kneading, the dough should be smooth and pillowy, and it should spring back if you poke it with your finger.
Ferment the dough (2 hours): Shape the dough into a ball and let it rest on a lightly floured surface while you scrape, clean, and lightly oil your large bowl. Place the dough in the bowl and turn once to coat with oil. Cover with a clean damp towel or plastic wrap and place in a moderately warm, draft-free place until increased in volume about one-quarter. (I usually put it in my oven--—it'’s a gas oven and usually a pretty cozy temperature. In the winter if your kitchen is cold, you can pre-heat your oven a few minutes. You should be able to comfortably rest your hand on the oven wrack. If it'’s too hot for you to touch, the oven is too hot for the rising dough and it will bake instead of rise!
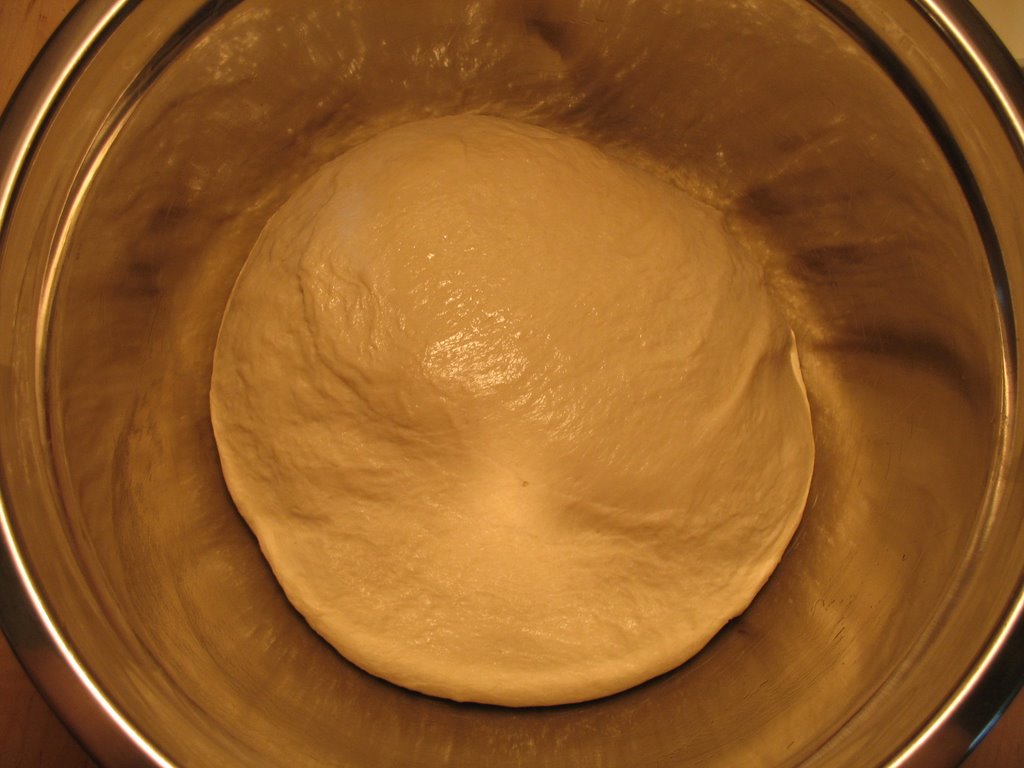 This is the dough right before the first rise.
And right after the first rise.
Divide the dough and rest (35 minutes): Deflate the dough by pushing down in the center and pulling up on the sides. Transfer the dough to a lightly floured work surface and knead briefly. Cut into 2 equal pieces, and shape each into a tight round ball and place on a lightly floured board. Let rest for about 15 minutes to relax the gluten.
Shape the final loaves and ferment (2-2.5 hours): Shape each ball of dough into desired final shape--a ball for round loaves, a 'roll' for loaves, etc. If you have a brotform, bread basket, or loaf pans, you can place the dough into these forms now. Alternatively, you can let the loaf rise 'free-form' on top of a piece of parchment paper on your counter top.
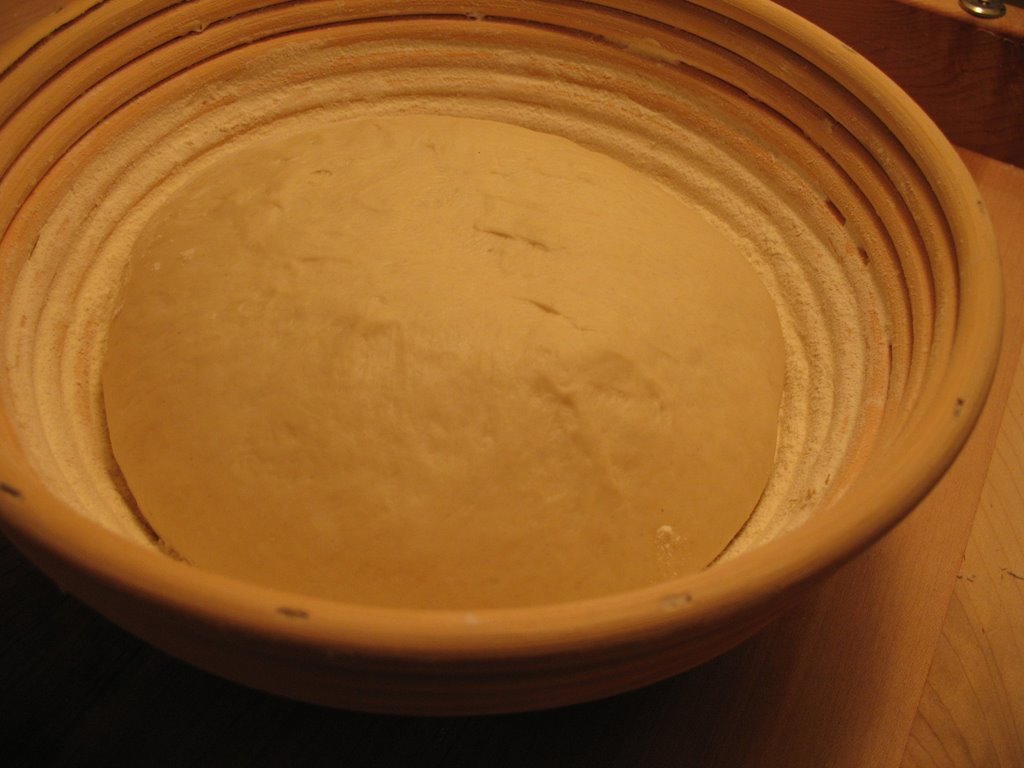 Shaped loaf in a 'brotform' or bread basket
Shaped loaf in a loaf pan
Cover with a clean damp towel or plastic wrap and let rise for about 2 hours or until the loaves have reached the desired size. Keep in mind that they will have a final burst of rising right after you put them in the hot oven! (I'’ve had many a loaf ‘spill over’ because I let them rise too long plus you risk the dough collapsing on itself and then you get a dense, brick-like final loaf. Bleck.) Forty-five minutes to an hour before baking, pre-heat the oven to 450 degrees. Be sure the oven rack is placed in the middle of the oven: —if it'’s too high, the top will burn, and if it'’s too low, the bottoms will burn. If you have a baking stone, place this on the middle rack and allow it to heat up with the oven.
 After final rise
 After final rise
After final rise--both loaves are ready to bake
Bake the loaves (about 30 minutes): Using a sharp blade, score each loaf on the top by making several quick shallow cuts about ¼ to ½ inch deep along the surface.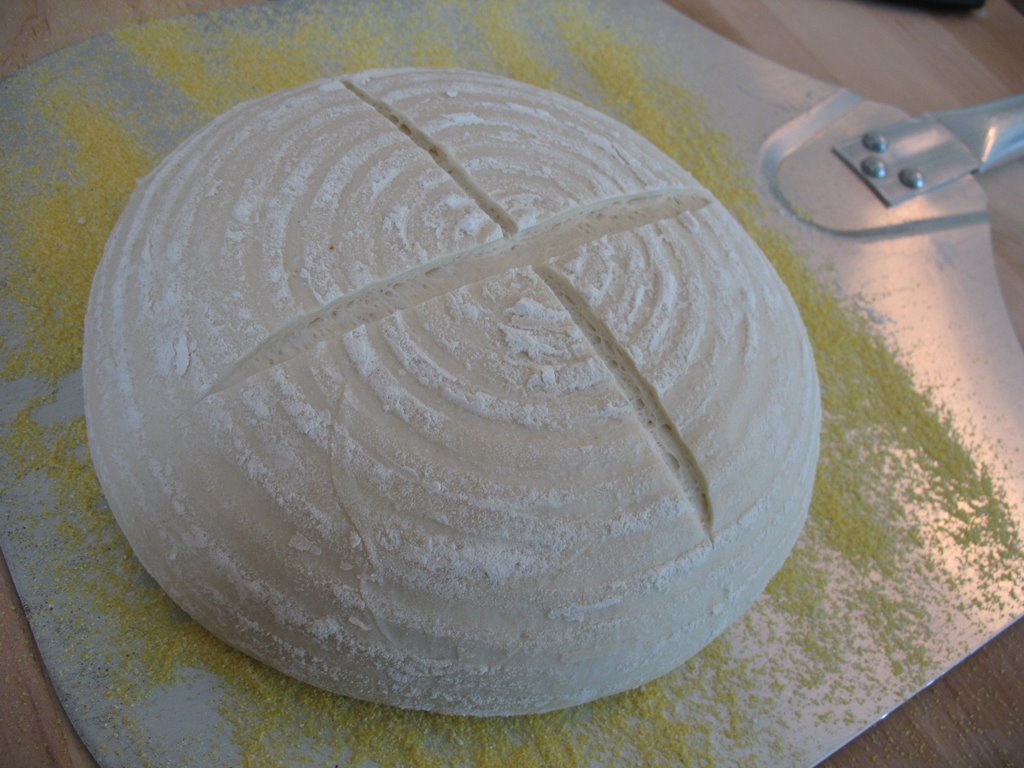 Round loaf with score marks. See the ridges from the brotform? Cool, huh?!
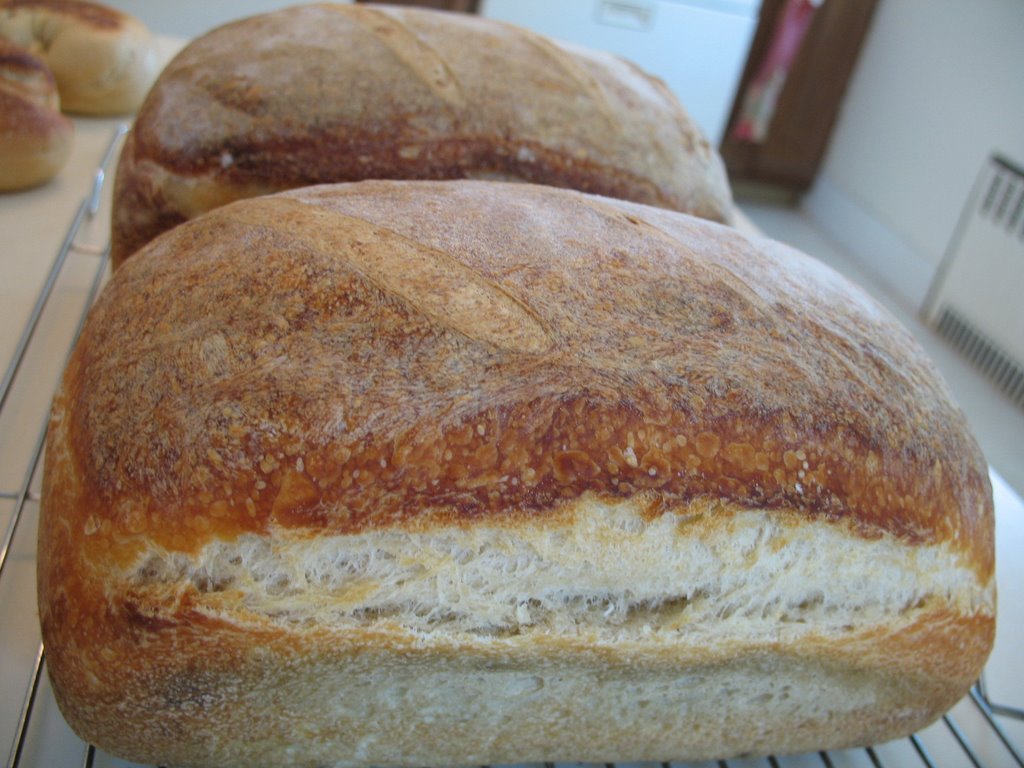 ) Slide the loaves into the oven and allow to back until the loaves are a rich caramel color (the baker's rule is that if you can see three distinct shades of brown, the loaves are done). My recipe says this takes about 25 -– 30 minutes, but I find that it'’s closer to 30 -– 35 minutes. To test the loaves for doneness, remove them from the pan and turn them upside down. Hit the bottom with your thumb. If you hear a sharp hollow sound, like knocking on a door, the bread is done. If not, bake about 5 minutes longer. Allow to cool completely on a wire rack. Don'’t be tempted to eat them right out of the oven because the loaves actually finish baking while they're cooling and the crust needs to firm up. If you cut them too soon, the loaves can get soggy and sink in on itself.
 This bread keeps pretty well for about a week. Many traditional bakers abhor any kind of storage unit and say you should keep your loaves out in the air with the cut-side facing down on the counter. The crust gets really crust, but the inside (theoretically) stays moist. Loaves keep this way for a day or two, and then I personally think they're too hard to chew. I keep my loaves in big ziplock bags. The crust will take in moisture and be more chewy instead of crispy, but I usually like to toast my bread anyway. You can also freeze bread very well. I usually just put it in a big ziplock bag, squish out as much air as possible, and tuck it away. I recommend writing the date and the kind of bread on the bag with a sharpie or dry-erase marker--I started doing this was after the Christmas eve where I had about five loaves on the counter, scrutinizing them and sniffing mournfully at the frozen loaves, trying to find the sourdough loaf I KNEW was in there and really wanted to bring to Christmas dinner. *sigh* Learn from my mistakes, ladies and gentlemen.
If not quite easy-peasy, this is still relatively painless. Takes a bit of practice and perseverance, but you'll get the hang of it, I guarantee. Go forth, bake bread, god speed.
Saturday, August 12, 2006
An Interim Sourdough Lesson
Kay, so after "Our Sourdough, Ourselves: Part I" I started getting really curious about the science behind sourdough, and really, bread baking in general. I've had some awareness of the science just from all the recipes I've read and what I've picked up talking to people, but I've never sat down to put it all together. Much of the 'science' some recipe authors give as background seems to be the stuff of legend, and there's a lot of garbled pseudo-science rumbling around out there.
Here is a little fact/fiction break down for ya, gleaned from my bread books and a bit of web research. Please feel free to correct/add/subtract/tell me I'm wrong. There's so little good info out there, I'd hate to add to the muddle. Also let me know if you have a question or come across another baking science myth--I'd love to look into it. Keep an eye on this page; I'll add new info as I go:
----------
Fiction: Adding a pinch of yeast as you begin cultivating your starter will help collect wild yeast from the air.
Fact: MEEEH! Try again! Though it sounds like fun, yeast does not happily float through the air in search of a good party. Yeast is a kind of fungus. Fungi absorb their food and reproduce asexually by division of cells (also called 'budding' or 'fission'). Yeast cells are also not mobile organisms able to seek out their food (or kinfolk); in other words, yeast has to live in or on its food in order to eat and survive. Adding a pinch of yeast to your initial starter is more like planting a seed or using a match to start a fire. Honestly, I don't think you even really need the pinch of yeast to get things going--the yeast will eventually make a home in your starter on its own. Certainly you should never need to add any commercial yeast after you've gotten your initial starter going.
----------
Fiction: Yeast eats flour.
Fact: Yeast eats sugar. Sugar comes, eventually, from the flour. Flour is made up of starch molecules (complex carbohydrates). Starch molecules are composed of many many threads of simple sugar molecules wrapped very tightly together. Something is needed to break down the starch molecules and release the sugar molecules. That "something" is an enzyme called amylase. Once the amylase breaks down the starch molecules into simple sugar, the yeast begins feeding on the sugar.
----------
Fiction: The sour taste in sourdough comes from dead yeast cells.
Fact: Honestly, I'm a little shaky on this one. Here's one definite fact: There's more than just wild yeast in them thar waters. Also in residence in your little pot 'o starter is a friendly, nonharmful bacteria called lactobacillus. The fuzziness here is that I can't figure out if the lactobacillus breaks down starch molecules into sugars for the yeast, or if enzymes still break down the starch and both the yeast and the lactobacillus feast on it. In any case, lactobacillus produce two kinds of acid as a by-product: lactic acid gives the sourdough its mellow, rich flavor and acetic acid gives sourdough its tang and punch. Another spot of fuzziness: I *think* one or the other of these acids is produced in greater abundance depending on the conditions in your starter, like whether you keep your starter in more of a liquid state or in a stiff dough. Liquidy starter (near equal balance of flour and water) makes more acetic acid and makes your sourdough more sour. A stiff starter (higher percentage of flour to water, about 2:1) makes more lactic acid and gives your final bread a more mellow, rather sweet taste.
Wild yeast doesn't actually contribute to the flavor of the sourdough at all. Wild yeast is necessary because it's made of sterner stuff than commercial yeast, which would die in the acidic environment created by the bacteria. The wild yeast is in there as the leavening agent (in the same way that commercial yeast leavens regular bread dough), and also produces alcohol and carbon dioxide as a by-product. (The carbon dioxide is what leavens the dough--carbon dioxide molecules get trapped in the web of gluten strands and lifts the structure up.)
----------
Fiction: Wild yeast is commercial yeast, only it lives in the air instead of a little paper packet.
Fact: Actually, wild yeast and commercial (or domesticated) yeast are two different strains of yeast entirely. Wild yeast is Saccharomyces exiguus, and commercial yeast is Saccharomyces cerevisae. Who'd a thunk it. Commercial yeast likes a near-neutral pH environment in which to do it's groove thang. Wild yeast likes the acidic environment of the sourdough. Wild yeast is also longer lived and can stand up to the longer, more rigorous process of sourdough bread baking.
Here is a little fact/fiction break down for ya, gleaned from my bread books and a bit of web research. Please feel free to correct/add/subtract/tell me I'm wrong. There's so little good info out there, I'd hate to add to the muddle. Also let me know if you have a question or come across another baking science myth--I'd love to look into it. Keep an eye on this page; I'll add new info as I go:
----------
Fiction: Adding a pinch of yeast as you begin cultivating your starter will help collect wild yeast from the air.
Fact: MEEEH! Try again! Though it sounds like fun, yeast does not happily float through the air in search of a good party. Yeast is a kind of fungus. Fungi absorb their food and reproduce asexually by division of cells (also called 'budding' or 'fission'). Yeast cells are also not mobile organisms able to seek out their food (or kinfolk); in other words, yeast has to live in or on its food in order to eat and survive. Adding a pinch of yeast to your initial starter is more like planting a seed or using a match to start a fire. Honestly, I don't think you even really need the pinch of yeast to get things going--the yeast will eventually make a home in your starter on its own. Certainly you should never need to add any commercial yeast after you've gotten your initial starter going.
----------
Fiction: Yeast eats flour.
Fact: Yeast eats sugar. Sugar comes, eventually, from the flour. Flour is made up of starch molecules (complex carbohydrates). Starch molecules are composed of many many threads of simple sugar molecules wrapped very tightly together. Something is needed to break down the starch molecules and release the sugar molecules. That "something" is an enzyme called amylase. Once the amylase breaks down the starch molecules into simple sugar, the yeast begins feeding on the sugar.
----------
Fiction: The sour taste in sourdough comes from dead yeast cells.
Fact: Honestly, I'm a little shaky on this one. Here's one definite fact: There's more than just wild yeast in them thar waters. Also in residence in your little pot 'o starter is a friendly, nonharmful bacteria called lactobacillus. The fuzziness here is that I can't figure out if the lactobacillus breaks down starch molecules into sugars for the yeast, or if enzymes still break down the starch and both the yeast and the lactobacillus feast on it. In any case, lactobacillus produce two kinds of acid as a by-product: lactic acid gives the sourdough its mellow, rich flavor and acetic acid gives sourdough its tang and punch. Another spot of fuzziness: I *think* one or the other of these acids is produced in greater abundance depending on the conditions in your starter, like whether you keep your starter in more of a liquid state or in a stiff dough. Liquidy starter (near equal balance of flour and water) makes more acetic acid and makes your sourdough more sour. A stiff starter (higher percentage of flour to water, about 2:1) makes more lactic acid and gives your final bread a more mellow, rather sweet taste.
Wild yeast doesn't actually contribute to the flavor of the sourdough at all. Wild yeast is necessary because it's made of sterner stuff than commercial yeast, which would die in the acidic environment created by the bacteria. The wild yeast is in there as the leavening agent (in the same way that commercial yeast leavens regular bread dough), and also produces alcohol and carbon dioxide as a by-product. (The carbon dioxide is what leavens the dough--carbon dioxide molecules get trapped in the web of gluten strands and lifts the structure up.)
----------
Fiction: Wild yeast is commercial yeast, only it lives in the air instead of a little paper packet.
Fact: Actually, wild yeast and commercial (or domesticated) yeast are two different strains of yeast entirely. Wild yeast is Saccharomyces exiguus, and commercial yeast is Saccharomyces cerevisae. Who'd a thunk it. Commercial yeast likes a near-neutral pH environment in which to do it's groove thang. Wild yeast likes the acidic environment of the sourdough. Wild yeast is also longer lived and can stand up to the longer, more rigorous process of sourdough bread baking.
Monday, August 7, 2006
Our Sourdough, Ourselves--Part I
OK, you can laugh all you like: My first memory of sourdough bread is "The San Francisco Sandwich" that the Hardee's fast food chain ran for a while back in the 90's. Now, we can stand here and debate the relative authenticity and perhaps dubious quality of sourdough bread served at a fast food chain until the cows come home. Whether it was truly the "Authentic Taste of San Francisco Sourdough" or addictive chemicals added to the dough, I was hooked.
When I first started baking a few years back, the idea of making my own sourdough bread seemed like a tall tale dreamed up to scare would-be bakers, and I regarded every sourdough recipe I came across with the appropriate amounts of reverence and trepidation. Ancestral recipes for sourdough starters and sourdough breads have a reputation for being jealously guarded, passed down through baking-family dynasties, and kept secret from all novices. There are legends of French sourdough starters that have literally been maintained for generations.
My friends, the truth is that sourdough is really, truly, verily not as scary as it sounds. No expensive 'starter' powders from foofy baking companies. No secret ingredients only available on the baker's black market. You don't need anything fancier than a tupperware container, flour, water, and a pinch of yeast to get it going. It's even easier if you can beg a cup of starter off a friend (or steal a cup from a fancy French bakery, hee hee hee).
If you feel like making it from scratch, here's how:
Creating Your Very Own Sourdough
To create the most basic sourdough starter from scratch, you need a big container (at least 2 – 3 quarts) with a lid, flour, water, a little bit of yeast. I have found that regular, run of the mill, all-purpose, white flour works the best (I use King Arthur Flour). For a while, I kept a separate sourdough that was about half whole wheat and half white. It worked fine, but it got to be too much for a lil' home baker like me to maintain two sourdoughs starters. I’ve also seen other sourdough starter recipes that use various ingredients like milk, honey, buttermilk, molasses, salt, and even grapes (see note at end of post). All these ingredients will vary the flavor of the sourdough. I recommend starting with the basic sourdough and elaborating once you get the hang of it.
Day 1
¾ c. plus 2 tablespoons (4 oz) all-purpose, white flour
½ c. (4 oz) water (filtered is best)
a pinch moist or dry yeast
Combine all ingredients and stir well to make a thick, soft dough. Do not add any more flour or water at this point. Scrape down the sides with a spatula, cover with a lid, and let stand at room temperature for 24 hours. Mark the side of the container at the level of the mixture with a dry-erase marker.
Day 2
¾ c. plus 2 tablespoons (4 oz) all-purpose, white flour
½ c. (4 oz) water (filtered is best)
The starter should have doubled in volume and have tiny bubbles in the surface. The initial bacteria cells from that pinch of yeast have been eagerly munching on the flour and reproducing like mad. Sugar and alcohol are byproducts of their reproduction (it's more technical than this, I'm sure, but that's another post).
Add new flour and water and stir vigorously to distribute all the ingredients and add fresh oxygen. Scrape down the sides, mark the level of the starter, and cover tightly for another 24 hours.
Day 3
¾ c. plus 2 tablespoons (4 oz) all-purpose, white flour
½ c. (4 oz) water (filtered is best)
The starter should now have the texture of thick batter, should have doubled in volume, and be quite bubbly. If you taste it, it will have a musty, sour flavor. It will smell of alcohol and vinegar. Mix in the fresh ingredients as with Day 2. Scrape down the sides, mark the level of the starter, and cover tightly for another 24 hours.
Day 4 and Beyond: Caring for your sourdough starter
Now your starter is ripe and ready to use. The best place to keep starter is in the fridge. The mixture will expand and contract a bit, but shouldn’t double. After a week, a clear or yellowy liquid may have formed on the surface and the starter should smell strongly of alcohol and vinegar. This is fine. If the liquid is tinted pink or smells ‘off’ then the starter has spoiled and you should throw it away and start fresh.
To nourish your starter, discard about one cup (8 oz) every week. Add in ½ cup (4 oz) of water and ¾ cup (4 oz) of flour. Mix well and store in the fridge.
TIPS: Filtered or spring water is best for starter. There are often hard minerals or chlorine in tap water that can kill or hinder the bacteria developing in the starter. On the other hand, potato water (water that you’ve used to boil potatoes) is excellent food for the bacteria and can be used in place of filtered water.
If you ever want to increase the amount of your starter, you can discard less or none of your starter. It’s most important to keep adding new ‘food’ every week.
If you want to decrease the amount of your starter or if you’ve noticed that the bread you’ve been making is getting really sour, you can discard all but ¼ cup (2 oz) of the starter. Add fresh ingredients and begin to build it up again.
Starter needs to be ‘fed’ about once a week, though I’ve gone as long as two weeks without having it spoil. If you go away for vacation, be sure to have ask a friend or neighbor to care for it along with the plants and pets! I’ve heard that you can freeze starter for up to several months, but I’ve never tried this myself. You can also keep sourdough on the counter, but it needs to be fed more often, which isn’t so practical for the home baker.
For this and other baking adventures, I highly recommend using an electric scale to accurately measure the ingredients.
NOTE: Keep in mind that the 'sour' flavor of your final dough is affected by lots of things including how long you've been maintaining the starter, how recently it was 'fed,' the manner in which you prepared the final dough, and even how fresh your final loaf is (I've noticed that my loaves will get more distinctly sour as the week goes on). Sourdough flavor also varies depending on your location. If you have a highly refined palate (oh, la la) and access to sourdough breads from a variety of regions, you might actually noticed distinct sourdough flavors in each loaf. I'll research an actual science lesson for another post, but the general principle is that the sourdough starter interacts with the wild yeast in the air where you live. Ipso facto, a true San Francisco sourdough can really only come from San Francisco. FYI, wild yeast is visible in one form as the film on grapes (which is why you might see some starter recipes using crushed grapes in the initial starter).
Our Sourdough, Ourselves--Part II: My favorite sourdough bread recipe....Coming up!
When I first started baking a few years back, the idea of making my own sourdough bread seemed like a tall tale dreamed up to scare would-be bakers, and I regarded every sourdough recipe I came across with the appropriate amounts of reverence and trepidation. Ancestral recipes for sourdough starters and sourdough breads have a reputation for being jealously guarded, passed down through baking-family dynasties, and kept secret from all novices. There are legends of French sourdough starters that have literally been maintained for generations.
My friends, the truth is that sourdough is really, truly, verily not as scary as it sounds. No expensive 'starter' powders from foofy baking companies. No secret ingredients only available on the baker's black market. You don't need anything fancier than a tupperware container, flour, water, and a pinch of yeast to get it going. It's even easier if you can beg a cup of starter off a friend (or steal a cup from a fancy French bakery, hee hee hee).
If you feel like making it from scratch, here's how:
Creating Your Very Own Sourdough
To create the most basic sourdough starter from scratch, you need a big container (at least 2 – 3 quarts) with a lid, flour, water, a little bit of yeast. I have found that regular, run of the mill, all-purpose, white flour works the best (I use King Arthur Flour). For a while, I kept a separate sourdough that was about half whole wheat and half white. It worked fine, but it got to be too much for a lil' home baker like me to maintain two sourdoughs starters. I’ve also seen other sourdough starter recipes that use various ingredients like milk, honey, buttermilk, molasses, salt, and even grapes (see note at end of post). All these ingredients will vary the flavor of the sourdough. I recommend starting with the basic sourdough and elaborating once you get the hang of it.
Day 1
¾ c. plus 2 tablespoons (4 oz) all-purpose, white flour
½ c. (4 oz) water (filtered is best)
a pinch moist or dry yeast
Combine all ingredients and stir well to make a thick, soft dough. Do not add any more flour or water at this point. Scrape down the sides with a spatula, cover with a lid, and let stand at room temperature for 24 hours. Mark the side of the container at the level of the mixture with a dry-erase marker.
Day 2
¾ c. plus 2 tablespoons (4 oz) all-purpose, white flour
½ c. (4 oz) water (filtered is best)
The starter should have doubled in volume and have tiny bubbles in the surface. The initial bacteria cells from that pinch of yeast have been eagerly munching on the flour and reproducing like mad. Sugar and alcohol are byproducts of their reproduction (it's more technical than this, I'm sure, but that's another post).
Add new flour and water and stir vigorously to distribute all the ingredients and add fresh oxygen. Scrape down the sides, mark the level of the starter, and cover tightly for another 24 hours.
Day 3
¾ c. plus 2 tablespoons (4 oz) all-purpose, white flour
½ c. (4 oz) water (filtered is best)
The starter should now have the texture of thick batter, should have doubled in volume, and be quite bubbly. If you taste it, it will have a musty, sour flavor. It will smell of alcohol and vinegar. Mix in the fresh ingredients as with Day 2. Scrape down the sides, mark the level of the starter, and cover tightly for another 24 hours.
Day 4 and Beyond: Caring for your sourdough starter

Now your starter is ripe and ready to use. The best place to keep starter is in the fridge. The mixture will expand and contract a bit, but shouldn’t double. After a week, a clear or yellowy liquid may have formed on the surface and the starter should smell strongly of alcohol and vinegar. This is fine. If the liquid is tinted pink or smells ‘off’ then the starter has spoiled and you should throw it away and start fresh.
To nourish your starter, discard about one cup (8 oz) every week. Add in ½ cup (4 oz) of water and ¾ cup (4 oz) of flour. Mix well and store in the fridge.
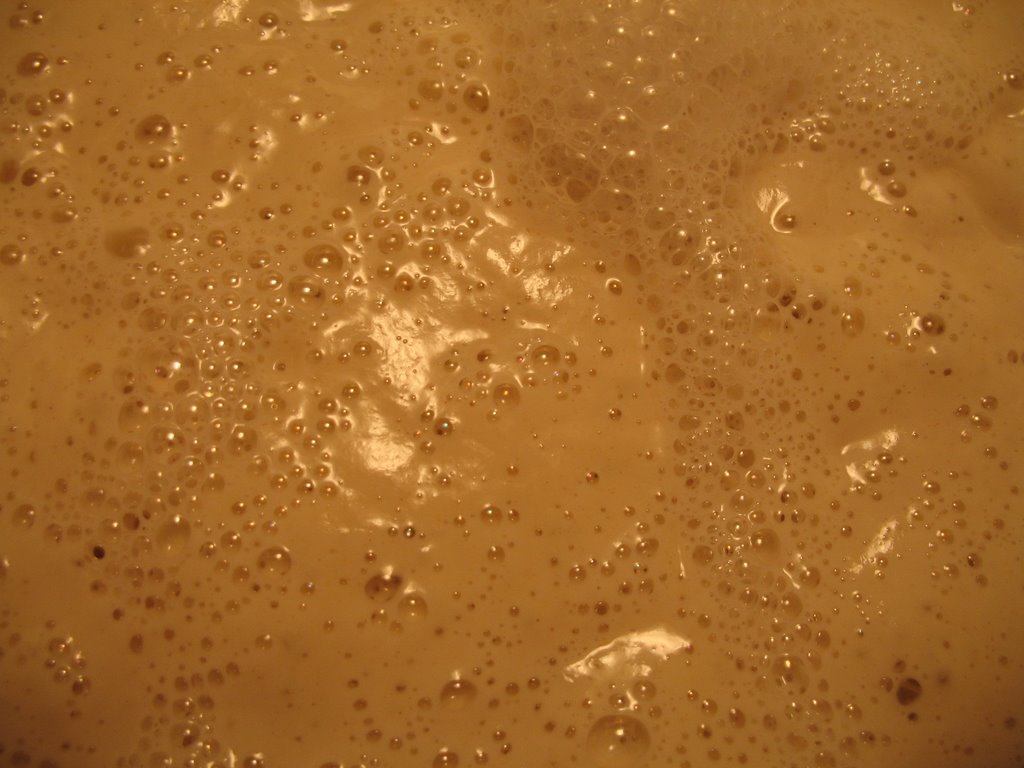
TIPS: Filtered or spring water is best for starter. There are often hard minerals or chlorine in tap water that can kill or hinder the bacteria developing in the starter. On the other hand, potato water (water that you’ve used to boil potatoes) is excellent food for the bacteria and can be used in place of filtered water.
If you ever want to increase the amount of your starter, you can discard less or none of your starter. It’s most important to keep adding new ‘food’ every week.
If you want to decrease the amount of your starter or if you’ve noticed that the bread you’ve been making is getting really sour, you can discard all but ¼ cup (2 oz) of the starter. Add fresh ingredients and begin to build it up again.
Starter needs to be ‘fed’ about once a week, though I’ve gone as long as two weeks without having it spoil. If you go away for vacation, be sure to have ask a friend or neighbor to care for it along with the plants and pets! I’ve heard that you can freeze starter for up to several months, but I’ve never tried this myself. You can also keep sourdough on the counter, but it needs to be fed more often, which isn’t so practical for the home baker.
For this and other baking adventures, I highly recommend using an electric scale to accurately measure the ingredients.
NOTE: Keep in mind that the 'sour' flavor of your final dough is affected by lots of things including how long you've been maintaining the starter, how recently it was 'fed,' the manner in which you prepared the final dough, and even how fresh your final loaf is (I've noticed that my loaves will get more distinctly sour as the week goes on). Sourdough flavor also varies depending on your location. If you have a highly refined palate (oh, la la) and access to sourdough breads from a variety of regions, you might actually noticed distinct sourdough flavors in each loaf. I'll research an actual science lesson for another post, but the general principle is that the sourdough starter interacts with the wild yeast in the air where you live. Ipso facto, a true San Francisco sourdough can really only come from San Francisco. FYI, wild yeast is visible in one form as the film on grapes (which is why you might see some starter recipes using crushed grapes in the initial starter).
Our Sourdough, Ourselves--Part II: My favorite sourdough bread recipe....Coming up!
Subscribe to:
Posts (Atom)
