Quickie post this lazy Sunday afternoon--just wanted to share my basic pasta sauce recipe with all y'all. For the longest time, I didn't question the fundamental American assumption that pasta sauce comes in jars. Period. No further thought required. Then one fateful shopping trip, while tenaciously deciphering which pasta sauce had the cheaper unit price and then asking myself if this was a sauce I actually desired to consume, it hit me. I could actually make my own pasta sauce. My own! Let me share a little secret with you: at its most basic, pasta sauce is really just...wait for it...tomatoes. Yes, tomatoes. Eureka!
Now there are about a hundred bajillion recipes for tomato sauce (basic pasta sauce) out there. By all means, go forth and sample. But if you're like me and the idea of making your own sauce is a novel shift of paradigm, here's a good place to start. The veggies I give below are my basic mix, but you can certainly add or subtract based on what you have in your fridge and your tastes.
A note on the tomatoes: If they're in season, sauce made from fresh beefsteak tomatoes is to die for. Plan extra time for it, though, as it takes a good hour or so for the tomatoes to simmer down into a sauce. However, if it's the middle of winter, if you're short on time, or if you just don't feel like it, a can of diced tomatoes is a perfectly reasonable substitute. There is no shame in home cooking. Get a 28 oz can of your grocery store fav--I use "Nature's Promise" brand from Stop&Shop, from their new line of organic products. You can usually find cans with Italian spices or without, salted or not. If you want quick and easy, go for the pre-spiced stuff. If you're feeling adventurous, go for no spices, no salt and add your own.
A note for folks on Weight Watchers: The only ingredient adding points to this sauce is olive oil. Since such a small amount is used, I usually average this out to about 1/2 of a point (just to keep me honest). If you add in the wine, kick the sauce up to a whole point. Serve 3/4 cup of sauce over a cup of pasta for a good meal for just around 5 points.
----------
Emma's Basic Pasta Sauce
makes 6-8 servings
28 oz can of diced tomatoes with the juices--with Italian spices or not
or 2 pounds or more of beefsteak tomatoes (about 4 large), cored, peeled, and cut into 3/4-inch chunks
1 whole sweet onion--diced
1/2 large (or 1 small) zucchini--diced and salted (salt draws out the liquid in the zucchini)
1 red pepper (or orange or yellow)--diced
1/2 package of mushrooms--sliced (about 1 cup sliced)
3 medium-sized cloves garlic
2 cubes of veggie, chicken, or beef bouillon (I like using bouillon instead of broth for the concentrated flavor and to keep the amount of liquid used in the sauce at a minimum)
1-2 tsp olive oil
1/4 cup fresh basil or 1 tablespoon dried basil
salt and pepper to taste
1/2 cup of red wine (optional)
Heat olive oil in a large sauce pan or wok. Add onions and zucchini, and saute until barely translucent. Add garlic and stir until fragrant (about 30 seconds). Add peppers and stir until onions are fully translucent and zucchini is almost cooked through. Add mushrooms and saute for a minute or so. (If making sauce from whole tomatoes, do not cook the veggies as fully before adding the tomatoes. They will cook more fully as the sauce simmers.)
Add canned tomatoes (or diced whole tomatoes) and allow to come to a boil. Once boiling, add bouillon cubes, basil, and other spices. Reduce to a simmer. If using canned tomatoes, start water boiling for pasta. If using whole tomatoes, allow to simmer until sauce reaches desired consistency--between 45 minutes to 1 1/2 hours. In either case, stir occasionally.
Just before serving, stir in 1/2 cup of red wine if desired--this will give your sauce a nice depth of taste. Also, make sure the bouillon cubes are completely dissolved. There's nothing like chomping down on a bouillon cube to put you off salt for life. Or at least the next several minutes. But at least the faces you make will provide endless entertainment for any nearby guests, children, or other various loved ones.
Friday, September 22, 2006
Sunday, September 10, 2006
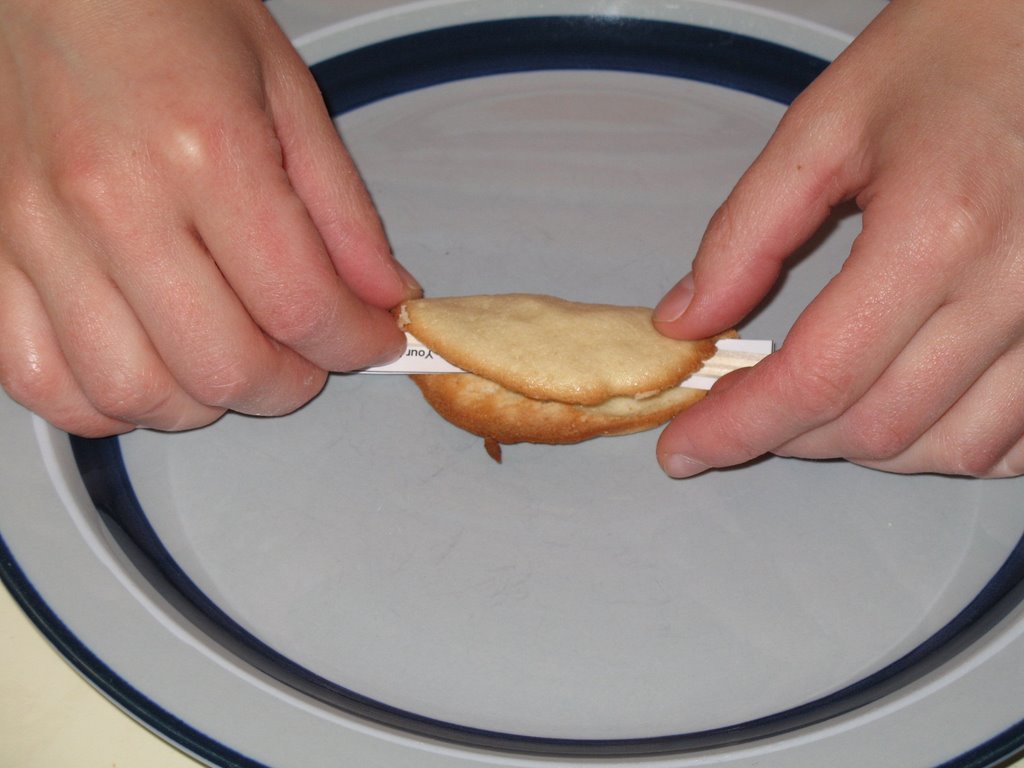
Fortune Cookies
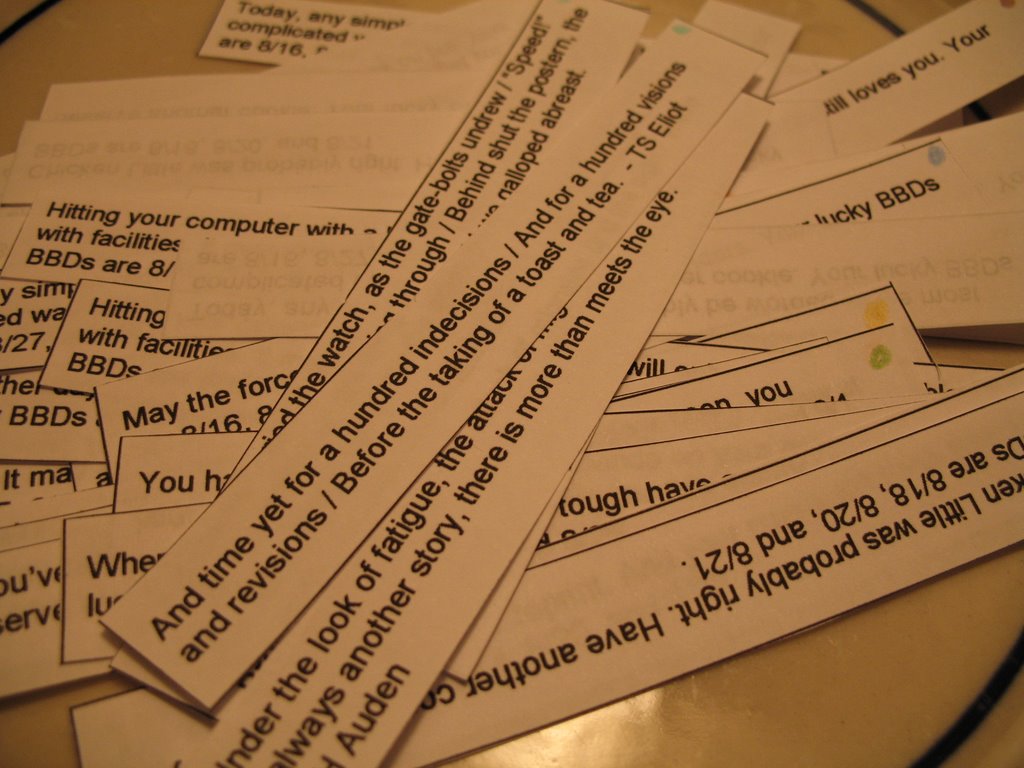
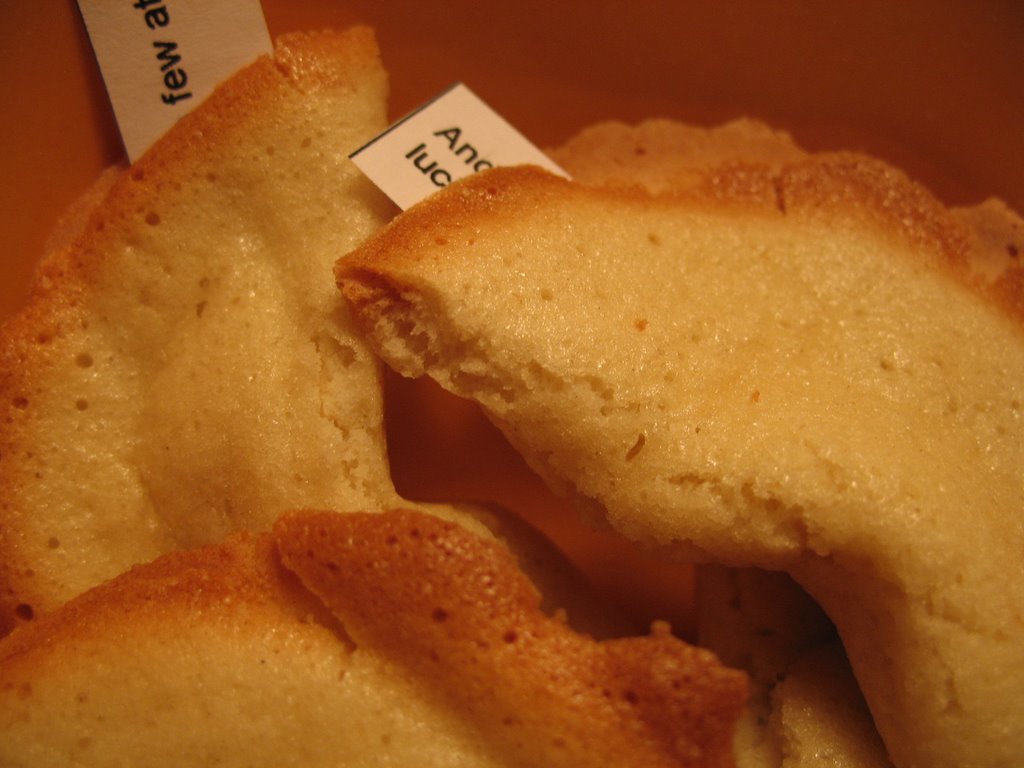 A few weeks ago, one of the departments in my company became inundated with projects that had moved down the conveyor belt to their desks and all the folks in that department were suddenly up to their ear lobes with paperwork and books and e-mails ever-so-politely requesting status updates on particularly gnarly projects (some of which MAY have come from yours truly). Part good wishing, part joke, part peace offering, I made the whole gang a batch of personalized fortune cookies.
Here's the recipe--por favor, give it a try and let me know your thoughts:
---------
Fortune Cookies
with grateful acknowledgement to Cooking Light magazine
Makes roughly 18 cookies
 1/2 c. bread flour
1/2 c. sugar
1 tsp vanilla extract (almond or orange extract might be yummy too!)
2 large egg whites
20 fortunes (a few extra just in case) roughly 3 inches long by 1/2 high
Pre-heat oven to 400 degrees.
1. Combine all ingredients and mix until well blended. You should have a thin batter similar in consistency to icing or glaze (mine was just a bit thinner than pancake batter). Cover bowl with plastic wrap and chill 1 hour.
2. While batter is chilling, cover two large baking sheets with parchment paper. Using a biscuit cutter or drinking glass about 3 inches in diameter, trace three or four circles in a row along the middle of the paper. Turn paper over.
3. Spoon about 1 teaspoon of batter into the center of each circle and use the back of the teaspoon to spread the batter evenly over the entire circle.
4. Bake one sheet at a time for about 5 minutes or until the edges of the cooks are just started to get brown and crinkly. Remove from oven.
5. Use a spatula to release the cookies from the baking sheet. (Don't afraid to be tough.)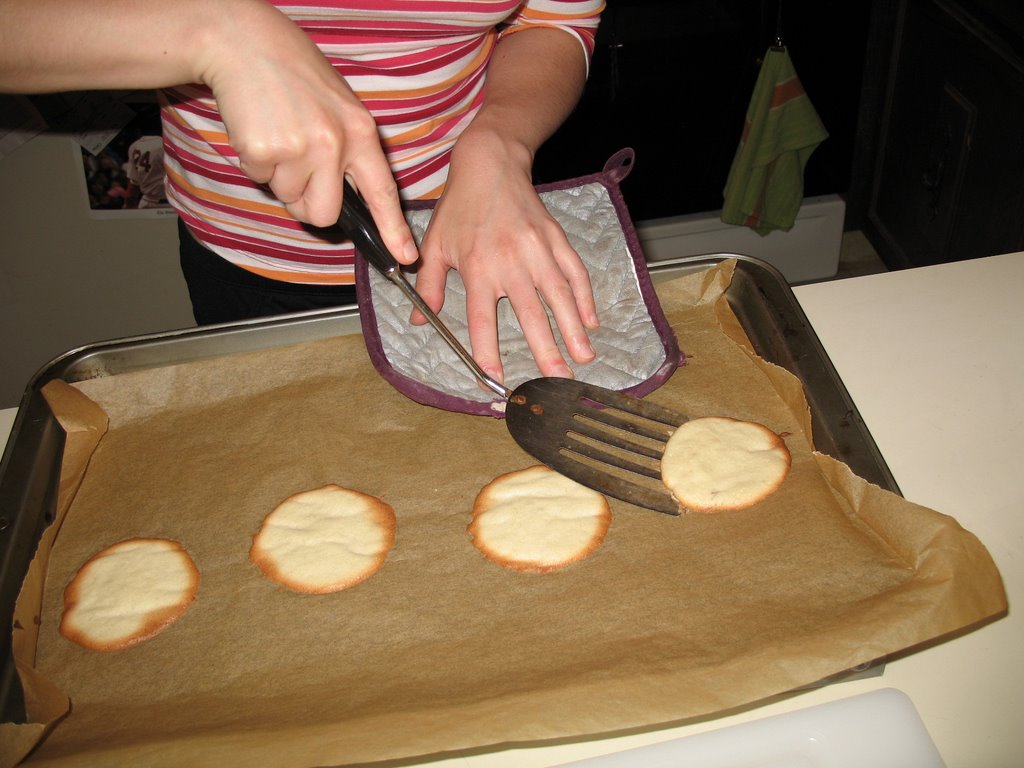
6. Working quickly and doing one cookie at a time, place the prepared fortune along the center of the cookie. Lay the handle of a wooden spoon or a chopstick along the fortune and fold the cookie over so the edges meet over the spoon handle. Press edges together. Remove spoon.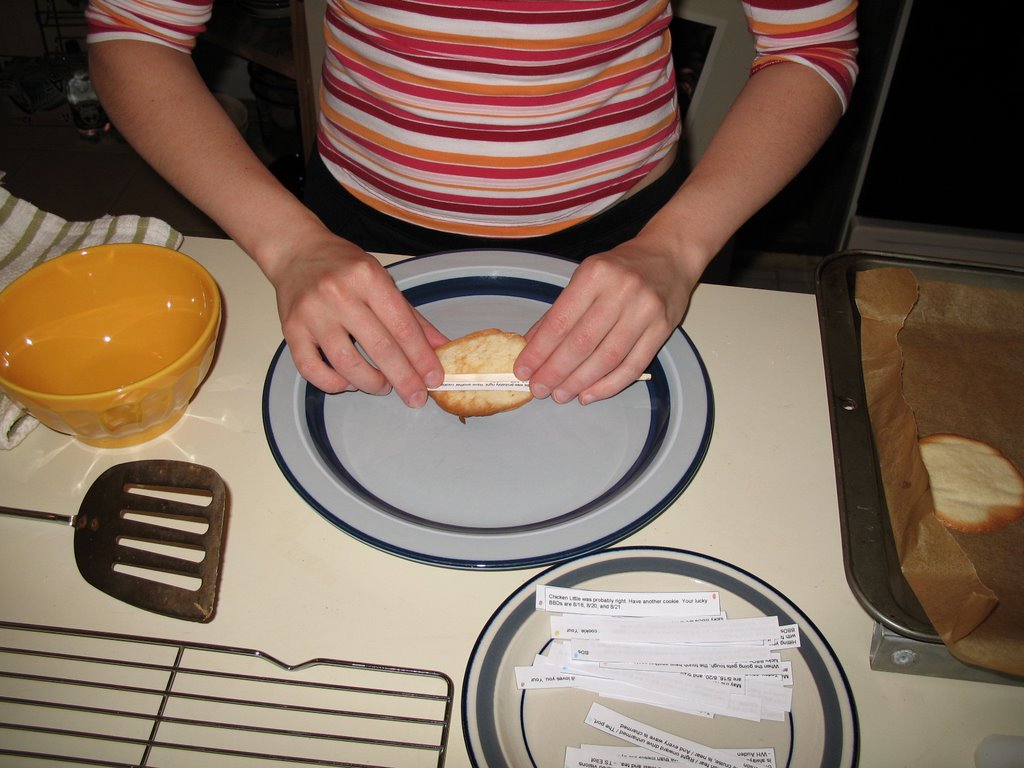
7. Pull the ends of the cookie down over the rim of a small bowl. Hold for a few seconds until set and then place cookie on a wire rack to cool completely. Repeat with remaining baked cookies.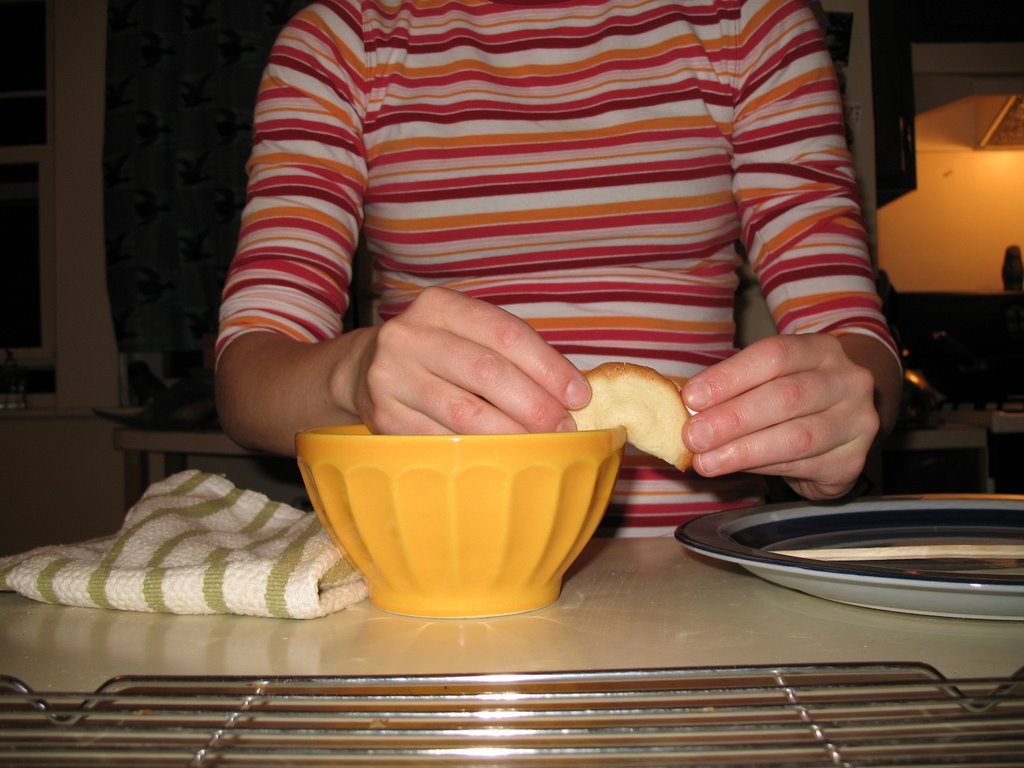
8. Repeat entire procedure until all the batter is used. Store in an air tight container.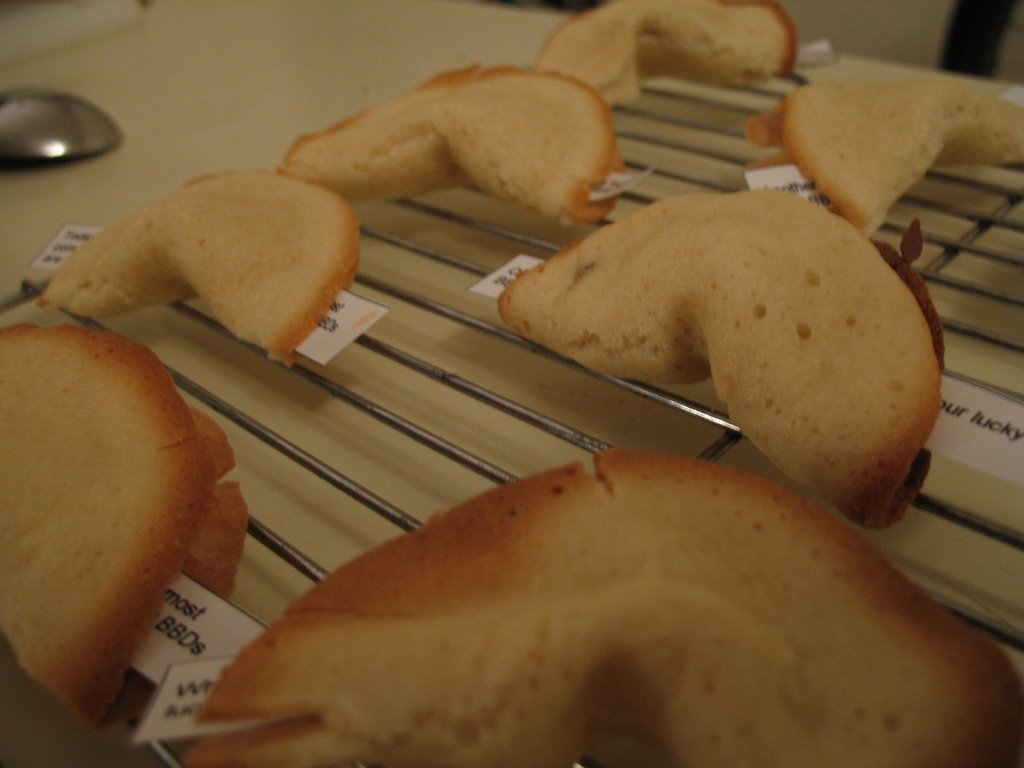
Calories: 37; Fat: 0.1 g; Protein: 0.9g; Fiber: 0.1g; Chol 0 mg; Iron 0.2 mg; Calcium 1 mg
Subscribe to:
Posts (Atom)
