This is my favorite, tried and true sourdough recipe. It consistently has a sourdough flavor that is not too sharp but has just the right amount of kick. The crumb is moist and chewy--and stays that way for several days. When made in loaf pans, the crumb tends to be a bit more 'fine' and spongy. When made in a brotform, bread basket, or baguette-shape, the crumb is more airy with larger holes (though not as airy as traditional baguette). By the by, sourdough will stay fresh significantly longer than regular bread because the 'sourdough' bacteria resists mold. Bonus for those of us who don't necessarily consume an entire loaf all that quickly (though I'm sure I could if I really put my mind to it...). This bread also rocks the house as toast with butter, French toast, bread crumbs, stuffing, and other yeasted favorites.
This is a traditional hearth bread recipe with a levain made the night before and allowed to ferment overnight. Levain is a term for one of several different varieties of 'pre-ferments.' Pre-ferments contribute to the leavening of the dough and enhance the flavor and texture of the bread. They are usually a combination of flour, water, and yeast, and the different kinds of pre-ferments vary in the proportion of flour to water. Some common pre-ferments are levain, chef, sponge, starter, and poolish.
Note: If I plan it right, I like to make the levain in the morning before I go to work and then prepare the final dough in the evening up to the step where you shape the loaves. At this point, I go ahead and shape the loaves, but instead of doing the final rise, I put them in the fridge overnight. In the morning, I let them come to room temperature and continue rising (the final rise)--about one hour or so--before baking them as the recipe directs. The idea for this was inspired by the delayed-fermentation method used for some slack-dough breads. I find the overnight rise in the fridge improves just about every aspect of the bread: the crust is more firm and chewy; the crumb has gorgeous, well-developed holes; and the taste is a bit sweeter and nuttier, though still distinctively sourdough.
Traditional Pain au Levain
This recipe is gratefully borrowed from Bread Alone by Daniel Leader.
 Levain
1 ¼ c. (6 oz) flour (either white or a blend of wheat and white)
1 ½ c. (12 oz) sourdough starter
Mix this the night before and let it sit out on the counter overnight in a container with a tight lid. The levain will double or more in size, so use a container with lots of extra space. Mix all ingredients together at once. This will form a very stiff dough. (
 Photos on left are from after it's fermented overnight: Photo # 1) Side view of the levain through the plastic tupperware--see all the bubbles? Photo #2) Top view of the levain--kinda gross-looking, huh? That's ok. It's how it's supposed to look.)
Final Dough
2 c. (18oz) levain (entire batch)
2 ¼ c. (18 oz) water
4 ½ - 5 ½ c. (24 -– 29 oz) flour (either all white or a blend of whole wheat and white)
1 tbsp ( ¾ oz) fine sea salt (if you use regular table salt, add about ¼ to ½ teaspoon extra)
Mix and knead the final dough (20-45 min): Combine the levain and the water in a 6-quart bowl. Break up the levain well with a wooden spoon or squeeze it through your fingers until broken up. Continue stirring until the levain is partly dissolved and the mixture is slightly frothy. Add 1 cup (5 oz) of the flour and stir until well combined. Add just enough of the remaining flour to make a thick mass that is difficult to stir. Turn out onto a lightly floured surface and knead:
 This is what the dough looks like before you knead it.
Kneading Alternative 1: (This is the traditional kneading technique you'll find in most standard cookbooks) Add salt just before you begin kneading. Begin kneading, adding remaining flour when needed, until dough is firm and smooth--—about 15 -– 17 minutes total. The dough is ready when a little dough pulled from the mass springs back quickly, or if you poke it, the impression of your finger springs back.
Kneading Alternative 2: (This is my perferred kneading techique. I find I get less tired, the dough is less sticky and uncooperative, and the final dough has better developed gluton) Knead for about five minutes. Dump some of the extra flour on the board and roll the dough in it so its nice and floury. Let it rest for 10 minutes while you gaze at it lovingly. Before the second round of kneading add the salt (I always forget this--usually I put the salt shaker in front of the dough before I let it rest so I don't forget). Fold in the salt and knead for 10 minutes. Dump a little of the extra flour on the board and roll the dough in it so its nice and floury. Let it rest for 10 minutes while you make a cuppa tea. The dough should be a little tacky during this final round, but if it starts sticking to your kneading surface or seriously gumming up your hands, add about a tablespoon of flour. The dough shouldn't require any more kneading after this, but you can tell it's ready when a little dough pulled from the mass springs back quickly, or if you poke it, the impression of your finger springs back.
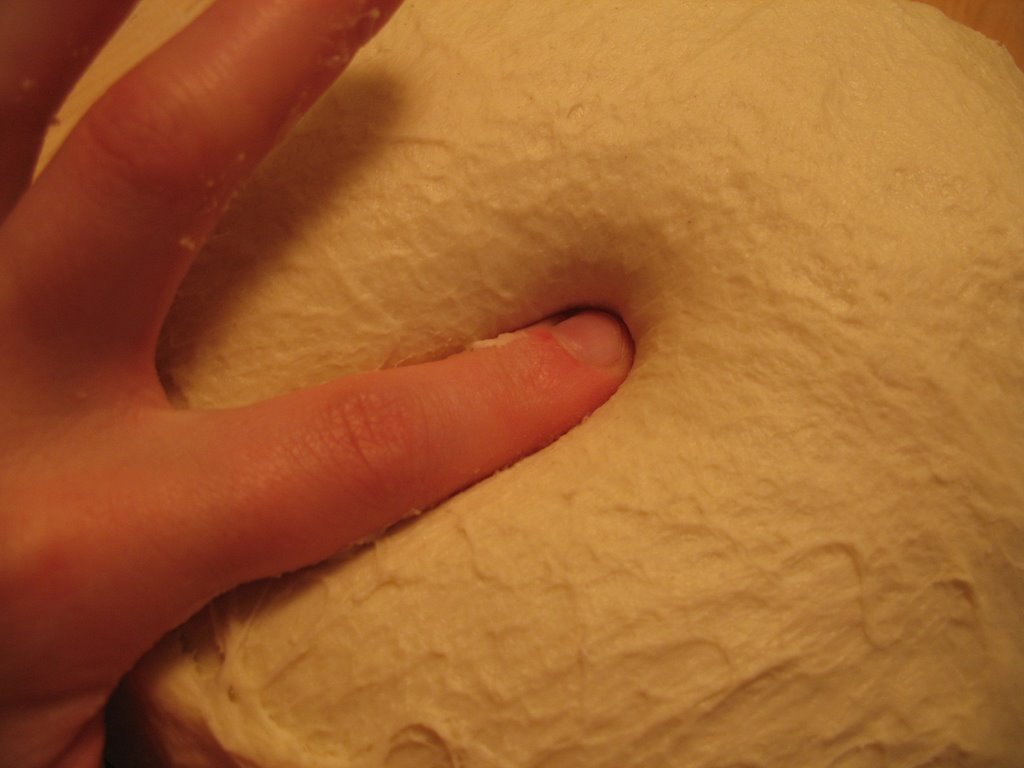 After you're done kneading, the dough should be smooth and pillowy, and it should spring back if you poke it with your finger.
Ferment the dough (2 hours): Shape the dough into a ball and let it rest on a lightly floured surface while you scrape, clean, and lightly oil your large bowl. Place the dough in the bowl and turn once to coat with oil. Cover with a clean damp towel or plastic wrap and place in a moderately warm, draft-free place until increased in volume about one-quarter. (I usually put it in my oven--—it'’s a gas oven and usually a pretty cozy temperature. In the winter if your kitchen is cold, you can pre-heat your oven a few minutes. You should be able to comfortably rest your hand on the oven wrack. If it'’s too hot for you to touch, the oven is too hot for the rising dough and it will bake instead of rise!
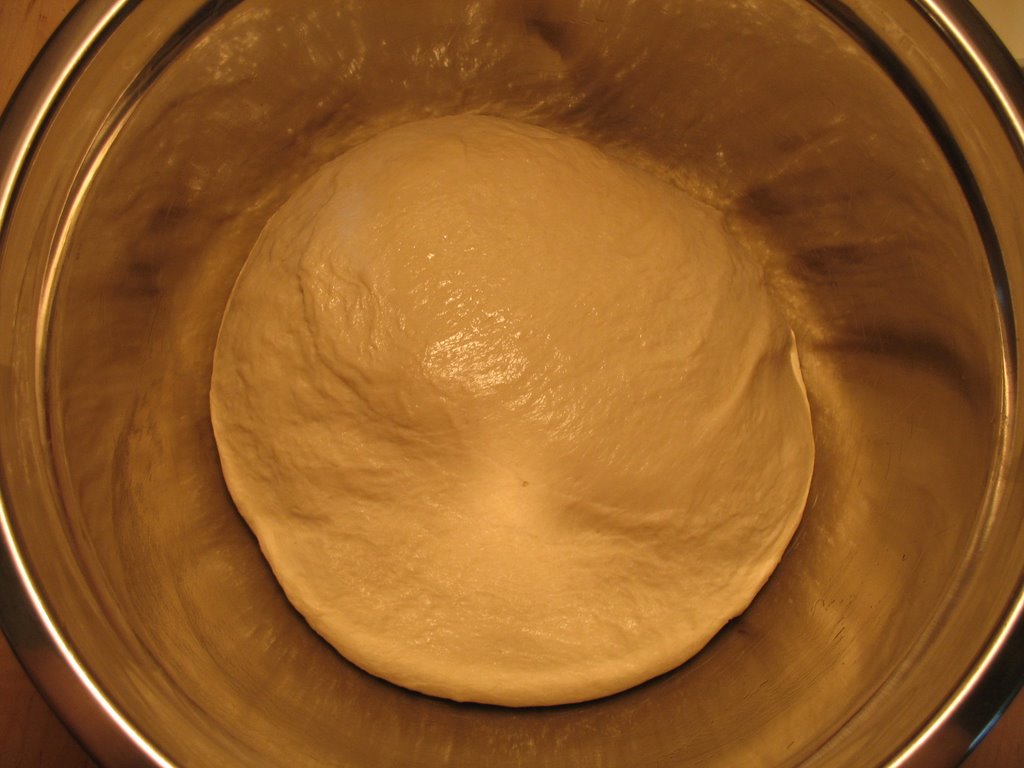 This is the dough right before the first rise.
And right after the first rise.
Divide the dough and rest (35 minutes): Deflate the dough by pushing down in the center and pulling up on the sides. Transfer the dough to a lightly floured work surface and knead briefly. Cut into 2 equal pieces, and shape each into a tight round ball and place on a lightly floured board. Let rest for about 15 minutes to relax the gluten.
Shape the final loaves and ferment (2-2.5 hours): Shape each ball of dough into desired final shape--a ball for round loaves, a 'roll' for loaves, etc. If you have a brotform, bread basket, or loaf pans, you can place the dough into these forms now. Alternatively, you can let the loaf rise 'free-form' on top of a piece of parchment paper on your counter top.
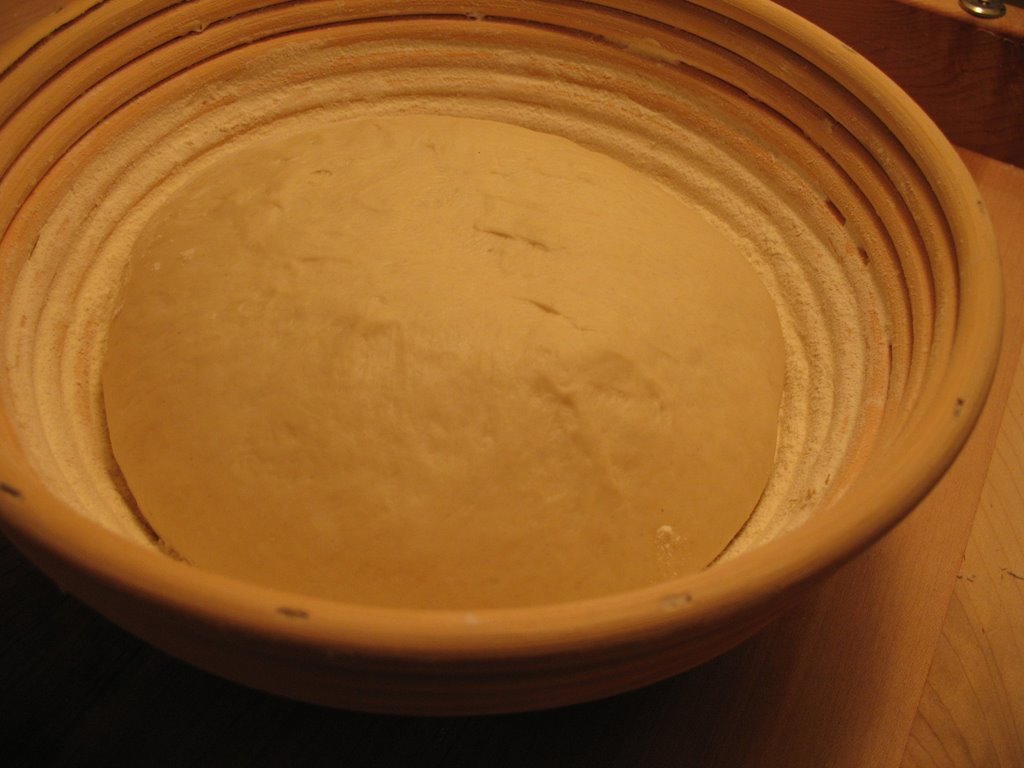 Shaped loaf in a 'brotform' or bread basket
Shaped loaf in a loaf pan
Cover with a clean damp towel or plastic wrap and let rise for about 2 hours or until the loaves have reached the desired size. Keep in mind that they will have a final burst of rising right after you put them in the hot oven! (I'’ve had many a loaf ‘spill over’ because I let them rise too long plus you risk the dough collapsing on itself and then you get a dense, brick-like final loaf. Bleck.) Forty-five minutes to an hour before baking, pre-heat the oven to 450 degrees. Be sure the oven rack is placed in the middle of the oven: —if it'’s too high, the top will burn, and if it'’s too low, the bottoms will burn. If you have a baking stone, place this on the middle rack and allow it to heat up with the oven.
 After final rise
 After final rise
After final rise--both loaves are ready to bake
Bake the loaves (about 30 minutes): Using a sharp blade, score each loaf on the top by making several quick shallow cuts about ¼ to ½ inch deep along the surface.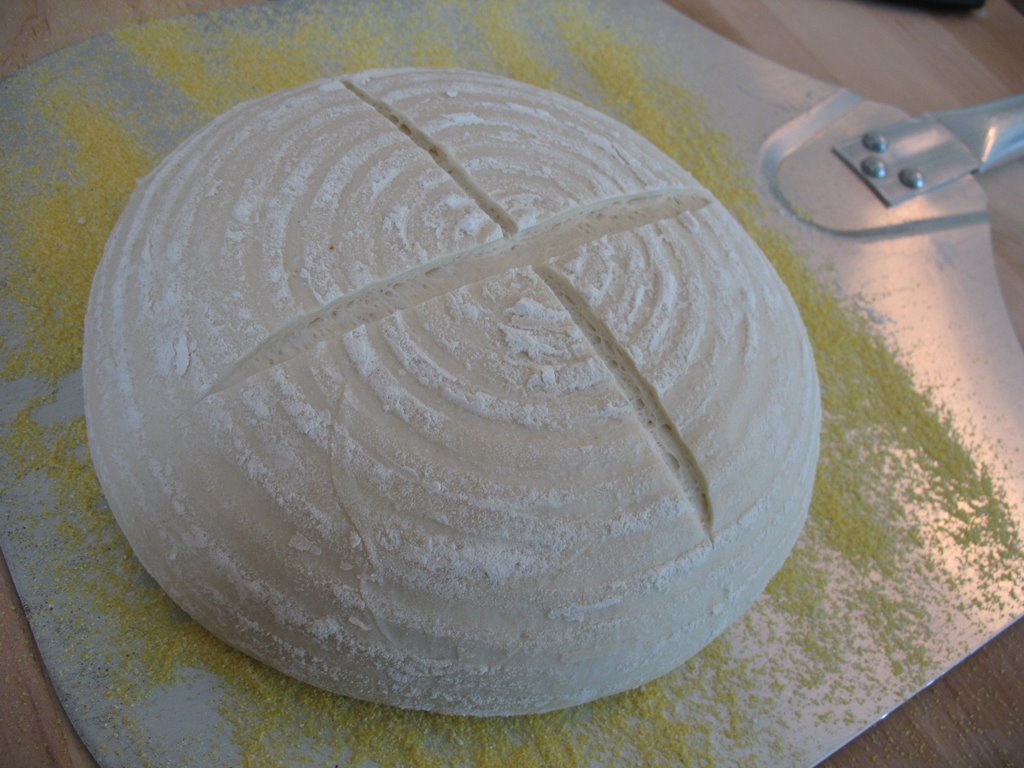 Round loaf with score marks. See the ridges from the brotform? Cool, huh?!
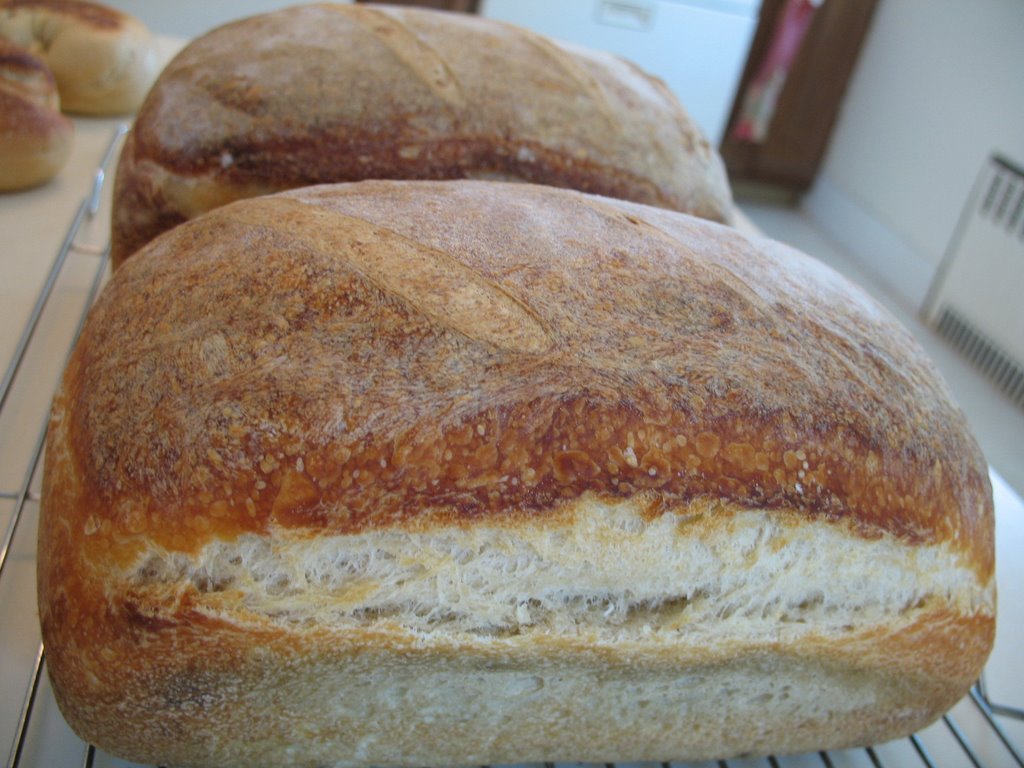 ) Slide the loaves into the oven and allow to back until the loaves are a rich caramel color (the baker's rule is that if you can see three distinct shades of brown, the loaves are done). My recipe says this takes about 25 -– 30 minutes, but I find that it'’s closer to 30 -– 35 minutes. To test the loaves for doneness, remove them from the pan and turn them upside down. Hit the bottom with your thumb. If you hear a sharp hollow sound, like knocking on a door, the bread is done. If not, bake about 5 minutes longer. Allow to cool completely on a wire rack. Don'’t be tempted to eat them right out of the oven because the loaves actually finish baking while they're cooling and the crust needs to firm up. If you cut them too soon, the loaves can get soggy and sink in on itself.
 This bread keeps pretty well for about a week. Many traditional bakers abhor any kind of storage unit and say you should keep your loaves out in the air with the cut-side facing down on the counter. The crust gets really crust, but the inside (theoretically) stays moist. Loaves keep this way for a day or two, and then I personally think they're too hard to chew. I keep my loaves in big ziplock bags. The crust will take in moisture and be more chewy instead of crispy, but I usually like to toast my bread anyway. You can also freeze bread very well. I usually just put it in a big ziplock bag, squish out as much air as possible, and tuck it away. I recommend writing the date and the kind of bread on the bag with a sharpie or dry-erase marker--I started doing this was after the Christmas eve where I had about five loaves on the counter, scrutinizing them and sniffing mournfully at the frozen loaves, trying to find the sourdough loaf I KNEW was in there and really wanted to bring to Christmas dinner. *sigh* Learn from my mistakes, ladies and gentlemen.
If not quite easy-peasy, this is still relatively painless. Takes a bit of practice and perseverance, but you'll get the hang of it, I guarantee. Go forth, bake bread, god speed.