Showing posts with label Sweet Tooth. Show all posts

Tuesday, May 27, 2008

Coffee Crunch Cake and To-Do Lists...

This was the last picture to make it into my final portfolio for school. I made the cake in class on Thursday night and then the Engineer forced me to hit SEND on Friday morning to get all the pictures off to Snapfish for printing.

It's called a coffee crunch cake--angel food cake layered with whipped cream and these coffee crunches on the outside. The crunchies were fun to make--essentially, you boil sugar until the hardcrack stage and throw in some baking powder. The sugar foams up and when it hardens, you've got this odd, honey-combed candy. A DIY crunchie bar, kinda like this one! Good stuff.

So the end-of-year countdown is on! Two and a half weeks until I'm officially done and gradumikated from culinary school!

Here's a look at my to-do list for the next few weeks:
  • Finish futzing with portfolio pictures HA! One down!
  • Put pictures in photo album and be dun wit it
  • Keep experimenting with dessert gnocci (my original recipe for one of our finals. More on this later!)
  • Make flashcards for American cuisine
  • Make flashcards for Asian cuisine
  • Memorize things
  • Bid my roommate farewell on Saturday. Sniff sniff. (Don't be too sad--she's moving back to California--where it's sunny? all the time? huh?--and also just happens to be going to Hawaii for vacation next week.)
  • Say "Hello! I love you! Hi!" to the Engineer who is MOVING IN on Saturday (wooHOO!)
  • Iron my red polka-dot dress
  • Wear said dress to my friend's wedding next week (Thumbs up, Kate and Adam!)
Additionally, I need to purchase the following:
  • A photo album
  • Photo corners
  • Teacup and saucer (for original recipe)
  • Butane cartridges for creme brulee torch (for original recipe...aren't you getting curious!)
  • Coffee grinder (cuz my roomie's taking hers with her and I am bereft)
  • Candy thermometer
  • Gelatin
  • Plants for container garden before summer is suddenly over
Totally do-able, right? I'm not going to go insane in the next two weeks, right? Heh? Who wants to taste test some dessert gnocchi?!

Thursday, December 13, 2007

Photo of the Week: Chocolate Cake...Thing-A-Ma-Jigs

I haven't thought of a good name for these puppies yet. Can't quite figure out a name grand enough, nuanced enough to appropriately describe these layers of chocolate genoise, pomegranate whipped cream, and hazelnut dacquoise. Oh, man, they were tasty!

Hazelnut dacquoise, for those who don't know, is a basic meringue (egg whites beaten with sugar) with ground hazelnuts mixed in. I spread them into little rounds to form the flat 'cookies' sandwiched between the whipped cream. I had...oh...two trays or so of cookies left over and may have (MAY have) personally eaten the majority of them.

Any brilliant names come to mind?!

Sunday, January 7, 2007

Holiday Festivus with Emma and the Engineer

On Christmas Eve at the abode of Emma n' the Engineer and with many friends in attendance, a festivus was had and, yay verily yay, it was good. This was the first Big Production meal I have ever prepared, and I was a bit nervous. We're talking appetizers, side dishes, main dishes, vegetarian dishes, drinks, and (of course) dessert. With the day itself looming on the horizon, I suddenly realized that pulling this whole thing off was going to require some Planning and Preparation. My list-making, organization-obsessed, multi-tasking little heart was filled with glee. Keep in mind that this is the same little heart that spent whole afternoons as a child organizing and then reorganizing the desk in her room, and who looked forward to buying school supplies every Fall nearly as much as she looked forward to Christmas.

My good friend R. and I had a grand time coming up with the menu. After much trolling of the Internet and a smattering of ideas thrown back and forth, we decided on a Cross-Atlantic Portuguese-Brazilian Dinner. Here was our final menu (click on the name of the dish to link to the recipe):


DRINKS:

STARTER/SIDES:

MAIN:

  • Portuguese Potato Dumpling Soup (with Kale)-- vegetarian
  • Portuguese Style Poached Chicken (with Lime, Chili, and other South o' the Border Seasonings)--loosely based on THIS recipe.

DESSERTS:

Like a dufus, I had a few too many caipirinha's and "forgot" to take picture of a lot of the dishes, but here's the run down of how the food part of the night went down and a few pictures of the pictures I remembered to take.

Drinks: The caipirinhas were FIERCE. Wowzas, did they knock your socks off. It wasn't until R. was actually preparing them that we fully realized that the drink is essentially all cachaca, a Brazilian brandy made from sugar cane, with a little sugar and lime thrown in there to take the edge off. Barely. We ended up adding a good dose of Fresca (classy!) to the drinks to make them a bit more drinkable. Even so, we all agreed that caipirinhas brought back ever-so-fond memories of Spring Break beach parties.

We had the quentaos after dinner as we reclined around the living room in various states of comatose. This is a drink that I would definitely have again--the spices are very similar to mulled wine (red wine is actually an ingredient in some variations) with some of that lovely cachaca. Also like mulled wine, it's served warm and would be quite nice for a cozy winter afternoon on the couch. I imagine a mug of this would also be an excellent antidote to insomnia, or at the very least you wouldn't mind being awake at 2:00 in the morning as much after you've had a few healthy gulps.

Ironically, we ended up drinking a South African wine with dinner--Mountain River 2003 Pinotage/Shiraz, a whooping $7.99 at Trader Joe's. While I was looking for Portuguese wines, I overheard another customer asking the wine steward for recommendations for a dinner of enchiladas and other South American dishes. The wine steward recommended this wine with such a glowing review that I had to try it. The wine was a deep red and very full-bodied. It had a deep, mellow flavor with just a touch of spice that really did pair well with all the flavors in the meal, but also didn't overshadow the food. I did find one bottle of a Portuguese wine, but we didn't end up opening it at the party--did I mention that the capirinhas were FIERCE?

Starters/Sides: The green beans were nothing super special. Blanched green beans drizzled with olive oil and seasoned with garlic and coriander. The recipe says to serve these cold or room temperature after having marinated for a day, but I didn't get my act together in time and also for some reason the idea of cold green beans with this particular meal didn't feel right to me, so I served them warm. (By the way, coriander was the surprise spice of the meal for me. I've never really cooked with coriander, but really liked it in the empanadas and the soup.)

The empanadas were a big hit. I'll do a separate post on them in another day or so and describe the whole preparation process. They're essentially little pasties or turnovers--a savory filling in a pie crust. I made them the week before the party, froze them, and then baked them right before dinner. The picture here is of an empanada right before I baked them. I really wish I'd remembered to take a picture after they came out of the oven--they were all crisp and golden, the kind of food that makes your mouth water just looking at them. The crust turned out well--nice and flaky, buttery and crisp. For the filling, I used onion, plum tomatoes, hearts of palm, corn, tomato paste, and spices (cayenne, chili powder, cumin, coriander, salt). The prep work is a lot of trouble, but it was really worth it. I think my guests and I would have been happy with just a plateful of these little empanadas!

The broa was kind of a disappointment for me, I have to admit. It's a cornmeal bread, so I knew it would be pretty dense and probably wouldn't rise like a regular wheat loaf, but I imagined the bread to be moist, crumbly, and springy like southern-style cornbread. Instead the loaf was more like a hockey puck--dry and dense. Sliced thin and spread with butter, the bread was decent, but I was still let down. I'm not sure if I didn't something wrong or if this is just the way the bread was supposed to be. I did a lot of searching on the Internet and found lots of recipes but few descriptions of how the final loaf was supposed to look, feel, and taste. From the pictures I found, I think the loaf is supposed to be rather flat (like mine turned out) but not quite as dense. More like a country hearth loaf than corn bread. I could probably figure out a better loaf if I had the urge, but I'm not a huge fan of cornmeal, so this will probably remain an unsolved baking mystery. By the way, I have an entire loaf and a half frozen in my freezer, so if you're still curious to try this bread despite my description, let me know and the loafs are yours!

Main:
Poaching chicken is my new favorite thing. I do it in my slow cooker and it comes out perfect every time. (OK, it's come out perfectly all two times that I've done it.) The meat is moist, flavored throughout, and literally falls off the bone. For this chicken, I prepared a marinade using THIS recipe from the Boston restaurant Chez Henri, only substituting 1 tablespoon of chili powder, 1 1/2 teaspoons of salt, 1 teaspoon of garam masala, and 1/4 tsp of cayenne in place of the achiote powder. (Achiote powder is a kind of sweet South American spice similar to chili powder--I couldn't find it in bulk at our co-op and didn't want to cough up the dough to buy a whole jar at the grocery store.) Instead of roasting the chicken as in the recipe, I poached it in the slow cooker with about a half cup of chicken broth, a few shots of soy sauce, lime juice, several whole quarters of limes, and a head of garlic with the cloves separated. Mmm, mmm, good. (P.S. I'm also planning another post on poaching whole chickens, but let me know if you want more detailed instructions before then.)

The only error in my otherwise well-timed meal prep was the time I allotted for preparing the potato dumplings for the potato dumpling soup. I plum forgot how gosh-darn long it takes for large
potatoes to cook through when you're boiling them. (The thirty minutes suggested in the recipe was NOT enough for my potatoes, by the by. I probably would have been better boiling them for 45 minutes or so.) By this point in the evening, our friends were starting to arrive and I was feeling a bit frazzled. I thought I could make do with slightly undercooked potatoes, but it turns out that undercooked potatoes don't mash very well or even take very kindly to being mashed at all. Ah, well. So we ended up having Portuguese Half-Pureed, Half-Chunky Potato Soup instead. And it was delicious. The broth was light, pleasantly starchy, and well-flavored with garlic, salt, and coriander. I'm used to loading my soups up with all the veggies in my fridge, so I had to really exercise restraint on this one. I stuck with my recipe and only used onions, green onions, and kale...oh, and the potatoes, of course. I've never cooked with kale before and was at first a bit intimidated by the mounds of leafy greenness taking up half my counter space. Like spinach, I stripped the leaves from the woody stalks, rolled them lengthwise a handful at a time into a long cigar-shape, and cut cross sections about an inch thick. This gives you ribbons of kale about the length of your hand and as wide as a finger. It looks like a LOT of leafy greenness, but once you submerge it in the broth, the greens wilt down into a more reasonably-sized state. I thought the kale was a bit rubbery, like seaweed, but this was not unpleasant. It was actually very satisfying to have something with a bit of chew in every bite. The bitterness of the kale also balanced well with the relative sweetness of the broth and the onions, and the whole soup was warm and filling. (In retrospect, I think I would have cut the kale into smaller, postage-stamp-sized pieces instead of the ribbons. Pieces this size would be less cumbersome when spooning the soup into your mouth.)

Dessert: And last but not least, the custard cups. These were so good that a lot of us burned our mouths rather than wait for them to cool completely. The puff pastry made a crisp and buttery cup for the custard. (FYI, I decided to leave-off making my own puff pastry for another dining adventure, so I got a little help from my friends at Pepperidge Farm for this one.) The custard was smooth and creamy, flavored with vanilla and a hint of lemon. This was my first time making custard, and I definitely recommend THIS recipe for anyone else out there looking for something new to serve. You can also caramelize the tops under the broiler or with a brulee torch for an added bit of elegance.

Since the Engineer and I were leaving for holidays in Minnesota the day after our party, our lovely friends reaped the reward of what leftovers there were. To everyone that came to the party, we were so happy to see you and spend time with you during the holidays. And to everyone else near and far, if you ever find yourself in Boston on Christmas Eve, feel free to stop by--we'll be here cooking up something fabulous!

Sunday, November 26, 2006

Pecan and Salt Caramel Cheesecake

I was willing to bring any dish to Thanksgiving dinner that my host requested, but I absolutely insisted on bringing this Pecan and Salt Caramel Cheesecake. I first saw this recipe a few months ago over at Chow.com (the recipe is HERE) and immediately knew I was going to have to make it. Luckily, there was very little resistance to adding another dessert to the menu--especially one with an ingredients list like this one.

Speaking of the ingredients, my only real worry with this recipe was that it would be a complete sugar overload. I easily envision the ingredients mingling together into one uniform 'sugar!!!' instead of retaining their individual flavors. And the verdict? It's a sweet dessert to be sure, but I was surprised and pleased to taste distinct layers to the sweetness and real depth of flavor. The sour of the cream cheese complimented the buttery caramel. The graham cracker was a nice balance to the sugar and vanilla. I think with a little more experimentation and refinement of the various steps, the caramel flavor could give the whole cake a roasted, smoky flavor that would really bring it all together.

My mom asked me how many Weight Watchers points each slice of this little doozy was and I just laughed at her. Honestly, folks, I didn't even bother to figure it out. This is just one of those occasions when you just need to relax and be a glut without guilt. Having said this, I do have a few ideas for making this cake a bit more waist-friendly (see below).

Some thoughts for improvements and future variations:

  • My caramel ended up with little chunks of sugar suspended in it. They weren't rock hard, didn't pose a threat to any one's dental work, and we didn't even notice them once I added the pecans, but the perfectionist in me was disgruntled. My suspicion is that I didn't stir the butter and sugar as thoroughly as I should have (I was in a bit of a rush seeing as how the Engineer's mother was arriving in about ten minutes). I've done a bit of research on the properties of sugars and making caramel sauce since making this recipe and have decided that, as you might suspect, making caramel is a bit more tricky than this recipe would lead a gal to believe. I'm actually really intrigued by the whole process since it has to do with chemical reactions on the molecular level and all sorts of science-experiment type things. I'm planning to do some more research and experimentation, and will be sure to share my findings with y'all!

  • Another caramel note: I was happy with the final flavor--it really did taste like caramel!--but I think it could have had more depth. As my pal Harold McGee says in his book On Food and Cooking, "The aroma of a simple caramelized sugar has several different notes, among them buttery and milky, fruity, flowery, sweet, rum-like, and roasted. As the reactions proceed, the taste of the mixture becomes less sweet as more of the original sugar is destroyed, with more pronounced acidity and eventually bitterness and an irritating, burning sensation." Thanks, Harold! Since my caramel could definitely be described as "buttery and milky," my suspicion is that I could have let the syrup boil for a little while longer to deepen the flavor before adding the butter and taking it off the heat.

  • I love pecans, but I'm not sure they really added very much here. The Engineer suggested briefly dry-frying or roasting the pecans before adding them to the cake. This is something that is often suggested in other recipes I've come across in order to activate the oils in the nut and enhance the overall flavor. I also think that roasting the pecans would bring out similar flavors in the caramel.

  • I also wondered about doing away with the pecans all together and instead sprinkling roughly crumbled graham crackers on the top. This would add a bit more crunch and bite in the mouth, would mirror the graham cracker crust (of course), and would also reduce the number of ingredients competing for precedence in your mouth. The taste of the cheesecake and caramel is complex enough, and unless the pecans are really enhancing the flavor in those components, I think they're just distracting. Again, I think graham crackers could compliment the flavors just as well if not better.

  • I am curious to make a lower-fat version of this cheesecake. A recipe for New York Cheesecake in The Best Light Recipes by Cook's Illustrated suggests replacing the cream cheese with a combination of light cream cheese, drained cottage cheese, and drained low-fat yogurt. The recipe is described as definitely tasting different than regular cheesecake, but just as excellent on its own merit. I've tried several recipes from this book and have been well pleased with many of the recipes, which don't just rely on using the "Low Fat" version of a full-fat product. Worth a try anyways.

  • It would also be fun to experiment with different flavors in the caramel. This could be done by either infusing the syrup while it's melting or by adding flavors to the final caramel as it's cooling. Cook's Illustrated has several mouth-watering suggestions: Orange-Espresso Caramel Sauce, Coconut Ginger Caramel Sauce, and Dark Rum Caramel Sauce, to name a few.
Some serving suggestions:

  • I think that this recipe could translate really well into a finger-food, buffet-table item. My thought is to make the cheesecake as normal, but then cut out mini-cheesecakes (either in square or in circles using a biscuit cutter) that would be about an inch or so across--small enough to be eaten in one single bite. Then use a chopstick or other poking-device to dowel a little hole in the top of the cake. Fill the hole with caramel and top with one whole pecan or a fragment of graham cracker.

  • Another serving option would be to make several mini-cakes in individually-portioned ramekins. This would be fun for a dinner party and would be a bit more elegant than cutting slices of cheesecake.
Ok, ok, enough jabbering. Here's the recipe itself:

-----

Pecan and Salt Caramel Cheesecake
Adapted from Chow.com

Crust:

1 1/4 c. graham cracker crumbs (5-6 graham cracker rectangles)
4 tbsp (1/2 stick) unsalted butter--at room temperature
3 tbsp granulated sugar

Cheesecake:

2 lbs (4 8-oz packages) cream cheese--at room temperature
1 c. granulated sugar
1 large egg yoke--at room temperature
3 whole eggs--at room temperature
1 tsp vanilla extract

Caramel Topping:

1 c. granulated sugar
4 tbsp (1/2 stick) unsalted butter--at room temperature
1/2 c. heavy cream--at room temperature
1 c. roughly chopped pecans
1 large pinch sea salt

To begin:

Place all ingredients (included refrigerated ingredients) on workspace. Allow refrigerated ingredients to come to room temperature. The butter should be soft and malleable. Eggs can also be placed in a bowl of hot water to bring them to room temperature.

Preheat oven to 350 degrees.

To make the crust:

To make graham cracker crumbs, break several squares of graham crackers into rough pieces in a bowl. Use the bottom of a cup or a pestle to grind the crackers into uniform-sized crumbs. This was one of the most satisfying parts of the process--I may start crumbling graham crackers for stress relief. Mix sugar into the crumbs. Mix in the butter with your hands, squeezing gobs of butter together with the crumbs with your fingers, until thoroughly combined. Press into the bottom of a 9- to 10-inch spring form pan. (If you don't have a spring form pan and want to make this cake in a regular pie dish, make sure to use a deep dish pan at least 2.5 inches deep. There's lots of toppings that go on this and the cheesecake with rise quite a bit in the oven!)

To make the cheesecake:

In the bowl of a stand mixer (or medium-sized bowl if using hand mixers), roughly combine sugar and cream cheese with a spoon. Once the sugar is adhered to the cream cheese, beat with a mixer until light and smooth--about the consistency of ganache frosting. Add the eggs one at a time, mixing until the egg is completely blended in (but be careful of over-mixing; the egg should just be barely blended so you can no longer see strings of the yellow yoke). Add vanilla extract and mix.

Pour mixture into the spring form pan on top of the graham cracker crust. Bake until a toothpick or a cake tester comes out clean and the center is set. The Chow.com instructions say this will take about 40 minutes, but mine ended up taking about 55 minutes, so just monitor your cake carefully. It will rise significantly in the pan and turn a deep golden color around the edges. It will also likely crack along the top--this is not so desirable in normal cheesecake, but fine for this one--just more nooks and crannies for the caramel!

Let the cheesecake cool completely on a cooling rack with the spring form still attached to the base. As it cools, the cheesecake will sink a bit into itself. Ultimately, the sides will be sloped slightly higher than the middle.

For the caramel:

Combine the sugar and 1 tablespoon of water in a small saucepan and stir until you make a thick sugar paste. Place over medium-high heat and bring to a boil. At this point, the Chow.com recipe says to allow the mixture to boil until it is amber in color. While this is true, I think it's a bit misleading about what you should expect.

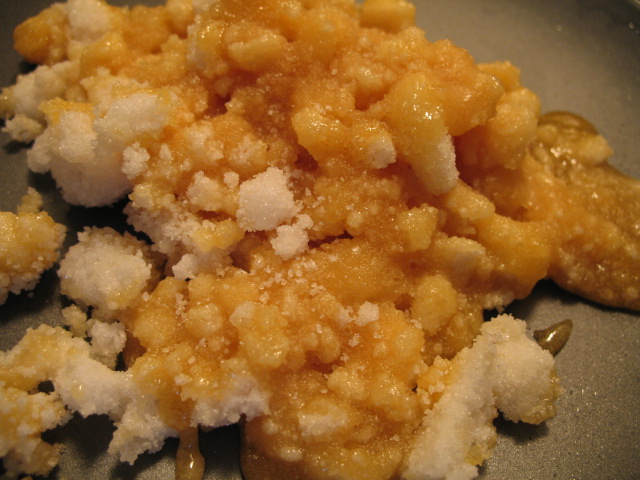
In this first picture (left), the sugar/water paste has just come to a boil. It looks a bit shiny, but is still a grey color. This will boil furiously for a few minutes without changing color and the boiling will slowly begin to stop. In my first batch of caramel, I kinda panicked at this point and assumed that I had done something wrong since it wasn't changing colors. I stirred it a bit, and the mixture started to reform itself into granules of sugar (the middle image). I waited for a while longer and noticed that the sugar on the bottom was melting again, and the re-melted sugar was indeed turning an amber color. However, the sugar was really clumping together and looking more like rock candy than sauce, so I dumped it into a pan to cool (far right picture) and started over again.

My recommendation is DON'T STIR the mixture--a crust will form on the top and you'll see it pushing and dipping here and there as the sugar melts into a liquid again. Eventually (in about 5 minutes or so), the crust will melt as well and you can stir it a bit. I wasn't sure exactly what constituted an 'amber' color, so I erred on the side of caution and called it good when the sugar was about the color of browned butter.

Add the butter to the pan, and be careful because the mixture will pop and bubble and generally behave like a spoiled brat of a sauce. Stir until the butter is completely combined with the sugar. Remove from heat and add the cream in two batches. Again, the mixture will boil and bubble, toil
and trouble, for a bit. Keep stirring until everything is well combined and the caramel is a milky tan color. As you stir and the sauce cools, it will thicken slightly into a more familiar caramel consistency. The milk and butter also stabilizes the caramel, so it won't harden into rock-candy and will stay a thick syrup.

When the caramel has cooled to room temperature (you should be able to dip your finger in for a taste test), pour it over the cheese cake. Sprinkle a few pinches of sea salt over the top and then sprinkle on the pecans.

Once the bottom of the pan is cool enough that you can touch it with your bare hands, cover and let the entire cake cool in the fridge. The longer it sits, the more the caramel will absorb into the nooks and crannies of the cheesecake. If you like this effect, let it sit for a few hours (for instance, while you're eating turkey n' stuffing). If you like your cake pristine and the layers separated, serve it a bit sooner.


Sunday, October 29, 2006

Comfort Cookies

I grew up in the Midwest during a time when going out to eat was still considered a rare luxury and the whole idea of 'take-out' was still catching on. We had the odd Pizza Hut pizza, and I can distinctly remember a few celebration meals at Sarah's, a bone fide American steak house in Algona, Iowa. But for the most part all of our meals were cooked and eaten at home. My parents both cooked--Dad mostly managed the garden and made the breads and soups, and Mom...well, Mom did pretty much everything else. From a young age, my brother and I were corralled into chopping vegetables, stirring soups, punching down bread doughs (ok, we actually fought over who got to do that one), cutting fruit for salad, and a host of other meal prep tasks.

This all sounds very wholesome and apple-cheeked, I'm sure, but in reality, my brother and I fought all this home-cooking tooth and nail. Whole-wheat bread tasted gross and the slices were too thick for sandwiches. Home-made cookies weren't "cool" enough when packed into school lunches. Hamburgers that didn't come from McDonald's just weren't the same. We adored Halloween with its abundance of commercially-made sweetness. I'm sure Mom and Dad thought they'd given birth to palate-challenged morons, but still, they persevered. A few 5-minute time outs on the back stairs and commands to eat now-cold plates of brussel sprouts (grown in our backyard, of course) didn't faze them in the least.

Still, something must have stuck because
my brother is happily employed as a line cook in a restaurant in Wisconsin, and here I am gleefully spending a Sunday afternoon dividing my time between my foodie blog and going through back issues of Bon Appetit, Saveur, and Gastronomica. In the past few months, my mother has repeatedly said, "I never would have thought this is what you and Andy would end up getting into"--always in the same slightly incredulous voice.

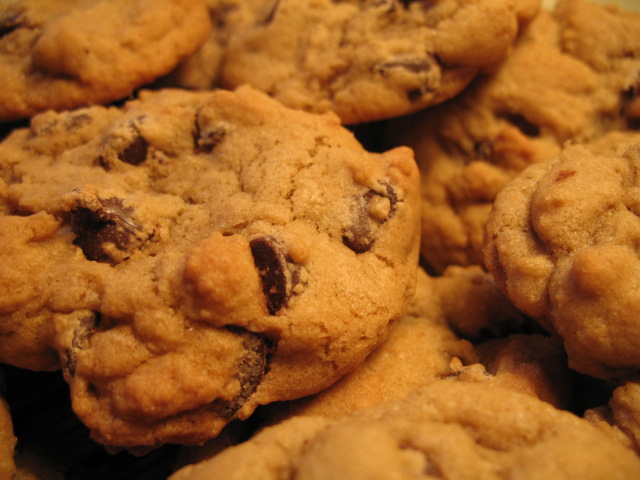
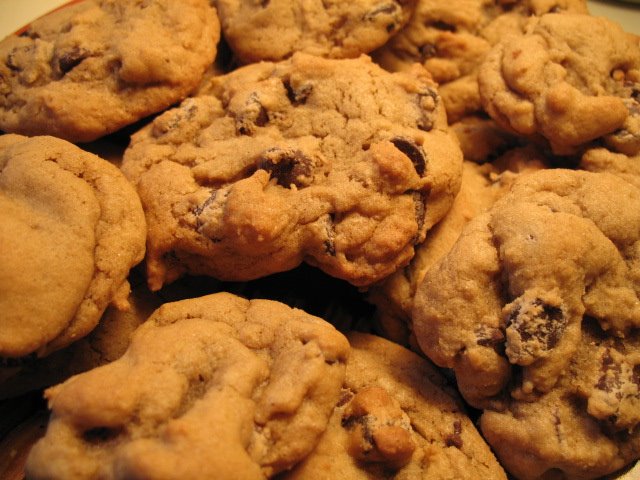
So when I find myself in need of some comfort food, what I crave is chili that's been simmering all afternoon, thick-sliced bread--toasted and buttered, and perhaps most of all, home-made chocolate chip cookies. It could be that I love these chocolate chip cookies just because they're familiar, but I haven't found another cookie anywhere else that I would take over my mother's. A few years ago when I was first living on my own and had a hankering for them, I called her up one afternoon and--for the first time ever--asked her for the recipe.

This recipe is basically the same recipe that's off the back of the Nestle chocolate chip bag, but with a few modifications of ingredients and procedure. First of all, use only one stick of butter instead of two. Surprisingly, the reason for this is not to cut down on the fat but to improve the texture of the cookie. More butter will make the cookie flatter and crispier. Less fat makes a denser cookie that is chewy without being cake-y.

Second (and this is my own modification), use dark brown sugar instead of light brown sugar. Dark brown sugar gives the cookie a deeper flavor with the subtle taste of molasses. I feel this creates a nice balance to the sweetness of the white sugar and compliments the semi-sweet chocolate.

Third, all of the ingredients should be room temperature, especially the butter and eggs. It's best if you let them come to room temperature on their own, but in a pinch you can microwave the butter for a few seconds until soft and put the eggs in a bowl of hot tap water for about 5 minutes.

And fourth, add the flour last (except for the chocolate chips) and mix very little to avoid forming any gluten. Developing the gluten in the flour will make your cookies hard and tough. You want a little gluten development for the chew (which is why you use all-purpose flour instead of pastry flour) but not too much.

Everyone has their own version of the perfect cookie, and this one is definitely mine. Chewy and moist, plenty of chocolate chips, not too sweet--it takes me right back to those school lunches trying fruitlessly to trade them away for Kudos bars and Chips Ahoy. But really? I was just as glad to keep them for myself.

-----

Francis Family Chocolate Chip Cookies
modified from Nestle's Chocolate Chip Cookie recipe

Makes about 36 large cookies or 72 small cookies.


3/4 c. white sugar
3/4 c. dark brown sugar
1 stick real butter (softened)
2 eggs (at room temperature)
1 tsp vanilla
1 tsp salt
1 tsp baking soda
2 1/4 c. all-purpose flour
~2 c. (about 1 bag) of chocolate chips

Preheat oven to 375 degrees.

Mix the two sugars together in a medium sized bowl. Mix in the butter gobs at a time. Mix in the eggs and vanilla, and then the salt and baking soda. Mix all of these ingredients as much as possible until the batter is smooth, shiny, and a rich brown color.

Add the flour all at once and mix as little as possible (to avoid forming gluten, which makes tough cookies). I prefer to fold the flour into the batter until it's evenly incorporated. To do this, run a long-handled spoon or spatula around the edge of the bowl under the batter. Smoothly lift the batter slightly and fold it toward the center of the bowl. Continue doing this at intervals along the entire circumference of the bowl and then continue until all the flour is incorporated. The dough will look like a grainy, light brown paste.

Stir in the chocolate chips all at once, again mixing as little as possible (and again, I prefer to fold the chocolate chips into the batter).

Drop batter onto a parchment-lined baking sheet using a full tablespoon (for larger cookies) or a well-rounded teaspoon (for smaller cookies).
Space them about two inches apart--they will spread a tiny bit as they bake. Bake for 9-11 minutes until the 'peaks' on the cookies are just starting to brown (leave cookies in longer for crunchier cookies). Allow to cool for about 5 minutes on a cooling rack before devouring. (I know it's hard, but it's worth it. If you eat them right away, not only will you burn your tongue and thus not be able to enjoy anymore tasty treats for a while, but when it first comes out of the oven, the cookie is actually still quite liquidy and will collapse on itself and on you until it has a few minutes to set.)

-->Large cookies are about 3 inches in diameter and are about 3 WeightWatchers points each.
-->Small cookies are about 1.5 inches in diameter and are about 1.5 WeightWatchers points each. (By the by, these smaller cookies definitely do not feel skimpy. They pack the same flavor, chew, and chocolate as the regular cookies--they're just portion controlled. I think the small cookies are the perfect size for feeling like you really had a good, satisfying treat.)

Sunday, September 10, 2006

Fortune Cookies

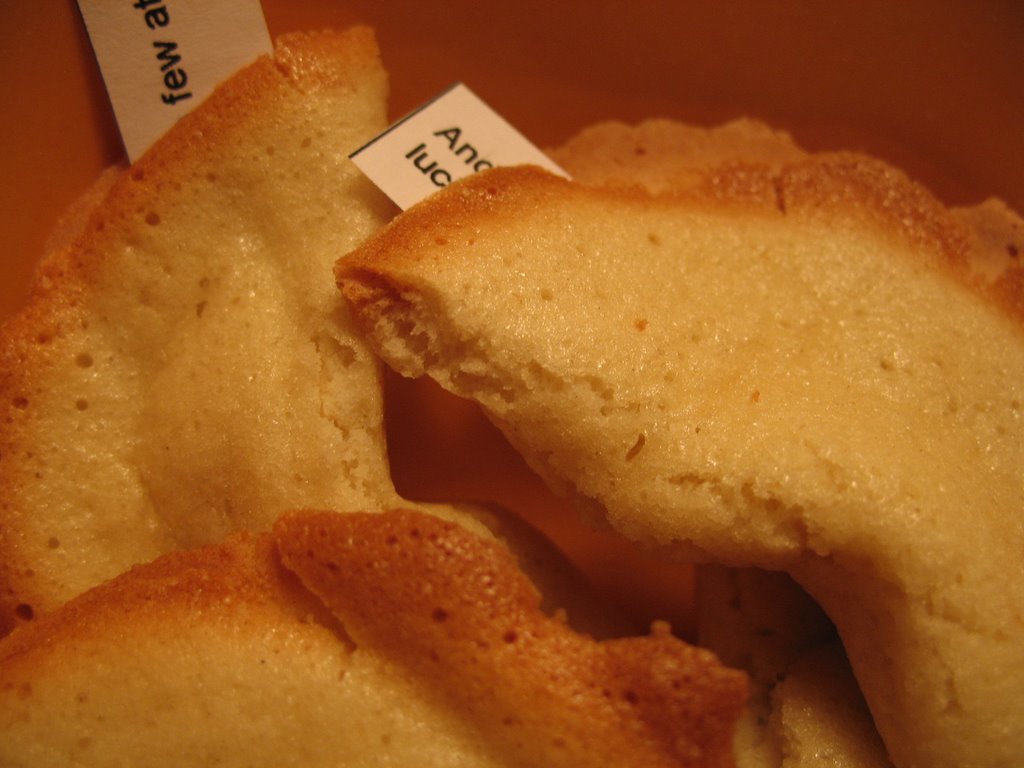
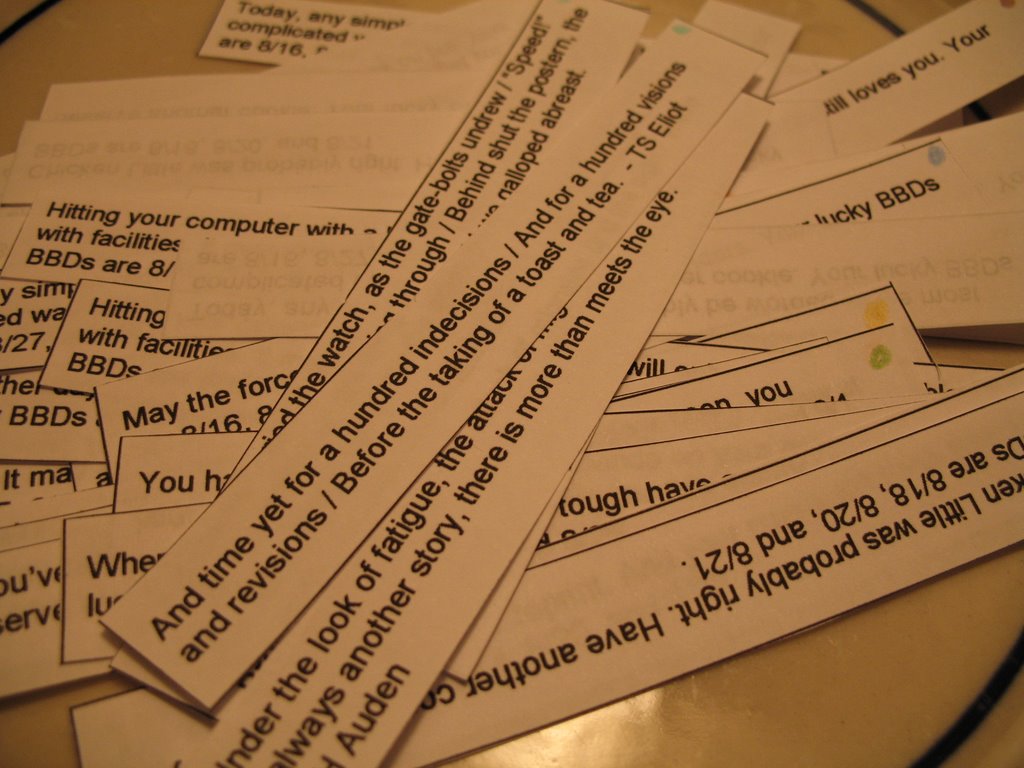
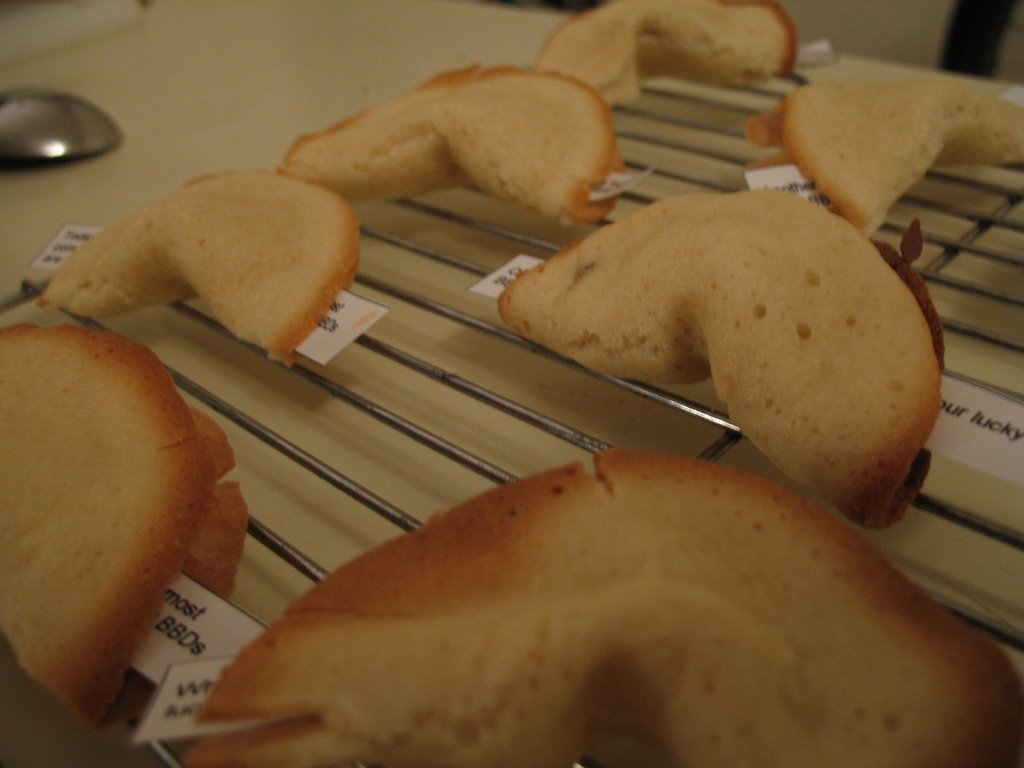
A few weeks ago, one of the departments in my company became inundated with projects that had moved down the conveyor belt to their desks and all the folks in that department were suddenly up to their ear lobes with paperwork and books and e-mails ever-so-politely requesting status updates on particularly gnarly projects (some of which MAY have come from yours truly). Part good wishing, part joke, part peace offering, I made the whole gang a batch of personalized fortune cookies.

I'd been rarin' for an excuse to make these cookies ever since I saw it while flipping through a back-issue of Cooking Light at The Engineer's mom's house. They looked like such fun to make, relatively easy, and healthy to boot. All these predictions turned out to be true, but I have to admit that I was a bit disappointed with the actual cookie itself. While the cookie part of a fortune cookie is really just a clever vehicle for the afore-mentioned fortune, I still think the cookie should be worth snacking on. These cookies certainly tasted like Chinese restaurant cookies, but had none of the satisfying snap that comes when you crack it in half or the melty crunch of actually eating it. My cookies stayed relatively limp and chewy--interesting, to be sure, but not *quite* what I was going for. I'm wondering if a different mixing technique might be in order. Any suggestions?

Here's the recipe--por favor, give it a try and let me know your thoughts:

---------

Fortune Cookies
with grateful acknowledgement to Cooking Light magazine

Makes roughly 18 cookies

1/2 c. bread flour

1/2 c. sugar

1 tsp vanilla extract (almond or orange extract might be yummy too!)

2 large egg whites

20 fortunes (a few extra just in case) roughly 3 inches long by 1/2 high

Pre-heat oven to 400 degrees.

1. Combine all ingredients and mix until well blended. You should have a thin batter similar in consistency to icing or glaze (mine was just a bit thinner than pancake batter). Cover bowl with plastic wrap and chill 1 hour.

2. While batter is chilling, cover two large baking sheets with parchment paper. Using a biscuit cutter or drinking glass about 3 inches in diameter, trace three or four circles in a row along the middle of the paper. Turn paper over.

3. Spoon about 1 teaspoon of batter into the center of each circle and use the back of the teaspoon to spread the batter evenly over the entire circle.

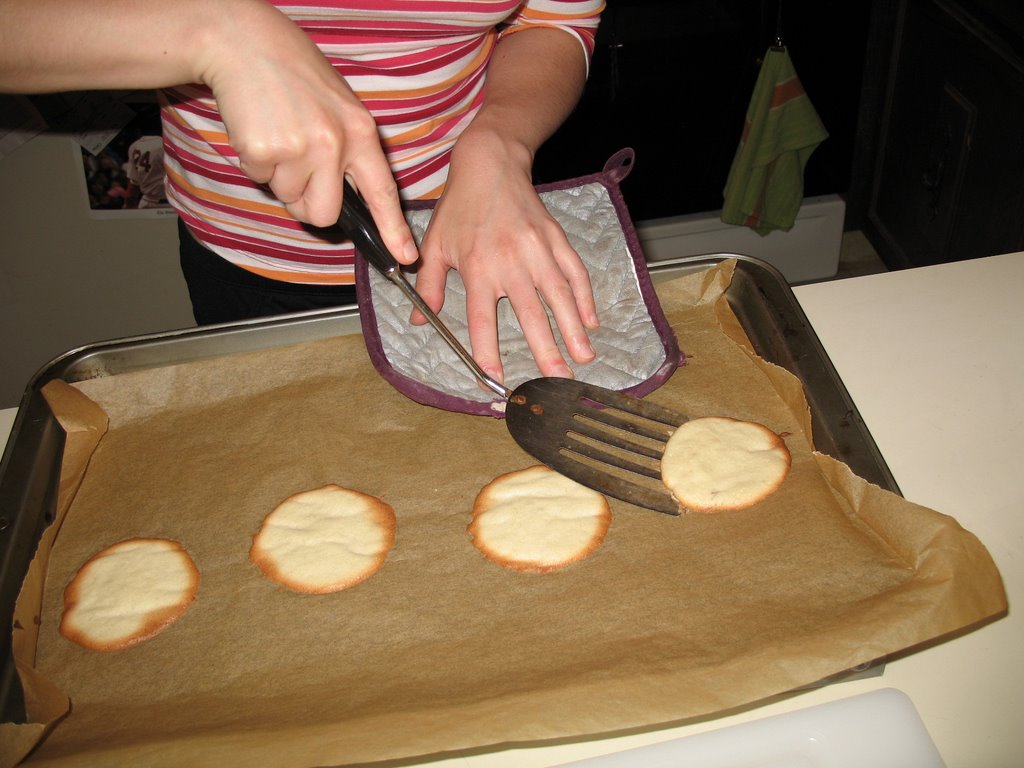
4. Bake one sheet at a time for about 5 minutes or until the edges of the cooks are just started to get brown and crinkly. Remove from oven.

5. Use a spatula to release the cookies from the baking sheet. (Don't afraid to be tough.)

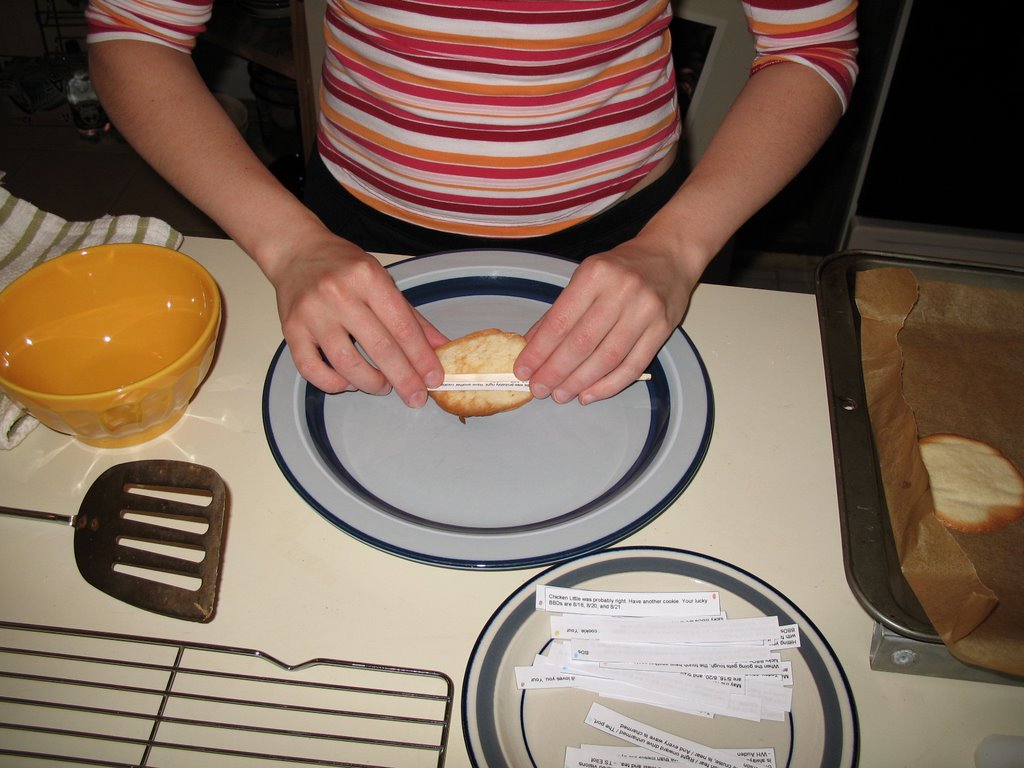
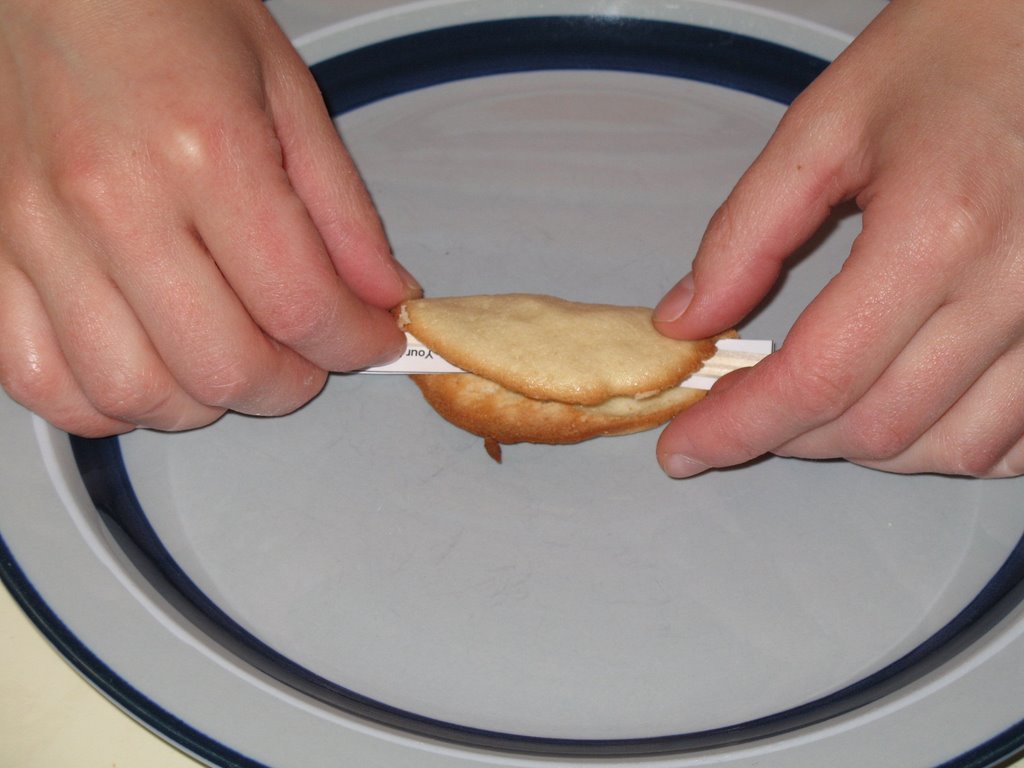
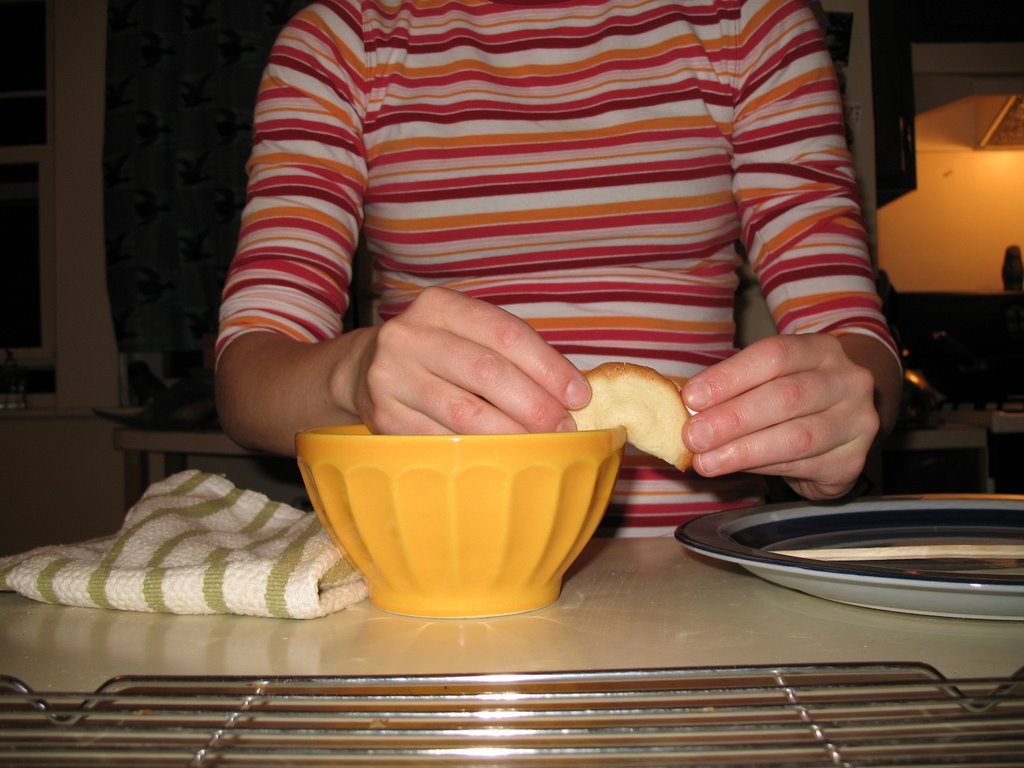
6. Working quickly and doing one cookie at a time, place the prepared fortune along the center of the cookie. Lay the handle of a wooden spoon or a chopstick along the fortune and fold the cookie over so the edges meet over the spoon handle. Press edges together. Remove spoon.

7. Pull the ends of the cookie down over the rim of a small bowl. Hold for a few seconds until set and then place cookie on a wire rack to cool completely. Repeat with remaining baked cookies.

8. Repeat entire procedure until all the batter is used. Store in an air tight container.

Calories: 37; Fat: 0.1 g; Protein: 0.9g; Fiber: 0.1g; Chol 0 mg; Iron 0.2 mg; Calcium 1 mg