Showing posts with label Comfort. Show all posts

Wednesday, February 13, 2008

Photo of the Week: Take the Cannoli

"Leave the gun. Take the cannolis."

I am too embarrassed to admit how many times that phrase crept into conversation last night or how we still laughed every time someone said it. But them was some miiiighty fine tasting cannolis.

I will say that my first cannoli experience left me with the impression that cannolis are rather a pain in the arse and are best enjoyed when one does not have to make them personally.
And by the way, the reason they look a little, well, burnt is because there's cocoa powder and cinnamon in the cannoli dough. Not at all because I might or might not have left them in the fry-o-lator too long. I'm not sayin' anything.

Stupid cannolis.

Sunday, January 27, 2008

Mini-Calzones

I had some leftover brisket wallowing in my fridge on last week and got it in my head to make some mini-calzones over the weekend. I thought I'd add some caramelized onions and roasted red peppers, but got stumped on the cheese. I stood in front of the cheese fridge at Trader Joe's for at least fifteen minutes picking up one cheese and then another, squinting my eyes and tasting various imaginary flavor combinations in my mouth. Goat cheese? No.... Sharp cheddar? Possibly... Maybe with some BBQ sauce? Sigh.... And then my hand wavered over some smoked gouda. I can't remember the last time I had gouda. No reason, really, I just...haven't.

And standing there imaging how gouda would taste with my smoky brisket etc. etc., I remembered my dad coming home from work with a shopping bag, all excited and jittery as he pulled out a round of smoked gouda and some tart apples. I was probably fourteen or fifteen at the time, and I just remember how happy he was as he cut up the wedges of apples and arranged them around some slices of gouda. "Here," he said, pushing the plate toward me, "Try this!" And with a fair bit of curious trepidation (likely disguised as teenage sass), I mirrored him as he took a slice of apple and layered on a slice of gouda. I bit off a corner and oh my! Good stuff!

I think this was the first time that I realized that cheese could be something other than what was sprinkled over pasta. It could be something more. It could transform my quiet, reserved father into a euphoric, cheese-pushing gourmand. That's some powerful stuff, right there.

And that's how I ended up with smoked gouda in my calzones. Not precisely a 'traditional' filling for calzones, true, but then I've never exactly been one to stand on formalities. I think my calzones and I will be juuuust fine.

I started making these mini-calzones a while back as part of my open-ended quest to find healthy, better-tasting, freezable, and easily-transportable lunch alternatives instead of things like Hot Pockets, Cup-o-Noodles, Lean Cuisines, and their ilk. It took a while to find a crust that fit the 'healthy' profile, until it dawned on me
(like a skillet to the forehead) to use my thin-crust pizza recipe. Duh. That dough is perfect for this--thin, but chewy; easy to make and healthy to boot; just enough flavor to give you a nice bread-y background but not so much that it steals the show. Splitting the dough into eight portions seems to give just the right amount of dough for a six-inch calzone. Poi-fect.

The combinations for fillings are really endless. I usually do a medley of meat, cheese, and sauteed veggies--whatever I have on hand.
Keep in mind that they are mini-calzones, after all, so there's a limit to what you can stuff in them. I usually weigh out a half-ounce of meat, a half-ounce of cheese, and then layer on as many veggies as I think will fit. Some combos I've done in the past are spicy pulled pork/goat cheese/caramelized onions and red peppers, sausage/cheddar/veggies, eggplant/kalamata olives/feta. You can also throw in a sauce of your choice--BBQ sauce works really well and a dab of tomato sauce is never out of place. Obviously, these calzones can be entirely vegetarian--even vegan, since the crust doesn't have any dairy! Woot!

The only drawback is that these are pretty labor-intensive to make, so I usually set aside an afternoon, make a double-batch of dough and keep on trucking until my fillings run out. I have found that it helps to lay out little piles of fillings in a row so you can just scoop and fold, scoop and fold.

Once they're cool, I wrap them up in saran wrap and throw them in a zip-lock bag in the freezer. A few minutes in the microwave gets the cheese melty and all the insides piping hot.

~~~
Mini-Calzones
(makes 8 with one batch of dough)

1 batch of thin-crust pizza dough (Recipe HERE)
4 ounces of cooked meat, separated into 8 half-ounce piles
4 ounces of cheese, separated into 8 half-ounce piles
sauteed veggies of your choice (onions, green or red peppers, eggplant, zucchini, mushrooms, etc.)

Pre-heat oven to 475-degrees F.

If you haven't already done so, cook your meat and set it aside to cool. Then sautee your veggies in a little olive oil until they are mostly cooked through and set them aside to cool. It's important to cook these ahead of time because they won't cook all the way through in the oven. Also, if you add the veggies raw, they will likely release a lot of liquid in the oven and you'll get mushy calzones.

Find a bowl in your kitchen that is about 6 inches across (in diameter). Use this bowl as a guide to trace 8 circles onto parchment paper. Cut the parchment into 8 pieces with once circle on each piece of parchment. Flip the parchment upside down so the actual pencil/pen mark of the circle is against the counter and your food-surface is clean.

Cut the pizza dough into 8 equal pieces. Place one piece on a piece of parchment paper in the middle of the circle. Press down on the center of the dough and then use the heel of your hand to gently push outward on all sides until you've filled the circle. The dough will be about 1/8 i
nch thick. Repeat with the remaining pieces of dough and parchment.
Cover each rolled-out circle as you finished with saran wrap or an upside down bowl to keep it from drying out while you finish the rest of the circles.

Place the meat and cheese in the center of the dough and layer on as many veggies as you think will fit (you'll get a feel for it after making one or two). Leave about 3/4 - 1 inch of space around the edge.
Lift one side of the dough over onto itself and pinch the dough together in the middle. Pinch all the dough to one side closed and then go back and pinch the other side closed, forming a half-moon. I find it easiest to do this if I pick up the calzone and hold it upright in my left hand like a taco, and then I use the fingers of my right hand to pinch the rest of the dough closed. You can poke any errant bits of filling back inside. Repeat with remaining calzones. (Note--the parchment paper will continue sticking to the dough and that's fine! When the calzone bakes, the parchment will gradually un-stick itself.)
Arrange as many calzones as will fit on a sheet pan. Just before baking, use a paring knife to cut three steam vents in the top of the calzone--go right through the parchment paper. Bake the calzones for five minutes and then flip them over. Bake for another 5 minutes and flip them over again. Bake for another 3-5 minutes until the calzones are golden and browned in spots. This whole baking process takes about 15 minutes in my oven, but it may take shorter or longer in yours. Since the filling is already cooked, you're really just looking for the crust to be a nice browned color. If the edges start to char, that's a sign that they're likely done cooking.

Remove calzones to a cooling rack and bake off any remaining calzones. Once they're completely cool, wrap each calzone in plastic wrap and keep them in a ziplock bag in the freezer. They'll last in there for a few months (if you don't manage to eat them all first...)

I don't get too worried about the calzones splitting open, honestly. These are more functional than beautiful and I'm usually the only customer I have to please! Once they're cool, I tuck any tumbling bits of filling back into the shell and wrap it all up in saran wrap so it's a tidy package for grabbing in the morning and sticking in my lunch bag.

Re-heat for 1-3 minutes on High. I've also eaten them cold (like cold pizza) if they've been thawing in the office fridge for a few hours.

For interested parties and Weight-Watchers folks: The calzone shell alone is 2 points. A half-ounce (14 g) of meat is usually 1-2 points, and a half-ounce (14 g) of cheese is also usually 1-2 points. If I only use a dab of olive oil for the veggies, I usually count them as zero points. So! One calzone is usually 4-6 points or so. Not too shabby for a meal-on-the-go!


Friday, January 18, 2008

Photo of the Week: Behold! More Pasta!

Shaking excess flour from cut pasta.

I know! Pasta! It's really just so cool! And I know you're all out there going, "Yes, Emma! I'm with you! Pasta is really just so cool!" Excellent. I knew I liked you.

This here's some spinach pasta--same basic pasta recipe with a pound of steamed spinach cuz it's pretty. And also because it's "good for growing girls and boys." We rolled it out fairly thick (Level 5 on most pasta machines), so it had a nice chew to it. And it slurped up nicely with a Gorgonzola Cream Sauce.

Tagliatelle Verdi Al Gorgonzola
(c) Roberta L. Dowling 2004, CSCA

Pasta Dough
1 lb fresh spinach, de-stemmed, steamed, squeezed dry, and chopped (I'd imagine you could also use frozen grocery store spinach here if you wanted to save your self some steaming)
3 eggs
4 cups of flour

Stir the eggs together with a fork and then stir in the spinach. Make a well in the flour and pour in the egg/spinach mixture. Gradually incorporate the flour into the egg/spinach with a fork until it comes together in a cohesive ball. (Note: You'll probably end up using more flour with this pasta because of the spinach.) Knead until smooth and let rest for a half hour. Roll out and cut into thick noodles.

Sauce
4 oz. butter
1 c. heavy cream
1 lb gorgonzola, rind removed and cut/broken into small chunks.
3/4 c. Grana Padano cheese, grated
1 pinch nutmeg
salt and pepper
chopped parsley for garnish

Melt the butter and add the cream until it simmers. Cook for a few minutes on low heat. Add the Gorgonzola and half of the Grana Padano cheese tot eh cream sauce and stir gently over low heat until thoroughly melted. Add the nutmeg and season with salt and pepper. Cook the pasta in large amount of salted, rapidly boiling water. Drain the pasta and toss with the Gorgonzola sauce. Serve with an extra sprinkle of Grana Padana and some chopped parsley.

Sunday, December 16, 2007

Simple Crispy (No-Knead!) Loaf

This past Thursday, I left my cube to get something at the printer and by the time I walked back (muttering to myself because I'd ALREADY found a typo I'd have to fix), the sky out the window was full of thick, fat flakes. Our offices closed about an hour after that. I was supposed to have class later, but honestly? I just wasn't feelin' it. What I WAS feelin' was going home, curling up on the couch with some knitting and watching the season premiere of "Crowned" taped the night before. And so I sat at my computer in my empty office pressing the refresh button on my internet browser until ("C'mon! C'mon!") the note went up on the school website that classes were canceled. YES!

Three full trains passed through the station before one came with enough space for me to smoosh myself, my two bags of shtuff, and my equipment roll into the crevice between the first step and the door. Two hours later, I finally got off the train and forged the last stretch of the journey on foot because I could walk faster than the traffic. It was cumbersome with the bags, but I actually think they made good ballast to keep me afloat in the snow. And though I managed to keep my footing the whole way, I like to think they would have cushioned my fall. Except for my equipment roll. That would have...yeah, not the equipment roll.

So after I thawed out with a glass of wine and some mother-daughter pageant action, what did I do with my evening off from baking class? Why, I BAKED of course! I mean DUH! What ELSE would I be doing with a night off from school?!

Ahem.

I first saw this recipe for "Simple Crusty Bread" in the New York Times a few weeks ago. It pledged to be an alternative to the No-Knead Bread of recent fame, but even simpler! quicker! and more flavorful! It was this last promise that really caught my eye since, for me, the lackluster flavor of the No-Knead Bread outweighed it's convenience. I was also intrigued by the fact that one recipe made four loaves and the dough would keep in the fridge for up to two weeks, allowing you to lob off a piece whenever the mood struck. In general a slow rise will give you a more complex flavor and better texture, and a 'retarded' or 'delayed fermentation' rise in the fridge will result in a slightly sweet bread, like the slackdough breads I was working on a few summers ago--HERE. I baked off one loaf right away and stored the other three in the fridge for taste-tests over the next few weeks.

Dough just after combining ingredients

My initial reaction to this bread is....(drumroll!)....pleasant surprise. The just-mixed dough was stiff and tacky, and I had very low expectations of being able to shape it into anything resembling loaf. But somewhere over the next two hours of rising, it really pulled itself together. With only a light dusting of flour, I was able to handle it relatively easily and shape it into a nice little ball. I decided to rest my dough on the countertop instead of on the peel as the recipe suggests since I've had a few too many experiences of resting the dough on the peel, going to shuffle it loving into the oven, and having it stick to the peel and turn out looking like THIS despite a generous dusting of cornmeal. I was able to pick the ball up off the counter and plop it onto my peel without too much fuss. It stuck a bit, but then willingly slid out onto the pizza stone. It didn't rise very much in the oven, but it did keep it's nice round shape without deflating at all--an amazing feat for any loaf, if I do say so myself.

The dough after the 2-hour rise

The crust browned very evenly and crackled when I cut into it--thumbs up for that. The crumb was tight and moist with a few larger holes here and there--a second thumbs up. And the taste? Decent! Not as much flavor as a traditionally kneaded bread, but also not too shabby. It's a little salty, but I'm a fan of salt so no complaints here. It even past the second-day-toast-test with flying colors. I also like that it's a smaller loaf, which means that I have a chance of eating it before it goes completely stale or moldy.

I'm really excited to try the other loaves as the dough ages over the next few weeks. Even if there's not much flavor development, I think this is still my new standby Lazy Girl's Loaf!


Shaped loaf

This is what the underside of the loaf looks like after you stretch the top

~~~~~~

Lazy Girl's Loaf (a.k.a. Simple Crusty Bread)
Recipe alone: http://www.nytimes.com/2007/11/21/dining/211brex.html
Full article: http://query.nytimes.com/gst/fullpage.html?res=9C0DEEDB153FF932A15752C1A9619C8B63

Adapted from "Artisan Bread in Five Minutes a Day," by Jeff Hertzberg
and Zoë François (Thomas Dunne Books, 2007)

Time: About 45 minutes plus about 3 hours' resting and rising

1 1/2 tablespoons yeast
1 1/2 tablespoons kosher salt (If you don't like salty, try cutting this down to 1 Tablespoon)
6 1/2 cups unbleached, all-purpose flour, more for dusting dough
Cornmeal.

1. In a large bowl or plastic container, mix yeast and salt into 3
cups lukewarm water (about 100 degrees). Stir in flour, mixing until
there are no dry patches. Dough will be quite loose. Cover, but not
with an airtight lid. Let dough rise at room temperature 2 hours (or
up to 5 hours).

2. Bake at this point or refrigerate, covered, for as long as two
weeks. When ready to bake, sprinkle a little flour on dough and cut
off a grapefruit-size piece with serrated knife. Turn dough in hands
to lightly stretch surface, creating a rounded top and a lumpy bottom.
Put dough on pizza peel sprinkled with cornmeal; let rest 40 minutes.
Repeat with remaining dough or refrigerate it.

3. Place broiler pan on bottom of oven. Place baking stone on middle
rack and turn oven to 450 degrees; heat stone at that temperature for
20 minutes.

4. Dust dough with flour, slash top with serrated or very sharp knife
three times. Slide onto stone. Pour one cup hot water into broiler pan
and shut oven quickly to trap steam. Bake until well browned, about 30
minutes. Cool completely.

Yield: 4 loaves.

Variation: If not using stone, stretch rounded dough into oval and
place in a greased, nonstick loaf pan. Let rest 40 minutes if fresh,
an extra hour if refrigerated. Heat oven to 450 degrees for 5 minutes.
Place pan on middle rack.

Wednesday, January 24, 2007

Sausage, Barley, and Alien Soup

At first we were afraid. Very afraid. Imagine, Emma the Innocent is innocently chopping vegetables for a nice pot o' sausage, barley, and mushroom soup. Engineer the Brilliant is expounding on vector-based something-or-other, which involve moments of gobbledegook and forces corresponding to jibberish. Emma the Innocent nods sagely and pulls another parsnip from the grocery bag....or DOES she?! Screams of terror! Vector-based forces collide in moments! Counter attack--we'll EAT him out!
When that proved too crunchy and tasteless, we decided to make friends. Here's the Engineer and his new friend communing.
Aw, shucks. We're gonna miss that little guy!And then we decided to sacrifice him to the Gods of Hunger and put him in our soup pot. As if in comic retribution, the resulting soup was bitter and lacked depth of flavor. I've made this soup before with wonderful, no-leftovers-left-over results, so I can only conclude that parsnips are not a good substitute for carrots (which I loathe) in this particular dish. The whole time I choked down my bowl, I kept thinking, "Dang. I really just want the taste of potatoes in this." So next time? Potatoes.
In an attempt to salvage the rest of the pot, I tried sprinkling my next bowl with a healthy portion of freshly grated Parmesan cheese. (Cheese can never hurt, right? Though I was worried about
wasting my lovely Parmigiano Reggiano...) While parsnips still are definitely not the best choice for this soup, with the addition of cheese, the soup went from "inedible" to "acceptably decent." It wasn't until days later while reading "Umami: A Taste By Any Other Name" by Rowan Jacobson (published in The Art of Eating, Issue No. 72) when I realized that what was lacking in the soup--and what the Parmesan made up for--was the flavor of umami.

Umami literally means "the essence of deliciousness" in Japanese, and is a legitimate fifth taste with its very own taste buds alongside those responding to sweet, sour, salty, and bitter. At its most basic, the flavor of umami comes from the amino acid glutamate (of the ill-famed MSG additive). The umami flavor can perhaps best be described as 'savory'
and is found in protein based foods where the protein has begun to break down--like aged and cured beef, anchovies, soy sauce, and, yes, you guessed it, Parmesan cheese. In fact, the little tiny white crystals in Parmigiano Reggiano are granules of an amino acid with umami flavor. As Rowan Jacobsen says in his article, "Whenever a soup or sauce 'needs something,' chances are that something is umami--and, chances are, a Western cook will mistakenly add salt instead." Oops. Guilty. Too bad I didn't read that article until after I'd made the soup...

Here is the soup recipe for your very own experiments. Unless you feel like playing around with umami, I'd recommend leaving the parsnips to their alien conspiracies. The original recipe
(found HERE) calls for celery and carrots, but since I don't like those things, I leave them out. I might try adding potatoes for a little more body and starch next time I make it, but I've also made it a few times with the recipe exactly as I've written it below and loved it. Enjoy!

Sausage, Barley, & Mushroom Soup
Makes 4-6 one-cup servings
  • 1 large onion, diced
  • 4 links of turkey or chicken sausage (spicy or sweet, as you prefer)--slit each link down the center and remove from casing. Break into crumbly pieces with your fingers. (Or you can chop them if you're grossed out.)
  • 4 garlic cloves, minced
  • 1 bay leaf
  • 2 tablespoons fresh thyme, chopped
  • 1 1/2 cups of portobello or baby bella mushrooms (I use 1 carton from the store)
  • 5 cups shiitake mushrooms (about 1/2 lb), stems discarded and chopped (this is best when mushrooms are in season and you can find them at farmer's markets. Otherwise, I add a second carton of baby bella mushrooms.)
  • 1 cup barley
  • 6 cups chicken stock
  • Salt and Pepper to taste
In a large stock pot, saute the onion in a few teaspoons of oil until soft and translucent. Add the sausage and cook until the sausage is browned. Add garlic, bay leaf, and thyme and stir until garlic is fragrant. Add mushrooms and cook until mushrooms just begin to sweat and shrivel. Add chicken broth and barley.

With the lid off, bring the soup to a boil. Once boiling, cover and reduce to a simmer. The soup is done when the barley is tender. If you have quick-cooking barley, the soup will be ready in about 15 minutes. Regular pearl barley will take about 45 minutes. Check seasonings and add salt and pepper to taste.

WeightWatcher's Notes: I use Al Fresco Chicken Sausage in this soup, which is 70% less fat than regular sausage. It comes in a lot of good flavors and the quality is good for use in soups like this. Depending on the flavor you get, one link is 3 - 4 points. The pot usually makes about 6 cups or more, so a serving is about 3.5 points for a one-cup serving. Depending on the type of sausage you find, you should double check the points. The total for the entire pot of soup before adding the sausage is 6 points.

And don't forget, Parsnip Aliens have feelings too.

Sunday, January 14, 2007

Don't be a Chicken!

I became a vegetarian my senior year in high school and only started eating meat again years later after making three very tough realizations:

1. The "for real" reason why I became a vegetarian was because my boyfriend decided to go veg and so I did too.

2. The vegetarian and I had broken up years ago.
3. I like meat.

Whether it's admitted or not, I think many people of my generation fell prey to the allure of vegetarianism not for ethical or altruistic reasons, but because it was cool at the time. Now, I fully recognize that for some folks vegetarianism was a good fit and what started as a fad became genuine heartfelt philosophy. But for the rest of us, I think we knew in our heart of hearts that we didn't quite belong. Oh, I was able to spout the memorized lines from the brochures along with the best of them, but I knew I was a liar.

I felt guilty and torn and miserable: a Judah among vegetarians. I just never stopped wanting meat. I craved it with a passion. I salivated at the sight of a big juicy cheeseburger. My stomach rumbled for bacon at brunch. I drooled for fried chicken (indeed, chicken fingers would be my ultimate downfall). When I admitted this to the seasoned vegetarians, they would nod reassuringly and say, "Don't worry. The longer you're a vegetarian, the less appeal meat will have for you." I trusted, I believed, I tried all the faux-meats I could get my hands on. I even tried NOT eating the faux-meats, thinking that maybe the faux-meats were just compounding my desire for real meat. Ultimately, I had to admit that I had a problem: I just wasn't a vegetarian.

I strongly believe in the ethical treatment of animals. I believe that consuming organically-raised and free-range animals is better for reasons of health, sustainability, and long-term economy. However, I do not believe that humans are natural vegetarians. I believe humans are true omnivores, and from a biological perspective, we are meant to eat meat--along with grains, vegetables, legumes, and other edibles. I believe that being a vegetarian is a choice made for personal, religious, or ethical reasons, not because it's a natural state of being for humans.

I also believe that it's ok to kill animals for food. I would prefer that the killing and butchering is done in a moral way and in a way that is as respectful of the animal as it is of the people the animal is going to feed. This is why I buy local, organic, and free-range meat whenever possible and affordable.
One of the attitudes of the general vegetarian movement that I found (and still find) most problematic is that by declaring it immoral to kill another animal for consumption, vegetarians are removing themselves and humans further from nature. Animals killing other animals for food is an integral part of what it means to exist in the natural world. If we say that it's wrong for humans to kill other animals for food, this elevates us above nature and distances us from the very thing we are claiming to care for.

This anthropocentric attitude is a very slippery slope. In our attempts to protect nature and act as steward to the environment, it's easy to forget that we are also a part of nature and are subject to the same grisly, unpleasant, natural rules as all other creatures. There are valid religious reasons for not killing other animals for food, some of which I respect and some of which I still find troubling, but many of these religions also have a counterbalancing philosophy that grounds followers firmly in the natural world.

Incidentally, I think that it's a real problem that humans have no real predators in the natural world at this point in history. We need a few predators (and other humans don't count) to keep us honest and remind us that we're not as in charge of things as we think.

When I first began eating meat again, I usually only ate it when it was being prepared for me. On my own, I usually cooked with tofu and only the occasional chicken breast. I didn't really know how to prepare meat so that it tasted good and also so that I knew I was being sanitary. And truthfully, ashamedly, grudgingly, I admit that I was squeamish. And still am. Though my attitude is slowly changing, my initial reaction to most raw meat is, "Ewwwww." It jiggles. It's sometimes bloody. There are little veins and tendons and sinews. And it's really really hard to forget that this thing I am inexpertly hacking into pieces on my counter was once a living creature.

But if I am going to be a meat-eater, these are the things that I need to deal with. Part of respecting this creature who died to feed me is actively remembering--not forgetting--that this animal with its innermost parts exposed on my counter was indeed once alive. I work to see the beauty in an otherwise decidedly unbeautiful moment. When I can afford it, I respect the animal by choosing one that was raised and killed in an ethical way. I also respect the animal by learning how to cook it properly.

To this end, a few weeks ago I decided that it was time to learn how to prepare a whole chicken.

Don't Be a Chicken: The Novice's Guide to Cooking a Whole Chicken

To feed four hungry people with enough leftover for a batch of enchiladas, all you need is a 4-pound chicken. In various recipes, you might see this referred to as a "roaster." In point of fact, the categories of chickens available for purchase break down like this:

Broilers: Young chickens of either sex that weigh about 2 1/2 pounds
Fryers: Young chickens of either sex that weight about 2 1/2 - 3 1/2 pounds
Roasters: Chickens of either sex, under 8 months old, and weigh 3 1/2 to 5 pounds
Stewing Chickens: Chickens over 10 months old (their meat is tougher and more stringy, so this type of chicken is best used in dishes like stews, as the name implies, that provide a long cooking time to break down the meat.)
Capons: Castrated males that weigh 6 - 8 pounds

When picking a chicken in the grocery store, check first for the sell-by date to find the freshest (as with any meat). I recommend always buying fresh birds that are not frozen (check the label, as sometimes birds will be frozen for transportation and then thawed at the market before being placed for sale.) As well as you can determine through the plastic wrapping, make sure that the skin is intact and is yellowy-translucent. The skin should be a bit loose on the meat, and the meat below should be of uniform color. When you press on the breasts and the thighs, the meat should give slightly beneath your finger and feel more or less like, well, a breast. (C'mon, we all either have them or we've felt them, so you know what I'm talking about!)

When you're ready to prepare the chicken, remove the plastic wrapping and set the raw chicken on a clean plate in your sink. In a store-bought bird, the giblets (the heart, liver, and kidneys) will be in a small sealed bag within the cavity of the chicken. I haven't yet been able to stomach giblets, so I usually take a deep breath, pull out the bag and deposit it directly into the garbage. If you're feeling adventuresome, there are plenty of giblet recipes out there for you to explore--I'm saving that one for another day.

Wash the chicken by running it under hot water and running your hands firmly over the skin. Lift the chicken and run water in the cavity. Swish it around, rub the cavity with your hands, and run more water until the water coming out of the chicken runs clear. (Note: Chickens "should" be cleaned before packaging, but this is just an extra precautionary step. Don't use soap, though, as it will give your meat a soapy flavor.)

Still with the chicken in the sink, cut off any large lumps of fat you can see--especially around both openings of the chicken. Be careful not to tear or damage the skin. Pat the chicken dry with paper towels and set it on a new clean plate on your counter. Now the bird is ready to go.

Emma's Lemon Garlic Slow-Cooker Chicken

I drew this recipe together from several different recipes I had hanging around. The chicken is poached in a small amount of liquids in the slow-cooker and the resulting meat literally falls off the bone--you don't even need a knife! The flavors of garlic, lemon, thyme, and rosemary are infused throughout the meat. It's excellent eaten by itself, as a layer in sandwiches, and in any other chicken-leftover recipe you may have. The only disadvantage to poaching the chicken like this is that the skin is discarded after cooking; my next feat is to attempt roasting a chicken and getting some crispy skin!

3-4 pound chicken

for the seasoning:
3 garlic cloves--minced
1 Tbsp olive oil
1 tsp salt
2 sprigs of thyme--leaves stripped and minced

Mix all the seasoning ingredients together in a bowl. Using your fingers, gently separate the skin from the meat of the breast, thighs, and legs of the chicken. Rub half of the seasoning mixture between the skin and meat. I found that if you get a good dollop under the skin, you can lay the skin back down and use your fingers to massage the outside of the skin and work the seasoning across the surface of the meat. Rub the remaining mixture inside the cavity of the chicken.

Heat a large skillet (a wok works well) to medium-high heat and coat with non-stick cooking spray. Pan-sear the chicken on all sides for 6-8 minutes until the outside is browned. Transfer the chicken to your slow cooker--BREASTS SIDE UP.

for the baste:
3 Tbsp fresh lemon juice (about 1 lemon)--reserve the lemon rinds
2 Tbsp soy sauce
1/4 c. chicken broth
1 whole lemon--quartered
1 head of garlic--cloves separated, but left in their individual skins
2 chicken bouillon cubes
2 sprigs of thyme
2 sprigs of rosemary

Combine lemon juice, soy sauce, and chicken broth. Put the pan used to sear the chicken back on medium-high heat, pour in HALF of the lemon juice mixture and let sit until just boiling. Use a spatula to scrape up any bits of chicken stuck to the pan. Once the pan is deglazed, pour mixture over the chicken in the slow-cooker.

Put lemon rinds (reserved from squeezing the juice), 1 whole bouillon cube, and a few of the garlic cloves inside the cavity of the chicken. Arrange lemon quarters, the remaining garlic cloves, and the sprigs of thyme around the chicken toward the edges of the cooker. Crumbled the other bouillon cube over the chicken and rub it into the skin.

Place the lid on the cooker and cook on HIGH for 4 hours. (Note: This recipe is best when done on HIGH, but can also be done in 6-8 hours on LOW.)

Twenty to thirty minutes before the time is done, pour reserved lemon juice mixture over chicken and add the rosemary sprigs. (Rosemary tends to get bitter and antiseptic tasting if cooked the entire time in the slow-cooker.)

Remove chicken from the slow-cooker and allow it to rest on the carving board (or handy cookie sheet) for about 20 minutes. The meat actually continues cooking during this resting period and the juices will redistribute through the meat. When ready to serve, tear off the skin and discard. Use your fingers to pull off the legs--the bones should come apart with a gentle tug, but if they don't use a carving knife to wedge them apart. Keep using your fingers to work over the chicken, placing the meat on a serving platter and reserving the bones for another use (like home-made chicken broth!). Serve immediately!

If you don't have a slow cooker, you have a couple other options:

1. Poaching in a dutch oven: A dutch oven can very closely duplicate the slow cooker. Prepare the chicken exactly following the instructions above, but place the chicken and all ingredients in a dutch oven instead. Cover with the lid and place it on the middle rack in a COLD (not preheated) oven. Heat the oven to 300 degrees and cook for three hours or until a thermometer in the thigh meat registers 180 degrees. You can bast the chicken every 45 minutes or so.

You can also follow this recipe on Chocolate & Zucchini HERE.

2. On the stove top: If you don't have a slow cooker or a dutch oven, you can poach chicken breasts on the stove top in a skillet. I'm sure you could figure out a way to poach an entire chicken on the stove top--perhaps in a stockpot or dutch over over low heat?--but I've never done it.

Marinate the chicken breasts for 2-24 hours in the seasoning mixture from the recipe above. When ready to cook, place the breasts in a skillet or fry pan in a SINGLE layer. Cover chicken with the basting mixture and add enough additional chicken broth so that there is about 1/2 inch of liquid in the bottom--it should almost cover chicken, but the tops should still be above the liquid.

Turn on the heat to medium-high and bring liquid to a boil. Reduce to a simmer and cover skillet with a fitted lid. Let it cook undisturbed for about 10 minutes, then cut into the thickest part of one of the breasts to check for doneness. If it is still raw pink, recover the pan and cook for anther 5 minutes. Repeat until all the breasts are done. (Smaller breasts may be done sooner and should be removed.)

VARIATION: For my Cross-Atlantic Portuguese-Brazilian dinner, I used the marinade from the Chez Henri recipe for Roast Chicken with Lime and Achiote HERE in place of the seasoning mixture in my recipe above. I then followed my recipe exactly, replacing the lemons in my marinade with limes. Yum!

Monday, December 11, 2006

Rebellion in my Roasted Veggies

I'm a bread and butter kind of girl. Cooking and eating fancy meals is just dandy for special occasions, but what I'm really interested in is what people eat every day. I like to keep it simple and keep it good. Good food doesn't need to take 10 hours to prepare or call for a million ingredients or use expensive spices in order to be good. You don't even need to be a master chef in order to make it good. You just need to want it to be good.

Two years ago, I didn't know how to cook. The Engineer and I subsisted on stir-fries and rice, pasta and jar sauce, and runs to Anna's Taqueria for burritos. Then I started doing WeightWatchers. And I realized that eating well was really boring. No flavor. No feeling of being full. No satisfaction of any kind. I felt that the only choice being offered was between eating what tasted good and being 'ok' with the portly consequences or eating boring food and staying healthy-thin. I felt miserable and trapped and angry.

And that's how cooking became my rebellion. I wanted my food to be good. I wanted it to taste good and be good for me at the same time. I wanted this in a way that I felt in my gut and my heart. I absolutely did not believe that my only choice was between good-tasting food and good-for-you food. So I started to cook.

Two years later, I have a lot more confidence in the kitchen. I try new recipes as I come across them and will reincarnate recipes to my own tastes if I think the original had potential. I know where I can cut corners and use low-fat ingredients, but add a few 'regular' ingredients to bring out a good balance of flavor. And I've loosened up a lot. I'm a recovering perfectionist and it's still hard to try a new ingredient without knowing how it will taste or not feel like a failure if a recipe doesn't turn out brilliantly.

I've also worked on expanding my portfolio of "Tastes That I Like." In a recent interview with Seth Roberts on The Restaurant Guys (Click HERE to download the interview), Roberts mentions that Americans tend more and more to eat foods with the same flavors. Walk into any fast food burger joint in the US and order any burger and I guarantee that it taste pretty much like any other burger you would order anywhere. On top of that, Roberts says that people tend to eat the same basic foods with the same basic flavors over and over again--their daily diets don't change. Although Roberts didn't go into this in his interview, what this tells me is that a lot of people out there are no longer really able to recognize what tastes good; they only recognize what is familiar.

When I first started cooking, I was only able to recognize when I didn't like something that I ate--it was too bland or too over-cooked, etc.--but I couldn't identify what was missing or how to make it better. It took a lot of trial and error in order for to figure out what flavors I liked, how much of a particular flavor was good, and what flavors went together. Chefs and foodies call this 'expanding your palate.' I'm still figuring this out and have gotten more adventurous about trying new combinations of ingredients and spices (Lemon-Anise Muffin recipe coming soon!).

So, bread and butter. When I was in college, my dad sent me a post card that said, "To simplify, you have to say no." That post card has hung next to every desk I've had since and I often think about it when I'm in decision-making situations--whether that situation is what to wear in the morning, how to handle a new project, or what ingredients to add in my soup. Simplify. Keep it simple and keep it good, that's how I roll.


-----

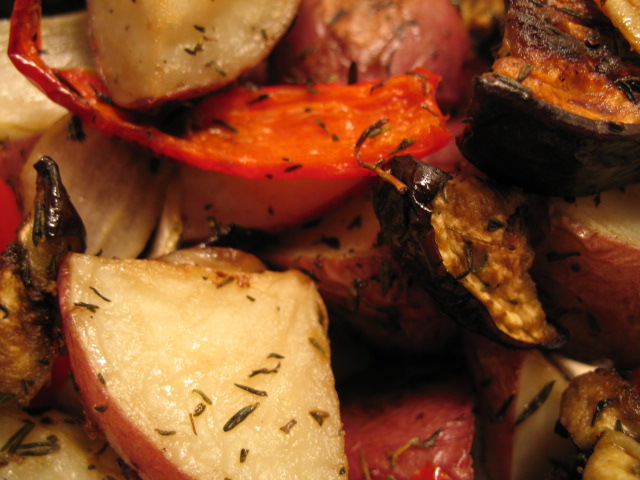
Oven-Roasted Vegetables

small red or white potatoes (2" - 3" across)--estimate about 2 potatoes per person plus one for the cook--halved and quartered
1 large onion--cut into wedges
1 red pepper--cut into chunks
1 zucchini/eggplant/summer squash--cut into chunks
Salt to taste
Thyme, rosemary and/or oregano to taste

Note: The potatoes should be cooked separately from the other veggies. Not only do they take longer, but other veggies tend to release water as they bake, which prevents the potatoes from crisping. If baking both potatoes and veggies, put the potatoes in the oven 10-20 minutes before the other veggies so both trays will be ready at the same time.

Preheat oven to 425 degrees.

Potatoes: Put the potatoes into a bowl by themselves. Drizzle 1 tablespoon of olive oil over the potatoes. Add 1 teaspoon of sea salt and 1 teaspoon of dried thyme, rosemary, or oregano (or any combination of these herbs equalling about 1 tsp). If using fresh herbs, increase the amount by 1/2 to 1 tsp. Line a baking sheet with aluminum foil, spray with non-stick coating, and spread potatoes over sheet. Bake for 40-50 minutes until browned and crisp, stirring occasionally to prevent the potatoes from sticking.

Other veggies: Combine the other veggies in a separate bowl, drizzle with 1 tablespoon of olive oil and add herbs. Line a second baking sheet with aluminum foil, spray with non-stick coating, and arrange veggies. Bake for about 30 minutes, stirring occasionally, until onions are crisp at the edges and caramelized, and the other veggies are cooked through.

Combine veggies and potatoes, adjust spices to taste, and serve!

WeightWatchers: Small potatoes are about 1 point each. One tablespoon of olive oil is 3 points. If cooking with 8 potatoes and 2 tablespoons of olive oil (total--one tablespoon for each bowl), the total points for the entire mess o' veggies is about 10. In other words, this is a very WeightWatcher's friendly meal or side-dish! I usually combine about 1 cup of roasted veggies (about 1 point) and 3/4 cup of rice (3 points) for a more satisfying meal.

Saturday, December 2, 2006

Enchiladas--A good use of leftover turkey

I know, I know--Thanksgiving is but a distant memory and you're on to bigger and better things by now. Unfortunately, between end-of-production-season frenzy at the Noodle Factory and Blogger being wonky on me, I've fallen a bit behind on my A-game here. Regardless, I'm sure there are some of you who still have a few morsels of dried-out turkey lurking in some forgotten container at the back of your fridge. You've had it on sandwiches. You've made soups. You've re-heated it until it can't be re-heated no more, no more. And now, not only are you sick of it, but your good Midwestern waste-not-want-not roots just won't let you throw away those last few mouthfuls that aren't even enough meat for a whole sandwich. Well, here is one last turkey left-overs resurrection for you to enjoy. If you don't have as much meat left as the recipe recommends, just throw in some veggies to fill it out. (Notes on completely vegetarian versions are at the end of the blog.)

Turkey Enchiladas


1 c. (4 oz) turkey or chicken breast--shredded or chopped into small chunks
1 jar salsa (~12 oz or so)

1 c. cheese--shredded
1 can black beans--drained and rinsed
1/2 c. non-fat plain yogurt
1 tsp chili powder (to taste)
1/2 tsp cumin (to taste)
1 tsp salt (to taste)
8 6"-flour tortillas

Preheat oven to 400 degrees.

Spread a thin layer of the salsa on the bottom of a 10x6 inch baking dish.

In a medium-sized bowl, mix the turkey, 1/2 cup of the cheese, the yogurt, the beans, and the spices. Taste a bit of the mixture to make sure you like the spices; add more spices if it doesn't have enough taste for you, but remember that you'll be eating this with salsa. Lay the tortillas out on a clean counter top and divide the turkey filling equally between each. You want the mound of filling to be toward the bottom third of each tortilla in a roughly rectangular shape.

Begin rolling up the tortillas. Fold the bottom (smaller) flap over the filling. Tuck in the sides. Roll the tortilla away from you until the filling is completely wrapped. (Chow.com has a great demo on the best way to roll up a tortilla for a burrito-type wrap HERE--it's toward the middle of the article.) Lay the enchilada seam-side down in your baking dish. Repeat for the rest of your enchiladas.

Pour the remaining salsa over the enchiladas, and then top with your remaining 1/2 cup of cheese. Cover with tin foil and bake about 20 minutes. Remove tin foil and bake for another 5 minutes until the cheese is completely melty and a little crispy-looking. Enjoy!

NOTES:
  • I found that one jar of salsa wasn't quite enough. I recommend using one whole jar of a chunky salsa (use some in the filling and some on the top), and then about half of a jar of a thinner, sauce-like salsa to make sure you get the moisture to really drench the enchiladas. Alternatively, you could use one jar of salsa and a bit of crushed or pureed tomato.
  • Any kind of salsa will do here, and whatever salsa you pick can really change the entire flavor of the dish. I used a roasted garlic salsa from Trader Joe's that was really fabulous.
  • If you're a vegetarian or simply don't have any leftover turkey or chicken on hand, you can replace the meat with other veggies. Try any or all of the following: diced onions, tofu crumbles, diced quorn, corn or hominy, zucchini, mushrooms, and peppers. Even cubed and cooked squash would make a good, sweeter version!
  • This is a pretty gosh darn healthy meal. If you're looking to make this more waist friendly, you can use a lot of low-fat ingredients and the end result doesn't taste at all low-fat. It really makes a difference to get a good quality salsa that you like and a good reduced-fat cheese like Sargento. I used 96% fat-free tortillas, nonfat yogurt, and a reduced-fat Sargento Mexican cheese mix. If you follow the Weight Watcher's program, the filling is about 2 points per enchilada and the tortillas I used were 1 point each--using my same ingredients, each enchilada comes out to about 3 points each. For dinner, 1 and 1/2 enchiladas really filled me up. Yay, cheese!

Tuesday, November 7, 2006

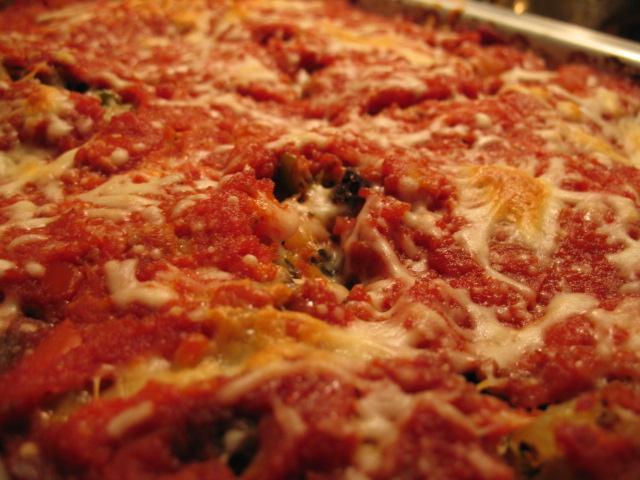
Il Lasagna Perfetto

You should all know by now that I love to cook. No doubt about it. But what I do not love is cooking every day. In fact, if I have to cook two days in a row, I get a bit cranky and start taking out my frustrations on the unsuspecting Engineer by muttering things under my breath like, "Though I may look and occasionally act like a 1940's housewife, I am not a 1940's housewife, mister." * He usually grins and says, "Pizza, then? Where are my keys?"

This is why I love love L-O-V-E love making humungoid meals
one or two times a week that will feed us both for lunch and dinner over several days. Luckily, the Engineer and I are both fairly monogastronomic (yes, I made up that word) and don't require a lot of variety in our diet to keep us satisfied. Throw in a few meals of eggs n' toast and a coupla stir fries and we're happy clams.

Whenever I come across a new recipe that I think has potential for deliciousness, I immediately begin to consider of two things: 1) How can I double or triple the amount of servings in this Bad Larry, and 2) How can I make it healthier? (The answer to both questions, by the way, is usually "add more vegetables." Just don't forget to adjust the spices.) I typically follow the recipe exactly one time and then modify on subsequent repetitions.

I've been working on my lasagna for about two years now--how's that for tenacious? My family was staying in a rented cabin tucked into the woods somewhere near Lake Superior--a winter vacation tradition in my family. The cabin came equipped with hand sewn quilts, a gorgeous view of one of Minnesota's 10,000 lakes, and a little kitchen of its own. After we were settled into our various cozy nooks, my mother started making "I'm-cooking-who-wants-to-help?" noises in the kitchen and organizing the various ingredients for lasagna.
Lasagna was a regular meal in our house--in fact I think it was my all-time-favorite food for a good chunk of elementary school, much to my mother's delight and disbelief. But this was the first time I consciously helped my mother make lasagna and recognized it as a meal that I could replicate for myself. It was a light bulb kind of moment.

At this time, my mother had been on WeightWatchers for a few years, but I hadn't yet started. As we got everything together, my mom explained the various substitutions she made to make the lasagna WeightWatcher's friendly: substituting lo-fat cottage cheese for
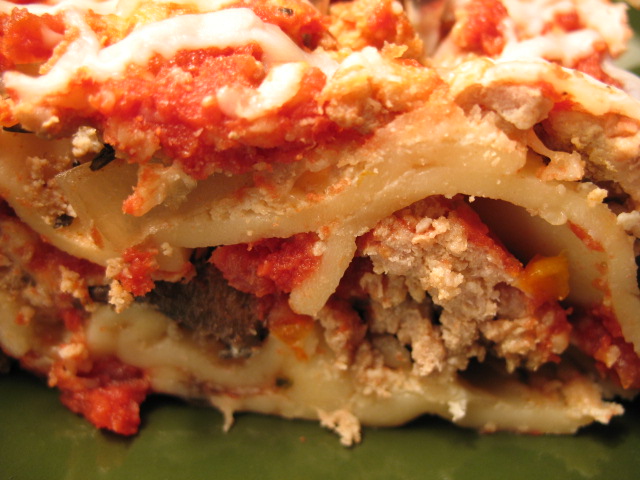
ricotta, using only 10 lasagna noodles over two layers, fattening up those layers with lots of veggies, and using a tomato sauce like Healthy Choice. I was intrigued, if skeptical, and was incredibly surprised at how fabulous it turned out. This lasagna did not taste like the lo-cal, limp, healthy-shmealthy dish I was expecting, and I was very relieved to see that the servings were much larger than a postage stamp. Mom's technique of using dry lasagna noodles in the layers rendered noodles that were al dente and richly flavored with absorbed tomato juice. Every bite was full of perfectly cooked vegetables, a bit of meat, a bit of noodle, and a bit of cheese--chewy and moist and perfect.

When I went on WeightWatchers myself a little over a year ago, I made Mom's recipe for lasagna often, but somehow it
wasn't quite as good as I remembered it. And although it was already significantly healthier than regular lasagna, I still grumbled about how much of my daily food allowance a slice would use up. Did I really need to use tomato sauce, or would crushed tomatoes work just as well? Did I need to use a whole pound of hamburger, or could a smaller amount still give that same meaty flavor and chew in every bite? To the kitchen I scurried.

I didn't go completely bananas and make 10 batches of lasagna in a weekend, but I kept notes on each batch I made and tried new little tweaks and twiddles each time. Crushed tomatoes does indeed make a good substitute for tomato sauce, though the flavor was a bit metallic and acidic until Mom suggested sprinkling just a touch of sugar over each layer of tomatoes. You don't taste the sugar specifically in the finished lasagna, but the metallic flavor was gone. Turns out that you can also get away with less meat (or meat-substitute if you're a veggie)--about 3/4 of a pound was good, and if you were really gung ho, you could happy reduce that further
or even cut the meat out all together. Just veggies makes a terrific lasagna on its own. I also tried using non-fat ricotta cheese and decided that I liked that traditional Italian flavor and mouthfeel. These three changes, along with experiments on spices and amounts of spices, has given me a purty darn near perfect lasagna, which I've now happily eaten for two weeks straight. But hey, that's monogastronomic ol' me.
-----
Il Lasagna Perfetto

10 dry lasagna noodles (not 'no boil')
1/2 - 3/4 lb of ground lean turkey, lean beef, or meat substitute
(optional)--cooked
1 28-oz can crushed tomatoes
2 1/2 tsp sugar
1 onion--diced
1 small eggplant, zucchini, or summer squash--diced
1 red bell pepper--diced
1 pkg baby bella mushrooms or portabella mushrooms--diced
1 c. non-fat ricotta cheese

1/2 c. low-fat cottage cheese
2 c. low-fat shredded cheese
1 tsp sea salt
1 tsp chili powder
1 tsp dried basil
1 tsp dried thyme
1/8 cup of water or chicken broth

Preheat oven to 400 degrees.

1. Mix all the chopped vegetables together in a large bowl and combine with all the spices. Taste a piece of eggplant or mushroom and adjust the spices if necessary--the mix should actually taste a bit too salty at this point.

2. Combine ricotta and cottage cheese together in a small bowl

3. In a 9x13 casserole dish or baking pan, spread a light layer of crushed tomatoes and sprinkle 1/2 tsp of the sugar over the top. Arrange a layer of 5 noodles--in my pan, I can fit 4 noodles length-wise and then have to break off about one inch on the fifth to fit it in along the side.

4. Spread half of the ricotta-cottage cheese mixture over the noodles. Then spread half of the veggies and half of the meat. Finally layer on about 1 cup of cheese and half the can of crushed tomatoes. Sprinkle 1 tsp of sugar over the tomatoes.

5. Add another layer of noodles and repeat step 4. Reserve a bit of cheese for the topping.

6. Swish the water or chicken broth (I prefer stock) in the empty can of tomatoes and dribble evenly over the top of the lasagna.

7. Cover the lasagna with a double layer of tinfoil and bake for 1 hour. After an hour, check the to see how done the noodles are and the onions are. I usually need to bake it covered for another 15 minutes. When the onions taste just a bit under done, uncover the lasagna and top with the reserved cheese. Bake uncovered for another 10-15 minutes or until the cheese is completely melted and a bit brown.

Let the lasagna cool for about 10 minutes and then cut into 12 portions.

WeightWatchers: If you made any substitutions or adjustments, I recommend tallying everything up for yourself to be on the safe side. Made with the above ingredients,12 portions is about 4.5 points per portion. If you're being really strict, you can cut it into 16 portions for about 3.25 points each, but, honestly, those portions are a bit measly--ok for lunch, but probably not enough for dinner unless you were also eating a side dish.

*For the record, I would like to state that while I definitely do the lion's share of the cooking in our household, the Engineer is always a willing and able sous chef. I admit to having tendencies toward control-freak-ism and have been known to hyperventilate if the onions are not diced to proper proportions. I'm much better than I used to be, mostly because I was came to realize that I needed to chill out or my sous chef would not be quite so willing and able. Still, we find it works best to divide tasks by type: I'm in charge of cutting and stir frying, and the Engineer is in charge of the pilaf; I'm in charge of toast and the Engineer is in charge of scrambling the eggs; and so on. *shrug* It works for us.

Monday, October 9, 2006

Fall = Ginger Snaps

My version of heaven would be endless autumn. And not just the beautiful crisp weather or the flaming trees against the bluest sky, but all of it. I love wearing my winter coat for the first time and finding a few left-over memories from the previous winter stowed away in the pockets. I love going to the Farmer's Market in Copley Square. I love seeing all the fruits and vegetables spilling out of their baskets and watching the people mill around fingering the last tomatoes and asking each other how the pears are this season. I love smiling at my favorite vendor, handing him a bag of apples--a different kind every week--and asking him about the harvest. I love drinking red wine out of a tea cup, making vast pots of soup and chili for my friends and family, and leaving ginger snaps out in bowls. I love the anticipation of the holidays to come. I love that I truly believe I can finish every single one of the crafty projects I have planned as gifts for the people I love. I love it all. Autumn is a season of change and I love the feeling of living on the cusp of something new. It makes me feel like everything is possible. Everything is moving and changing. It's the moment before the adventure begins and the hero sets out with his backpack slung over a shoulder.

On my runs through the park the past few weeks, I've been listening to The Power of Myth, conversations between Bill Moyers and Joseph C
ampbell recorded before Joseph Campbell died. There are many things in these conversations that speak to me as a writer and a person in her late twenties and as a person traveling through her life. But there is one phrase that I keep coming back to. Moyers and Campbell are talking about the beginning of the journey and the types of people who become heroes in the traditional myths. The most puzzling kind of hero is the one who comes upon his adventure unexpectedly, like Han Solo in Star Wars who gets unwillingly swept into the adventure. Campbell calls this the 'serendipitous adventure,' and Moyers asks if this kind of adventurer is still considered a hero. Campbell has this reply: "The achievement of the hero is one that he is ready for, and it's really a manifestation of his character. It's amusing the way in which the landscape and the conditions of the environment match the readiness of the hero. The adventure that he's ready for is the one that he gets."

That's the line that keeps drifting through my mind as I walk through the Farmer's Market or look at the changing trees on my bus ride back from New York: "The adventure that he's ready for is the one that he gets." I feel on the verge of an adventure. I feel my life changing around me, threads of possibility and change rippling outwards. I've been playing with a lot of ideas about what I want for my future--both the near future and the far future, for my individual self and my career and my life with S., et cetera, et cetera. More specifically, I feel that my life has been moving in the direction of merging cooking and publishing and writing. This has been slowly developing over time, mostly without my knowledge, and it's a surprise to see them coming together now. I'm not sure exactly how these different things will unite, but I feel very sure that they will. For the moment, I'm happy to be on the edge of this change, feeling it grow, and not pushing things too quickly.
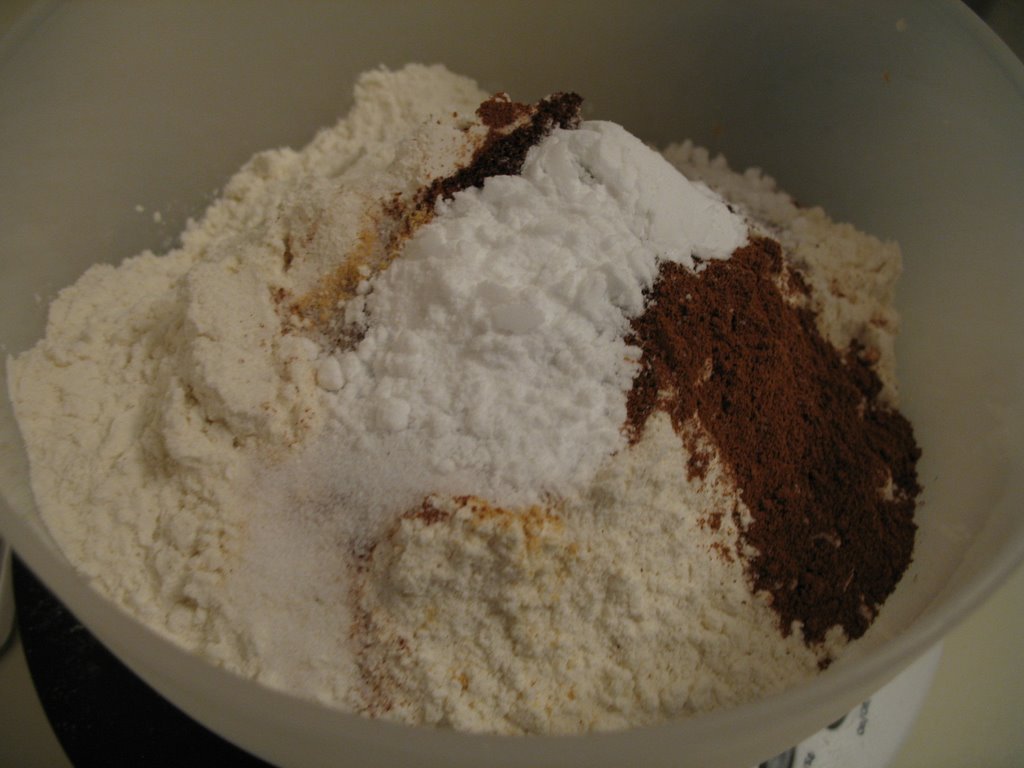
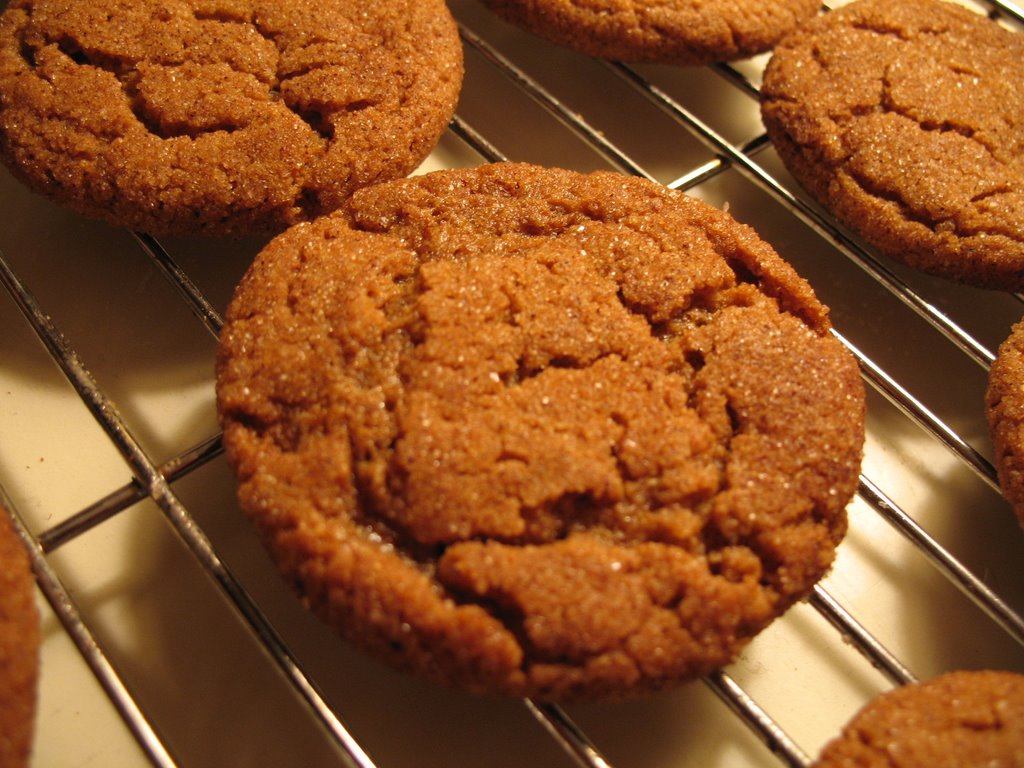
And in this spirit of movement and possibility, I give you my favorite cookie recipe: ginger snaps. Perfect for an afternoon snack with tea, evening dessert, or even a quick breakfast-on-the-go, the ginger snap is certainly the embodiment of possibility! My college roommate, R., was the first to introduced me to ginger snaps. A master storyteller herself, she had many eloquent things to say about the union of sweet sugar and spicy ginger, the balance of chew to crunch, and the harmony of the overall cookie. I still remember sitting in the window seat of our dorm room with her. I like to think it was autumn and maybe some afternoon sunlight was coming in through the window. She was eating a ginger snap, stolen from the dining hall, with her head tilted back and her eyes closed. S
he very precisely ate one bite of cookie, chewed thoughtfully, and handed it to me for the next bite.

Ginger Snaps
from The King Arthur Flour Baker's Companion: The All-Purpose Baking Cookbook

Makes six dozen 1 1/2-inch cookies


2 1/3 c. (9 3/4 oz) unbleached all-purpose flour

1 tsp ginger
1 tsp cinnamon
1/2 tsp cloves
1/2 tsp salt
2 tsp baking soda
3/4 c. (4 7/8 oz) shortening
1 c. (7 oz) sugar
1 large egg
1/3 c. (4 oz) molasses

for topping: 1/2 c (1 1/3 oz) cinnamon-sugar (2 tsp cinnamon mixed into 1/2 c. sugar)

Preheat the oven to 375 degrees.

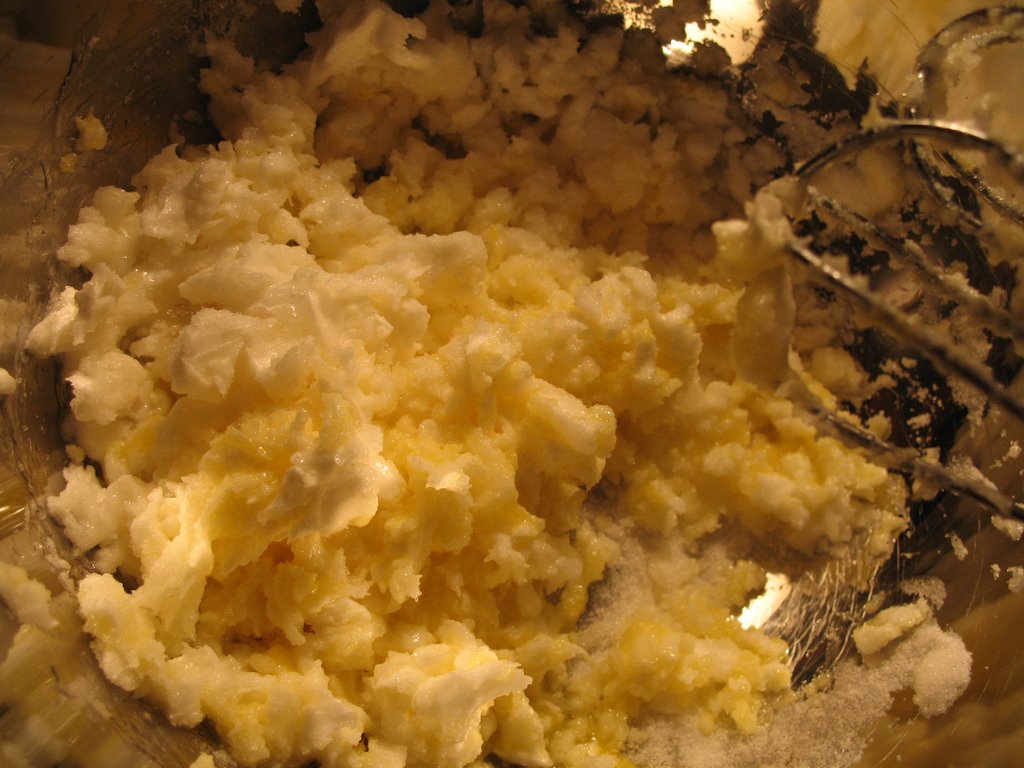
Sift together the flour, spices, salt, and baking soda in a small bowl. In a large mixing bowl, beat the shortening, sugar, and egg together until light and fluffy. Beat in the molasses. Stir in the dry ingredients to make a soft, smooth dough.

Measure out slightly rounded teaspoonfuls of dough, shape into balls, and roll each in cinnamon-sugar. Place the cookies 2 inches apart on a parchment-lined cookie sheet. Bake for about 10 minutes until cookies are golden brown and ‘cracked’ on top. Cool on wire racks and store in a tightly closed container.

(Nutrition: 50 cal, 2 g fat, 0 fiber)--> Weight Watcher's = 1 point per cookie

Possibilities for decadent future versions:

* Before baking, press a thumb or a back of a spoon into each ball of dough to make a depression in the cookie. After the cookies have cooled, fill with straight cream cheese or cream cheese frosting and a bit of candied ginger.

* Instead of just powdered ginger, maybe try using a combo of powdered ginger, freshly grated ginger, and candied ginger. I think the candied ginger would be especially good for having little bits of chew in the snap. Definite danger of over-ginger-ifying the cookie, though. Experimentation required...